
You are at the right place if you’re looking for a reliable method to integrate an interactive image editor into your Angular applications. In this article, we will be building an interactive Angular image editor. Let’s take a quick tour of the Angular framework first, though. Creating dynamic and scalable web apps is made possible by the well-known JavaScript framework Angular. But why are image editors necessary for web apps now, though?
In today’s visually-focused internet environment, image editing skills are essential for improving user experiences. An effective way to incorporate image editing functionality into your Angular applications is with Filestack, a great tool that streamlines image management. Let’s get started with building!
Setting up the Angular Project
The following are the steps for creating a new Angular project, setting up an Angular project using the Angular CLI, and configuring the required dependencies for image editing.
1. Use the following command to set up the Angular CLI:
npm install -g @angular/cli
2. Using the following command, you may start a new Angular project:
ng new my-project
3. You can include the subsequent packages in your project to set up the dependencies required for image editing using the following:
npm install –save @angular/material @angular/cdk @angular/forms
Integrating Filestack for Image Management
Researching and selecting the best image management service for your needs is crucial because there are numerous options available. Aspects such as cost, features, scalability, and security are important to take into account.
The image management service, Filestack, provides a variety of capabilities, such as automatic image optimization and resizing, as well as image watermarking, security, and hosting.
You must first register an account and receive API credentials in order to use Filestack. You can do this by visiting the Filestack website.
Your API key can be found on the Settings page once you have registered for an account.
You can include the following package in your project to incorporate Filestack SDK:
npm install filestack-js
npm install @filestack/angular
The Filestack SDK may be configured in your Angular project by adding the following import statement to your ‘app.module.ts’ file after it has been installed:
import { FilestackModule } from ‘@filestack/angular’;
Then, after adding the following code to your ‘app.module.ts’ file, you can configure Filestack:
@NgModule({
declarations: [
AppComponent
],
imports: [
BrowserModule,
FilestackModule.forRoot({ apikey: YOUR_APIKEY, options: ClientConfig })
],
bootstrap: [AppComponent]
})
export class AppModule {}
Designing the Image Editor Component
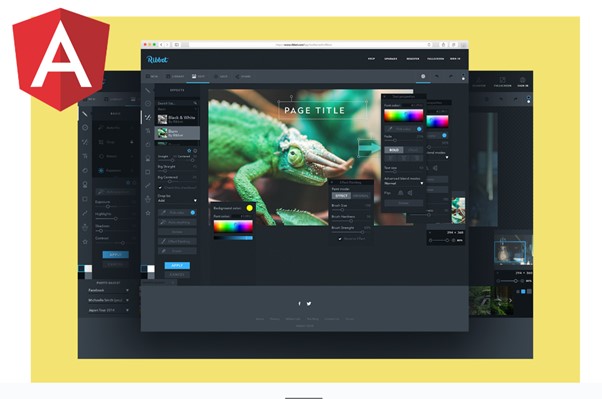
In order to design the image editor component, a new Angular component must be created together with the editor interface’s HTML template and the relevant CSS styles.
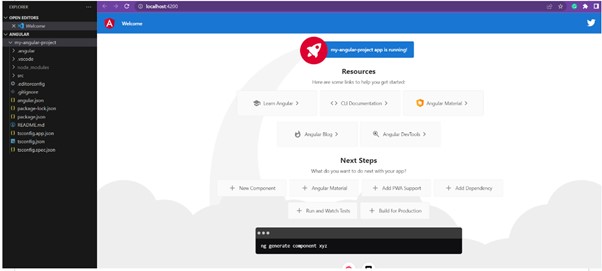
1. Creating a new Angular component for the image editor:
In order to create a new component, use the command below:
ng generate component image-editor
2. Specify the editing interface’s HTML template:
Defining the structure and elements of your image editor requires opening the newly created “image-editor.component.html” file. Tools such as sliders, canvas, and image preview areas may be included in this.
3. Implement necessary CSS styles for the editor:
To change the way your image editor looks, open the ‘image-editor.component.css’ file and add the necessary changes. Defining sizes, locations, colors, and other visual elements may be necessary.
Implementing basic image editing features
Here are the steps on how to implement basic image editing features using Filestack’s API:
- Load the image into the editor using the Filestack SDK.
- Display the image in the editor.
Below is an example of how to load and display an image in the editor using the Filestack SDK:
const filestack = new Filestack(‘YOUR_API_KEY’);
const image = filestack.url(‘https://example.com/image.jpg’);
const editor = new ImageEditor(image);
editor.show();
1. Once loaded, you can add image manipulation functionalities.
Here are some examples of how to crop, rotate, and resize an image using the Filestack SDK:
// Crop the image to a 100x100px square.
const croppedImage = editor.crop(100, 100);
// Rotate the image by 90 degrees.
const rotatedImage = editor.rotate(90);
// Resize the image to 50% of its original size.
const resizedImage = editor.resize(50);
2. Handle user interactions (e.g., dragging, scaling) on the image
Here is an example of how to listen for the `mousedown` event on the editor element and then crop the image to the area that the user clicked on:
editor.addEventListener(‘mousedown’, (event) => {
// Get the coordinates of the mouse click.
const x = event.clientX;
const y = event.clientY;
// Crop the image to the area that the user clicked on.
const croppedImage = editor.crop(x, y, event.clientWidth, event.clientHeight);
// Display the cropped image.
editor.show(croppedImage);
});
Advanced Editing Features
Filestack offers a wide range of image editing features, such as filters, effects, and text overlays. You can use these features to add a creative touch to your images.
Here is an example of how to add a filter to an image using the Filestack SDK:
const filteredImage = image.filter(‘sepia’);
filteredImage.show();
Here is an example of how to add an effect to an image:
const effectedImage = image.effect(‘blur’);
effectedImage.show();
Here is an example of how to add a text overlay:
const overlayedImage = image.text(‘This is a text overlay’);
overlayedImage.show();
Once you have edited your images, you can save them to your local computer or export them to a variety of formats using Filestack’s API.
Here is an example of how to save an edited image to your local computer using the Filestack SDK:
editedImage.save(‘edited-image.jpg’);
Here is an example of how to export an edited image to a variety of formats using the SDK:
editedImage.export(‘jpg’, ‘edited-image.jpg’);
Handling Image Editor Events
When certain actions are taken, such as when an image is loaded, altered, or saved, the image editor component will trigger events. These events can be handled by event handlers so that you can react to them specifically.
To display the image in the editor, for instance, you may add an event handler for the ‘imageLoaded’ event. To save the altered image to a file, you could alternatively add an event handler for the ‘imageEdited’ event.
Using the ‘imageLoaded’ event as an example, this is how to construct an event handler:
const imageEditor = new ImageEditor();
imageEditor.addEventListener(‘imageLoaded’, (event) => {
// Display the image in the editor.
imageEditor.show(event.target.image);
});
By triggering events, the image editor component can communicate with other program areas. To inform the application that an image has been altered, the image editor could, for instance, emit an event.
The program may then keep an eye out for this event and respond accordingly, updating the image preview or saving the changed image, for example.
Here is an example of how the image editor might initiate an event to inform the program that an image has been edited:
const imageEditor = new ImageEditor();
imageEditor.addEventListener(‘imageEdited’, (event) => {
// Notify the application that the image has been edited.
application.notifyImageEdited(event.target.image);
});
User Interface Enhancements
The image editor should feature intuitive controls and buttons that make it simple for users to carry out editing tasks. These buttons and controls ought to be conveniently placed and organized.
During the user interface creation, the image editor, for instance, might contain a drag and drop feature or toolbar with buttons for standard editing operations like cropping, rotating, and resizing.
Additionally, the image editor needs to be responsive in order to work on a range of gadgets, such as laptops, tablets, and smartphones. As a result, the image editor must adjust its layout to fit the size of the screen displayed.
Testing and Debugging
When testing specific pieces of code, such as functions or methods, unit tests are used. The image editor’s functionality can be checked using unit tests.
You can use a unit testing framework, such as Jest or Mocha, to run tests on an image editor. Then, you may create unit tests for every feature related to altering images, such as cropping, rotating, and resizing.
An example of a unit test for the crop function is shown below:
it(‘should crop an image’, () => {
// Create an image editor.
const imageEditor = new ImageEditor();
// Load an image into the editor.
const image = imageEditor.load(‘https://example.com/image.jpg’);
// Crop the image to a 100x100px square.
const croppedImage = imageEditor.crop(100, 100);
// Assert that the cropped image is the correct size.
expect(croppedImage.width).toBe(100);
expect(croppedImage.height).toBe(100);
});
You can use a debugger, such as Chrome DevTools or Visual Studio Code, to troubleshoot an image editor. The error will then be visible as you move through the code line by line.
Deployment and Optimization
The command ‘ng build –prod’ can be used to build an Angular project for usage in production. This will provide a performance-optimized production build of your application.
The ‘dist’ directory will be the location of the production build. After that, you can upload this directory to a hosting system with a custom source.
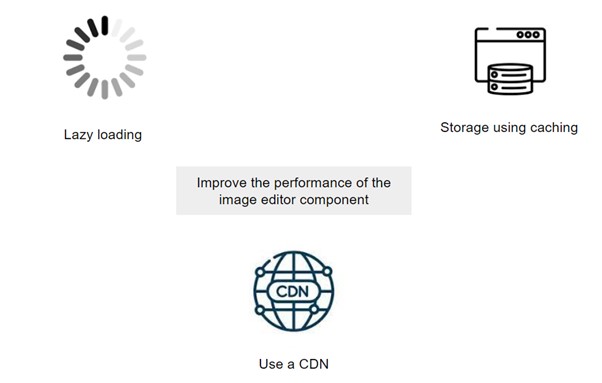
You may improve the performance of the image editor component in a number of ways. Here are some pointers:
- Use lazy loading to load photos only when needed and image compression to make images smaller.
- Store images in memory using caching to avoid constantly loading them from disk.
- To serve photos from a network location, use a CDN.
You can deploy your Angular image editor to a hosting platform once it has been built for production. Numerous hosting platforms are available, such as Google Cloud App Engine, AWS Elastic Beanstalk, and Azure App Service.
Conclusion
A great way to enhance your online application is by creating an interactive image editor in Angular. This article teaches you how to make an image editor that is simple to use and offers a variety of editing possibilities.
FAQs
What Is An Image Editor?
It’s software used to edit digital images.
What Are the Most Common Image Editing Tasks?
Cropping, resizing, rotating, and modifying brightness, contrast, and saturation.
What Are Some Popular Image Editors?
Adobe PhotoShop, GIMP, Paint.NET
What Are the Benefits of Using an Image Editor?
It enhances the quality of images, fixes errors, and adds artistic effects.