How to Create Payoneer Account in Pakistan 2020 – New Method
Today you are here to create a Payoneer account in Pakistan or even you can use the below methods to create your Payoneer account in anywhere any country. Hands down, you are an online worker or you are doing freelancing, fiver, Upwork or you have Google Adsense account. However, in Pakistan those who are doing an online job is difficult to withdraw the monthly payment direct to the local bank account. Therefore, you will need to create a Payoneer account and link your Payoneer to your local bank account. After that, you can easily transfer your monthly payment to your bank account.
As you know, we have the most useful payment method service like Paypal and Payoneer. These two online money transfer companies will allow you to withdraw your money from Google Adsense, Freelancing, or many other online platforms. You know, Paypal is not working in Pakistan but Payoneer works here and you can transfer money or purchase goods or any products with your Payoneer account.
So, Payoneer is a New York-based financial services company that provides you online money transfer facility over virtual accounts. As a result, you don’t need to go to the bank in order to create an account or activate your Payoneer account. Simply, you will need to access the Payoneer official website and create your new account. However, in 2019 the company hired approximately 1200 people and serves over 4 million users in 14 offices around the world. So, why you should not be one of the new Payoneer customers by following the below method.
Creating a Payoneer account is free and easy as compared to Paypal. Moreover, while you sign up to Payoneer then you will earn $25 rewards. Or, if someone else creates a Payoneer account from your affiliate links then you will get $25 rewards. Which is the extra point of Payoneer thus Paypal won’t have this option for new users.
How to Create Payoneer Account for Free
To create your new Payoneer account click the below button and follow the below steps. Make sure to have your all personal details like CNIC and bank details.
Step 1: Once you click the above button then you will see the Payoneer home page. Here, click the Signup and Earn $25 option.

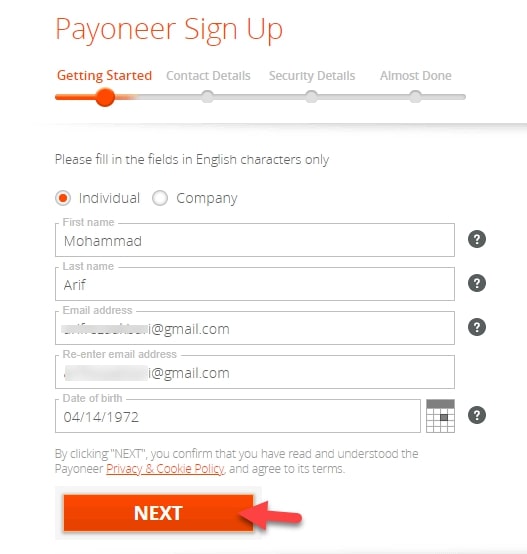
Step 2: After that, you will see the first step to provide your personal details. Therefore, Follow the below list.
- Enter your First Name
- Enter your Last Name
- Type your Gmail ID (The Gmail will be used for login)
- Re-Enter your Gmail ID
- At last, enter your Date of Birth
After completing this all information then click the Next button.
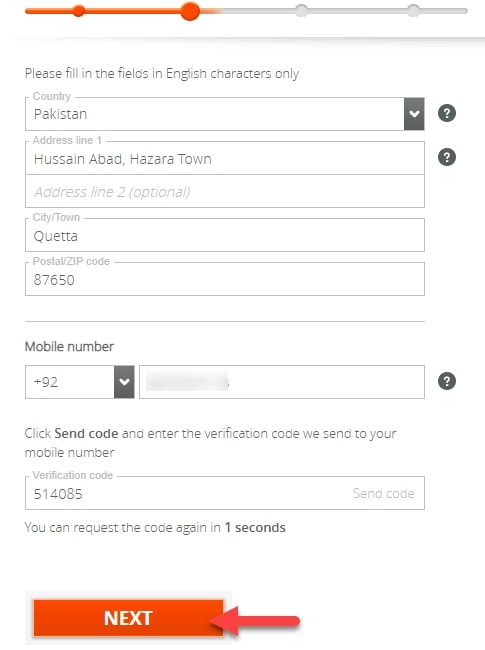
Step 3: Here, you will need to provide your contact details such as
- Provide your Home Address (Type the address that mention on your CNIC)
- Type your City/Town
- Type the City Zip Code or Postal Code
- Then, provide your Phone Number
- Once your type your phone number then on the Verification field, click the send code. After that, Payoneer will send 6-Digits to your number. Then, type the verification code that you received.
After all, click the Next button.
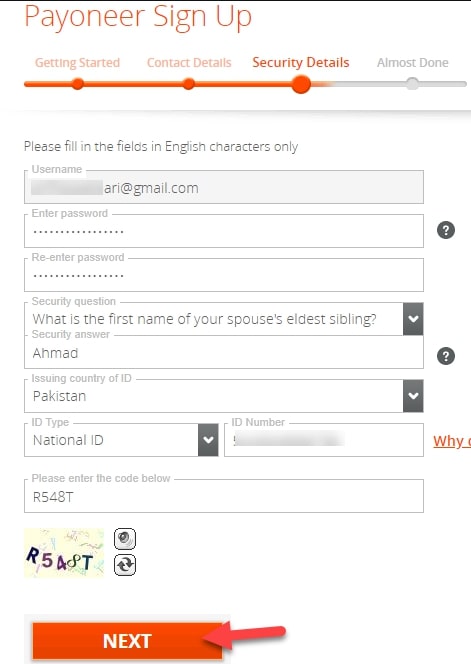
Step 4: On the security section, you will need to provide the below details.
- Type a strong Password
- Re-Enter the password
- Answer the Security Question
- Provide your CNIC Number without –
- Then enter the code below on the box
After all, click the Next button.
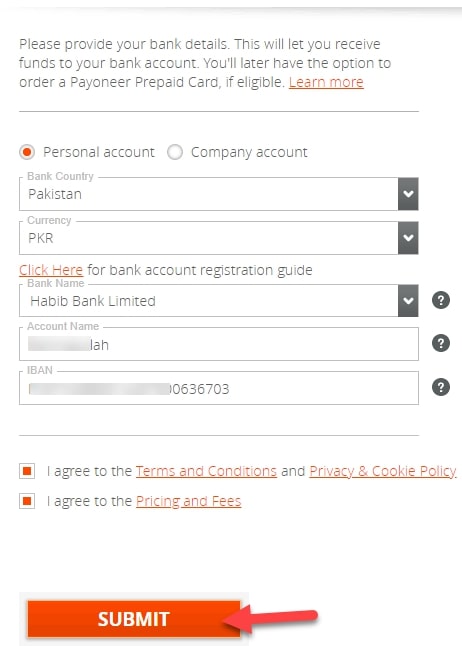
Step 5: On the last section, you will need to provide your bank details like
- Select your Bank Name from the dropdown menu
- Enter Account Holder Name
- Then, type your Account Number (IBAN)
- Agree to the Term and Condition
- Agree to the Pricing and Fees
This is the last step to create your account. Therefore, click the Submit button.
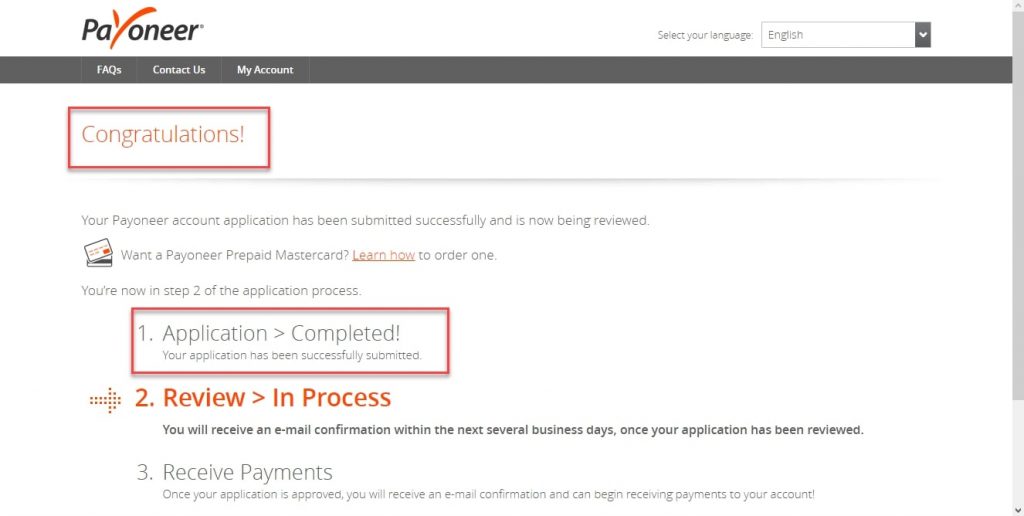
Congratulations! you have created your Payoneer account successfully. Now, you are in step 2 where your application is under review. Once, your application is approved then they will ask you to submit your CNIC picture. After that, your account will be fully approved and you can transfer money or connect your Payoneer with your online platforms.
Log in to your Payoneer Account
Once you create your new account and you submit your all details. Then, your application will be under review and it will be approved in few days. Till that time, you can log in to your account.
Step 1: While you create your account, then, click the Sign-in button and type your Gmail ID and password. Afterward, they will ask you to turn on your phone number for security purposes. Here, I recommend you to turn on your phone number.
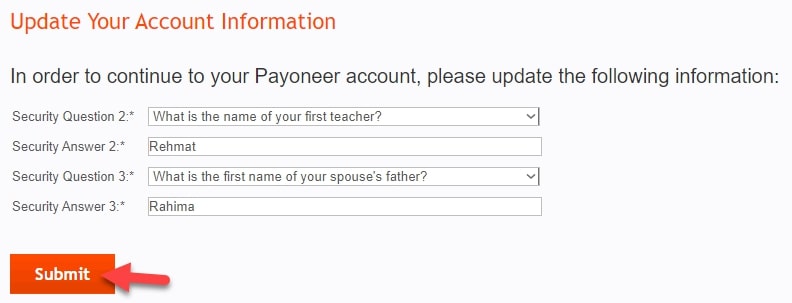
Step 2: Once, you log in then they will ask you to update your account information. Remember, this security question will be asked in the future. So, take a picture and save it on your mobile or computer.
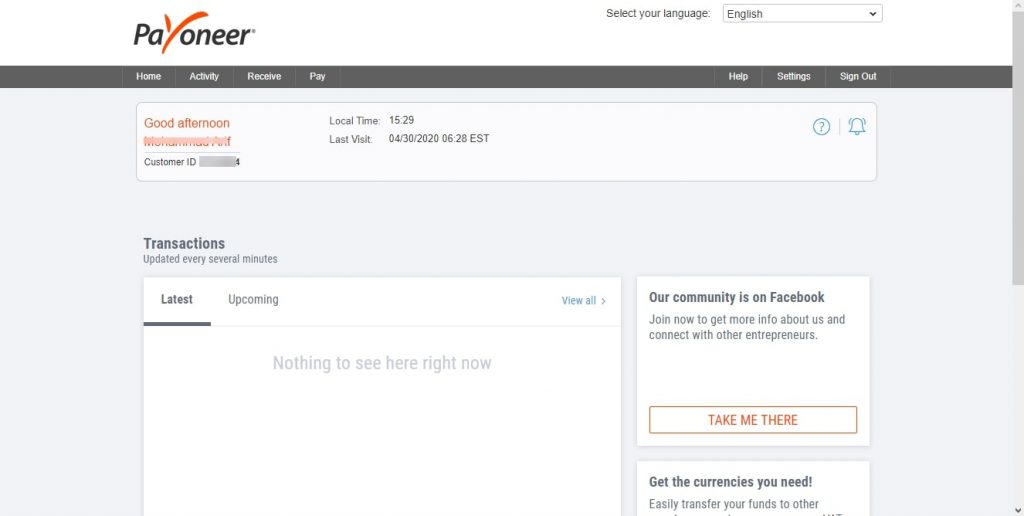
For now, your Payoneer account looks like this. Once, your application approves then you can use your Payoneer account. Even you can connect your Payoneer account to the online platforms (Those websites that support the Payoneer payment method). Just you will need to wait for a few days to approve your account.
Where Can I Connect my Payoneer Account?
Suppose your account has been approved and your Payoneer account is totally ready to transfer money. Then, a question might be raised on your mind, where can I connect my Payoneer Account?. Hands Down, you can connect your Payoneer account to those websites or platforms that support the Payoneer payment method.
I am using Payoneer account for 2 years and I have connected my account with my Google Adsense, Amazon, Paxful Bitcoins website, and even I linked my Payoneer account with my PayPal account. So, you can connect to any website that has the Payoneer payment method.
To connect your Payoneer account you will need to go to Receive -> Global Payment Service. Here, you have 5 different currencies that you can receive from opposite websites. Simply, copy and paste the currency details on the website you want to get paid. After that, you will receive payments from there.
Which Currencies Payoneer support?
As I am using Payoneer for 2 years and I have received Euro, AUD, and USD currencies from different platforms that I connect my account. However, Payoneer supports AUD, USD, Euro, JPY, and GPB. It means you have 5 currencies bank account and you can receive any of the currency.
Apply for Payoneer Master Card
Now that you have a Payoneer account and you might want to get Payoneer MasterCard. However, you can use your Payoneer MasterCard in Pakistan to withdraw money via the ATM machine. But, some of the people reviews says, it will charge for any transaction. Like, if you check your balance or withdraw money then it will charge extra taxes.
Moreover, it will be charged $30 per year for the Payoneer card. If you order it via DHL then $40 will be charged for DHL. However, in Pakistan only MCB branches can support Payoneer card no other ATM machines. I haven’t tried the Payoneer card because I always transfer money to my bank account. This way is more useful than applying MasterCard and withdraw from your Card.
Anyhow, I will show you how you can apply for MasterCard. However, Some of the research says, you can’t order for card until you don’t have money more than $30. Because, Payoneer will charge $30 for MasterCard. Or some research says, without having money on your Payoneer account you can order for card. So, check it yourself and tell me in the comment section whether you can order for card or no.
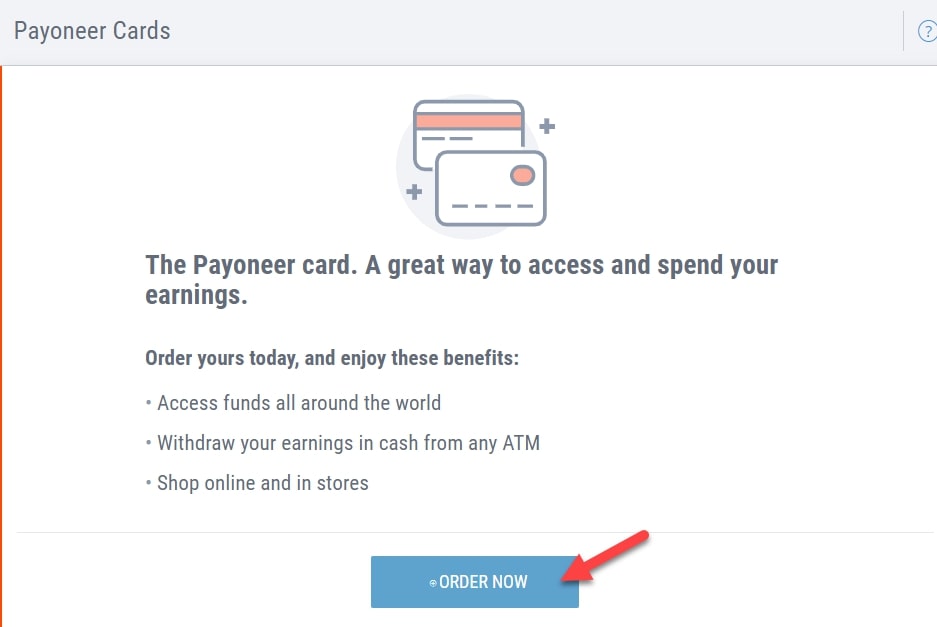
So, log in to your Payoneer account and go to Setting menu from the right side of the page and click the Payoneer Cards. After that, you will see the below screenshot and here click the Order Now and complete the process.
Conclusion
Before creating your Payoneer account make sure that all the information is correct. Because with one name you can only create one Payoneer account. Therefore, follow all rules and regulations not to spam the system. Once you created your account and submitted all the legal documents then you can use your Payoneer account anytime anywhere.
One Question, Have you created your Payoneer account? or is your Payoneer account is approved? Or without money have you received your MasterCard?
I need your answer in the comment section. Kindly answer any of the questions and let me know about your Payoneer account.
