Welcome to this comprehensive guide on how to whiten teeth in Photoshop. In today’s digital age, where flawless images are highly sought after, having a bright and confident smile is essential. Thankfully, with the power of Photoshop, achieving pearly white teeth in your photos is just a few simple steps away.
Whether you’re a professional photographer, a social media enthusiast, or simply someone who wants to enhance their personal photos, this article will walk you through the process of achieving stunningly white teeth with Photoshop.
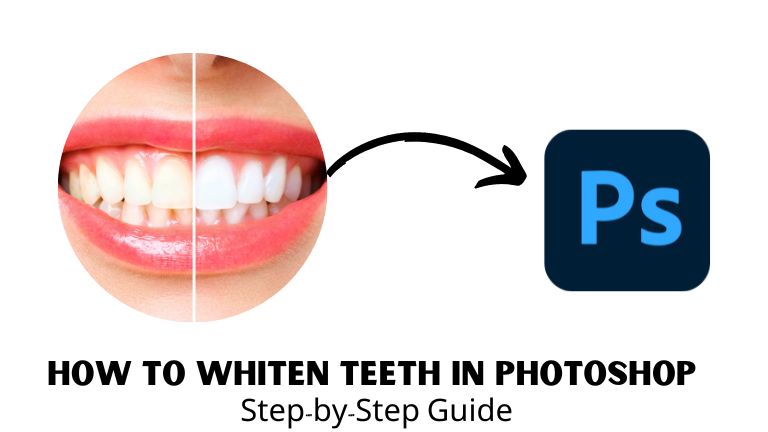
Learn how to whiten teeth in Photoshop with this comprehensive guide. Transform your photos and achieve a dazzling smile in just a few simple steps.
How to Whiten Teeth in Photoshop Step by Step
Photoshop is an incredible tool that allows us to retouch and perfect our photos, including brightening and whitening teeth. Let’s dive into the step-by-step process of transforming your smile from dull to dazzling.
1. Opening the Image in Photoshop
To start, launch Photoshop and open the image you want to work on. You can either go to “File” > “Open” or simply drag and drop the image into the Photoshop workspace. Make sure you choose a high-resolution image for optimal results.
2. Duplicating the Background Layer
Before making any changes, it’s essential to create a duplicate of the background layer. This ensures that you have a backup of the original image in case you need to revert any changes later. To duplicate the background layer, right-click on it in the Layers panel and select “Duplicate Layer.”
3. Making a Selection of the Teeth
To isolate the teeth, we need to make a precise selection. Photoshop offers various selection tools, but for teeth whitening, the “Lasso Tool” or the “Quick Selection Tool” work best. Choose the tool that you are most comfortable with and carefully select the teeth in your image. It’s okay if the selection isn’t perfect; we can refine it later.
4. Refining the Selection with Quick Mask Mode
To refine the selection and ensure that only the teeth are affected by our adjustments, we’ll use the Quick Mask mode. Press the letter “Q” on your keyboard or click on the Quick Mask icon in the toolbar. Now, using a soft brush with a low opacity, paint over any areas that were not included in the initial selection. This will add them to the selection, refining it for better accuracy.
5. Creating a New Adjustment Layer: Hue/Saturation
With the teeth selection ready, it’s time to apply the whitening effect. To do this, we’ll use an Adjustment Layer, which allows us to make non-destructive edits. Click on the “New Adjustment Layer” icon at the bottom of the Layers panel and choose “Hue/Saturation.” This adjustment layer will enable us to control the brightness and whiteness of the teeth without affecting the rest of the image.
6. Adjusting the Hue/Saturation Settings
Once the Hue/Saturation adjustment layer is added, the Properties panel will appear. Here, you can fine-tune the settings to achieve the desired level of teeth whitening. Drag the “Lightness” slider to the right to increase the brightness of the teeth. Be cautious not to overdo it, as overly white teeth may appear unnatural. Finding the right balance is key.
7. Refining the Whitening Effect with Layer Mask
To further refine the whitening effect, we can use a Layer Mask. By adding a Layer Mask to the Hue/Saturation adjustment layer, we can selectively apply the effect to specific areas of the teeth. Click on the Layer Mask icon in the Properties panel, ensuring the mask thumbnail is selected. Now, using a soft brush with a low opacity, paint over any areas where you want to reduce the whitening effect. This step helps achieve a natural and seamless result.
8. Fine-Tuning with Dodge and Burn Tools
For additional precision, we can utilize the Dodge and Burn tools to refine the whitening effect. Select the Dodge tool and set the Range to “Highlights” and Exposure to a low value, around 10-20%. Brush gently over the brightest areas of the teeth to make them even brighter. Conversely, switch to the Burn tool and set the Range to “Shadows” and Exposure to a similar value. Brush lightly over any areas that need to be slightly darker, enhancing the overall depth and realism of the image.
9. Zooming In for Pixel-Level Accuracy
Zooming in on the image allows us to work on a pixel level, ensuring the finest details are addressed. Use the Zoom tool or press “Ctrl” and the plus sign (“+”) on your keyboard to zoom in. Carefully inspect the teeth, making any necessary adjustments to achieve the desired outcome. Remember, the goal is to enhance your smile while keeping it natural-looking.
10. Evaluating the Final Result
Once you’re satisfied with the teeth-whitening effect, it’s crucial to evaluate the overall image. Zoom out and view the photo at 100% to see how it looks in its entirety. Ensure that the whitened teeth blend seamlessly with the rest of the image and appear natural. If any areas require further adjustments, you can go back and refine them using the previous steps.
11. Saving and Exporting the Edited Image
After achieving the perfect teeth whitening result, it’s time to save and export your edited image. Go to “File” > “Save As” and choose a file format that preserves the image quality, such as JPEG or PNG. Be sure to give your file a unique name to differentiate it from the original. Congratulations! You’ve successfully whitened your teeth in Photoshop and transformed your image into a stunning masterpiece.
Conclusion
Congratulations! You’ve reached the end of this comprehensive guide on how to whiten teeth in Photoshop. We hope this article has provided you with the knowledge and tools necessary to transform your photos and achieve a radiant smile. Remember to exercise moderation and aim for a natural-looking result that enhances your images. With practice and patience, you’ll soon master the art of teeth whitening in Photoshop.
Now it’s time to unleash your creativity and enhance your photos with dazzling white teeth. Get ready to impress your friends, clients, and followers with your stunning smile. Don’t let dull teeth hold you back in your digital endeavors. Embrace the power of Photoshop and showcase your best smile to the world!