
Installing windows on PC is quite easy and every single person can do it but installing Kali Linux in Virtualbox is quite hard. I know you have the knowledge of Virtualbox and installing it on PC but few of you have the idea how to install Kali Linux in Virtualbox. so, if you are not among those users then don’t depress I am here with my new article which is about how to install Kali Linux on Virtualbox. therefore you have to give a hook on a single line and read the article carefully, in order to not be in difficulties.
So Hello, friends In this article I am going to tell you about the pros and cons of running Kali Linux on Virtualbox and besides that, I will let you know about how to create a new virtual machine. at last, I am going to show you how to install Kali Linux on Virtualbox, so before wasting your much time let’s start.
How to install Oracle Virtualbox 6.0 on Windows 7/8/10 MS Office 2019 Free Download Microsoft Office
Pros of running Kali Linux on Virtualbox
here I will tell you about the goodness of running Kali Linux on Virtualbox, it is important that before using something we should have to know about its goodness.
- You can run more than one OS simultaneously.
- then You can install/re-install/backup/move/restore/rollback your guest OS easily.
- You can manage the allocation of resource (Memory, Hard disk). Resource Management!
- You can copy your VirtualBox to a different machine. Portability!
- You can completely break your installation and roll back in few clicks.
- You’re forced to troubleshoot and thus learn.
- Great for learning and testing.
Cons of running Kali Linux on Virtualbox
you got about Kali Linux pros and now it’s time to know about its badness. as you know every object has its pros and cons and every single person should know about it, so let’s know about its badness.
- Performance drop. Usually much slower.
- GPU Acceleration doesn’t work.
- USB Wireless cards can be problematic.
- You tend to avoid learning to troubleshoot and just rollback quite often.
- You won’t be comfortable installing and running in a real machine if you’re too used to VM’s.
- Can’t use FULL graphics as the card is Virtualized.
- Adds an additional layer between OS and actual hardware.
Create a new Virtual Machine
you might know a little bit about Virtualbox but if you don’t know what is VirtualBox and how to install it on PC then check the above link. here I won’t tell you about VirtualBox but needless to say, I am going to tell you how to create a new virtual machine. so let’s start
well if you don’t have the setup of Kali Linux and Virtualbox then check the link.
Kali Linux Downloads Download VirtualBox
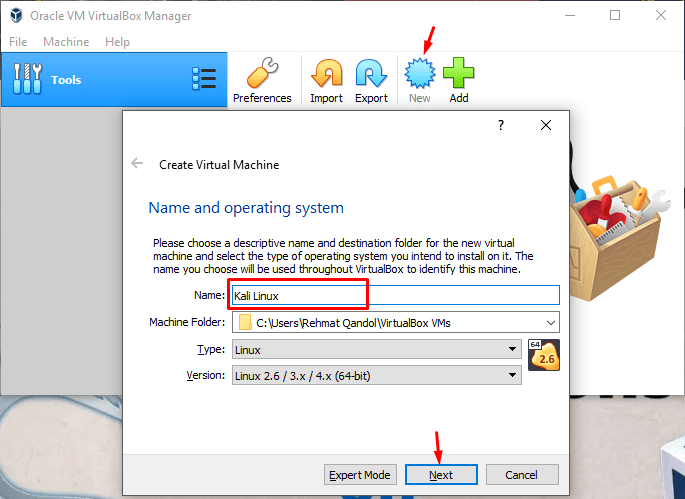
Step 1. once the downloading is completed then after that install Virtualbox on your PC. the installation is so simple, click on the setup and go ahead until it gets finished. afterward, open Virtualbox and click on the “New” on the right side of the windows.
then you will see a new windows pop up, and here you have to choose a proper name for Kali Linux as I put Kali Linux. when you type Kali Linux then it will automatically file all the necessary options. then click on the “Next” button.
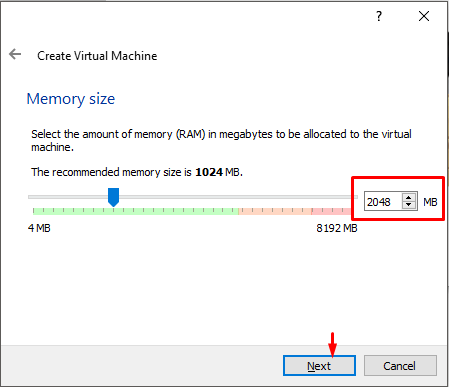
Step 2. choose at least 2 GB of memory size then click on the “Next” button.
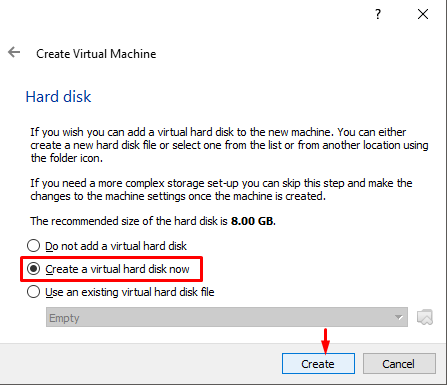
Step 3. create a new virtual hard disk where you need to choose the second option and then click on the “Next” button.
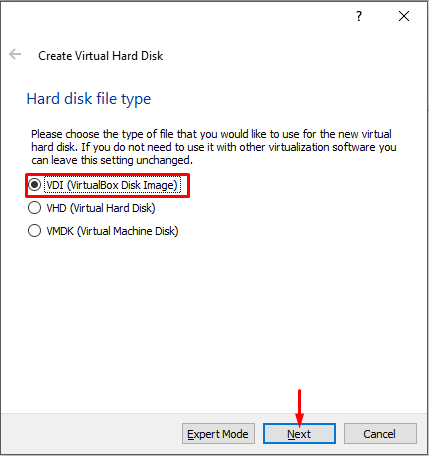
Step 4. choose first option VDI (Virtualbox Disk Image) then click on the “Next” button.
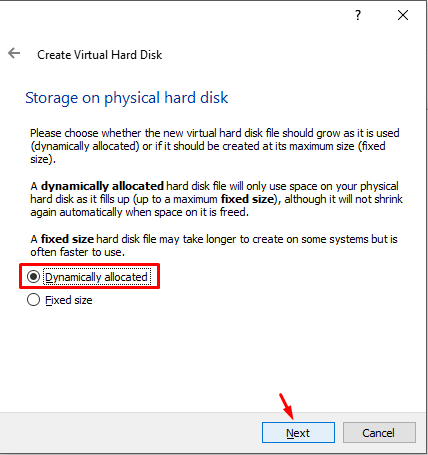
Step 5. here you will face with two options “Dynamic and Fixed Size”. A dynamic allocated hard disk file will only use space on your physical hard disk and Fixed Size will cut space from the physical hard disk when the size is filled. but I recommend you to choose Dynamic hard Disk.
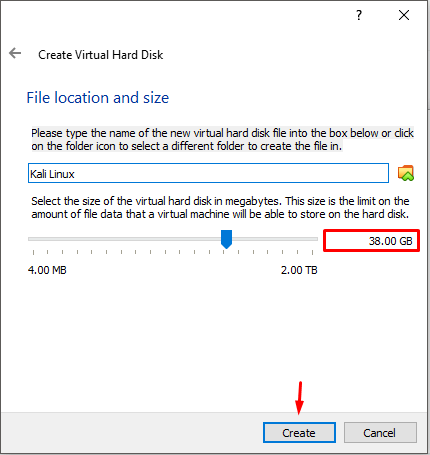
Step 6. choose the amount of space for the hard disk and click on the “Create” button.
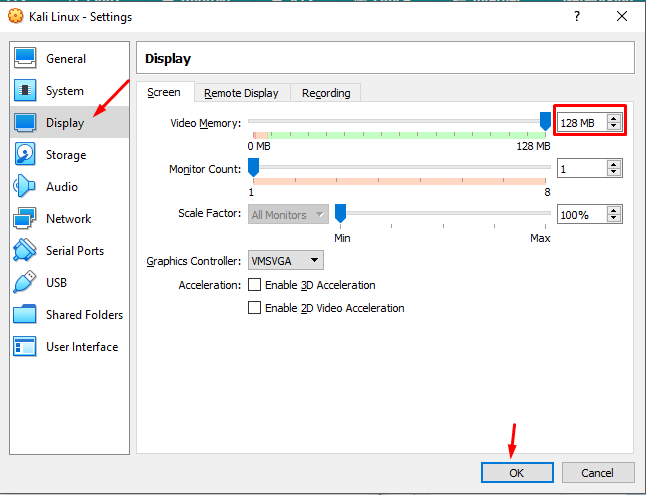
Step 7. now you have successfully created a new virtual machine but it’s not finished yet, click on the VirtualBox then click on the setting->display tab and increase the video memory.
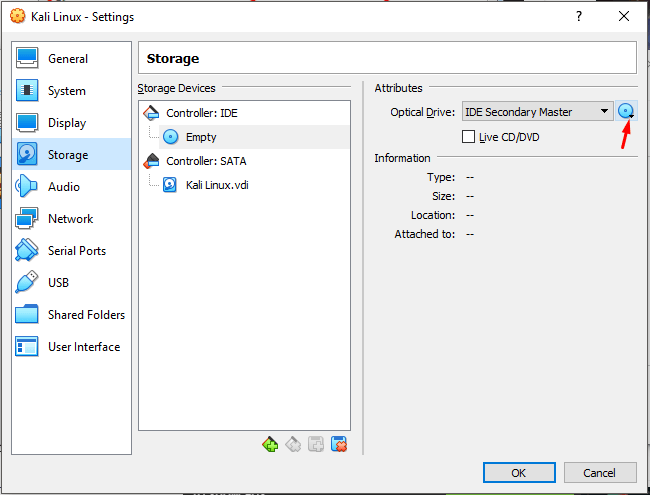
Step 8. after that click on the Storage and insert Kali Linux IOS file that you have downloaded. and click on the “Ok” button.
Install Kali Linux on Virtualbox
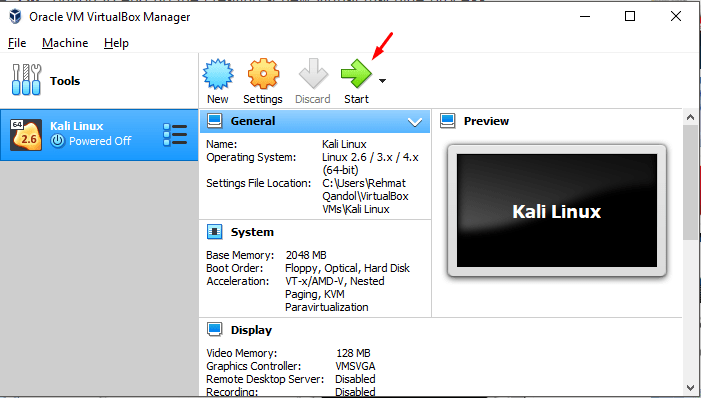
you have created a new Virtual machine successfully and now it’s time to install Kali Linux on Virtualbox in PC. open VirtualBox and select Kali Linux Virtual Machine then click on the “Start” button.
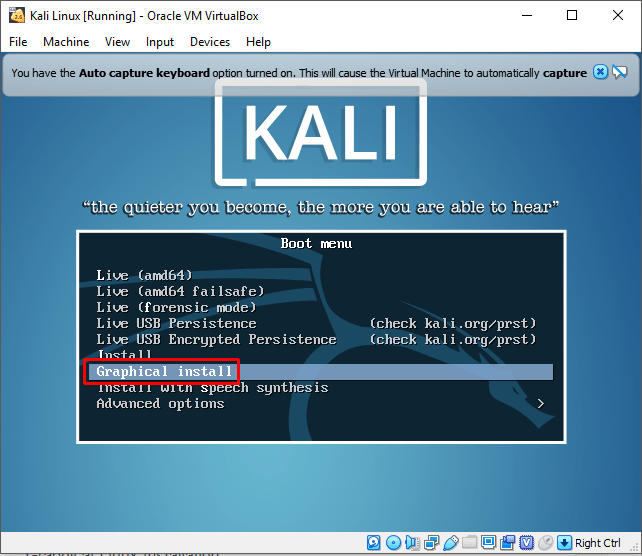
Step 1. after you clicked on the start button then you will see this windows, in here you have to choose “Graphical Install” and press enter button.
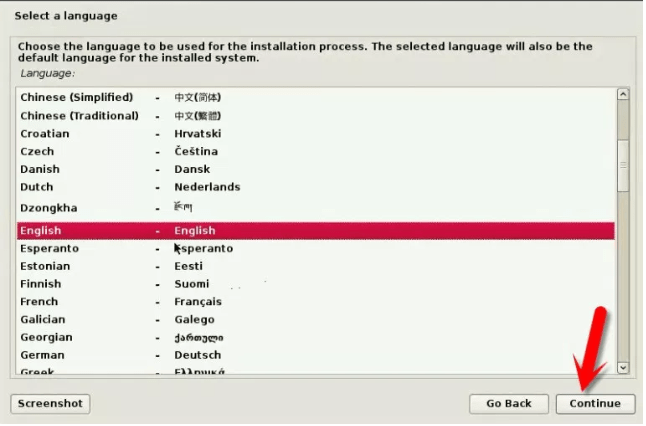
Step 2. in here you need to choose your language then click on the “continue” button.
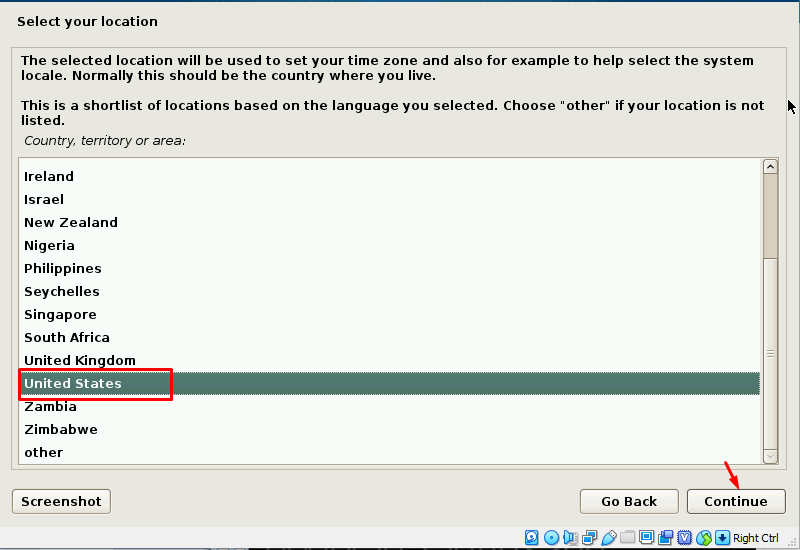
Step 3. select your country and keyboard type then click on the “continue” button.

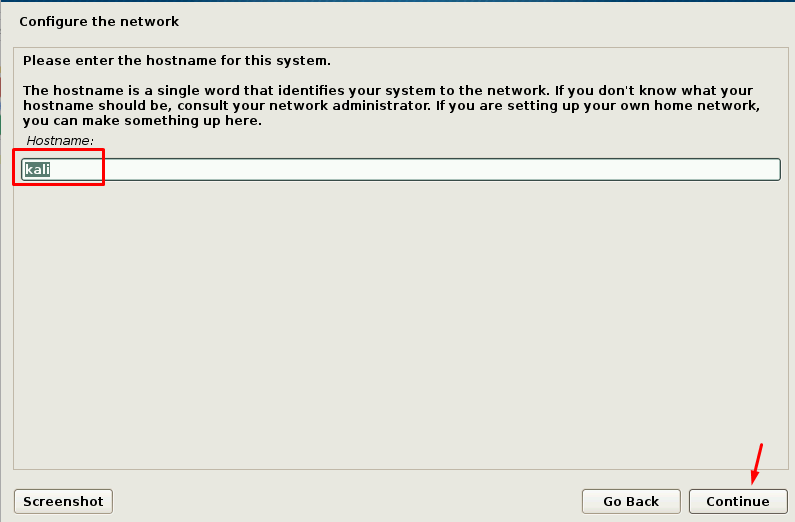
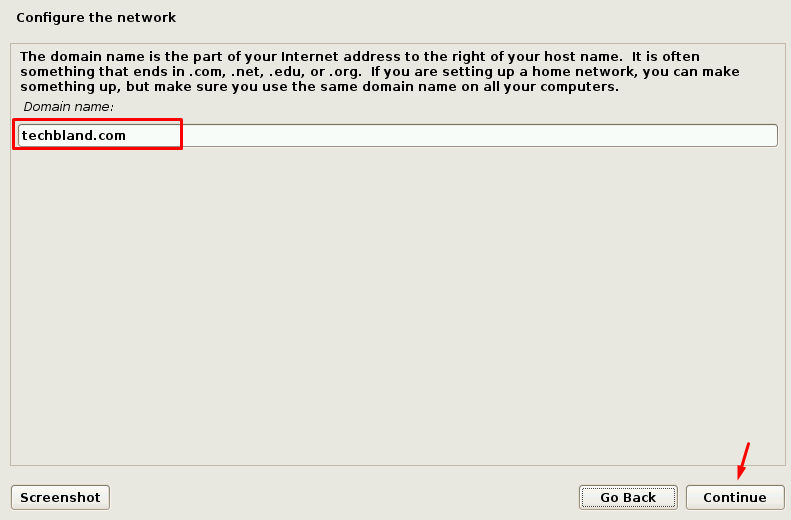
Step 4. after that you have to write hostname plus domain name and Click on the “continue” button.
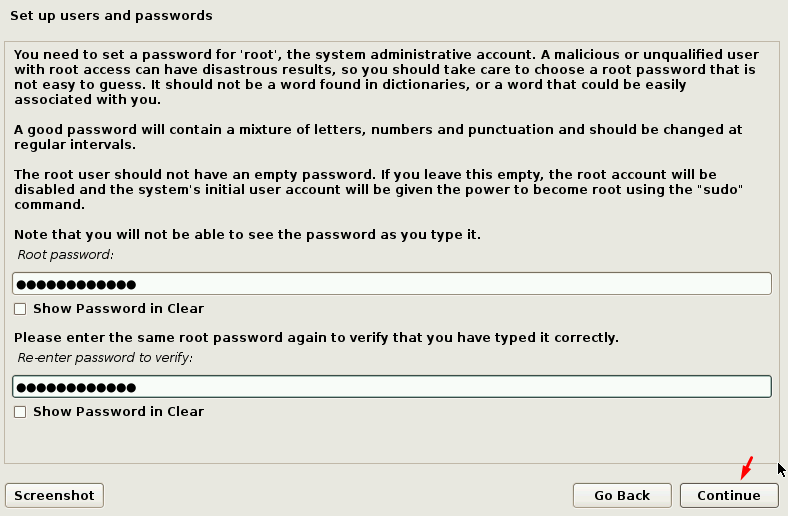
step 5. in here you need to set a password for ‘root’, as you can use upper letter, lower letter, number, and symbols.
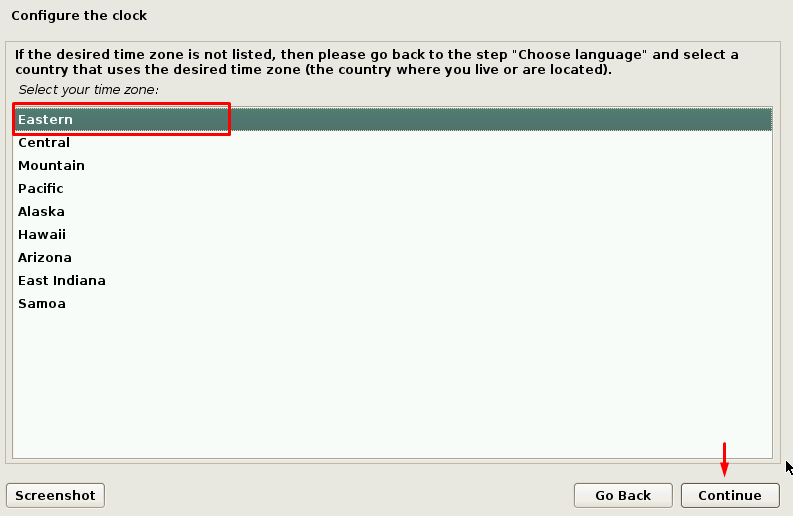
Step 6. select a proper time zone for your operating system.
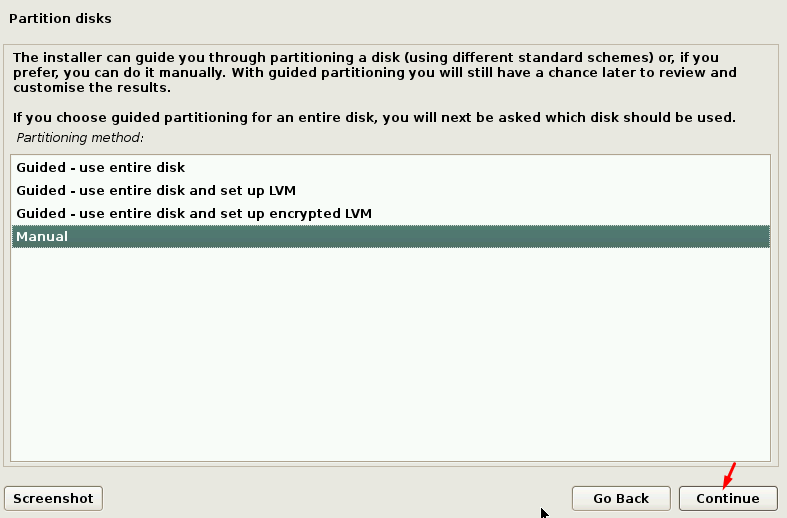
Step 7. in here you need to create a new partition so for that you need to select manual.
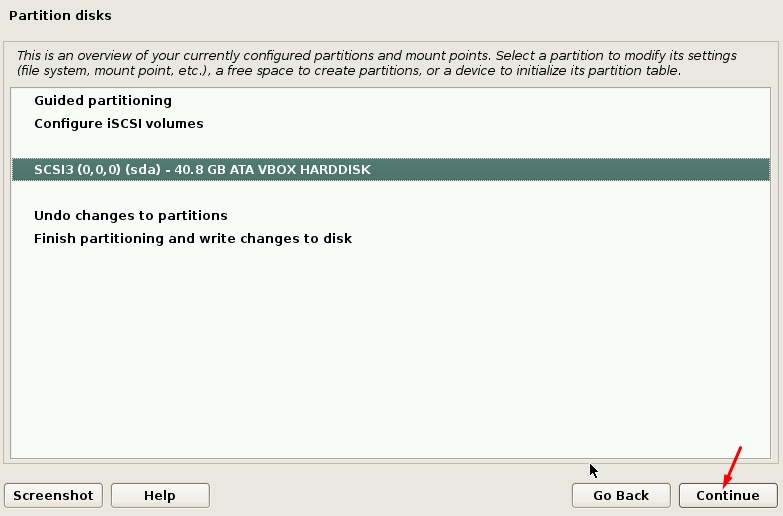
Step 8. select SCSI3 (0,0,0) (sda) – 40.8 GB ATA VBOX HARDDISK to create new partition.
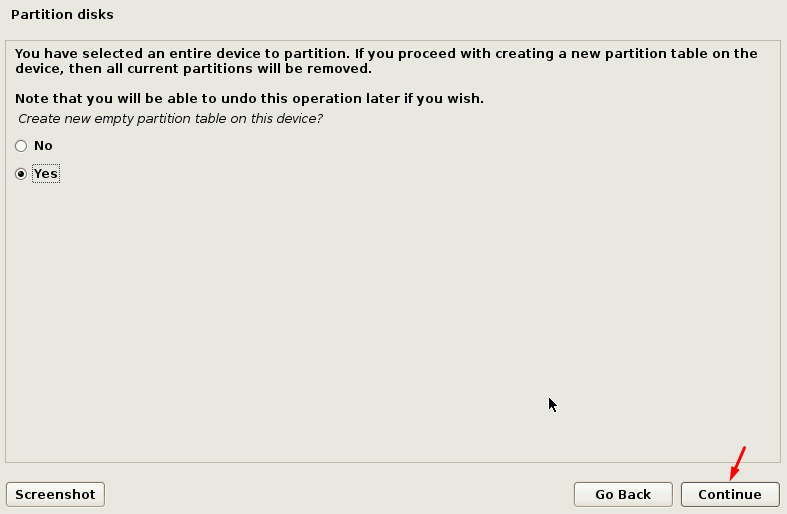
Step 9. select Yes and click on the “continue” button.
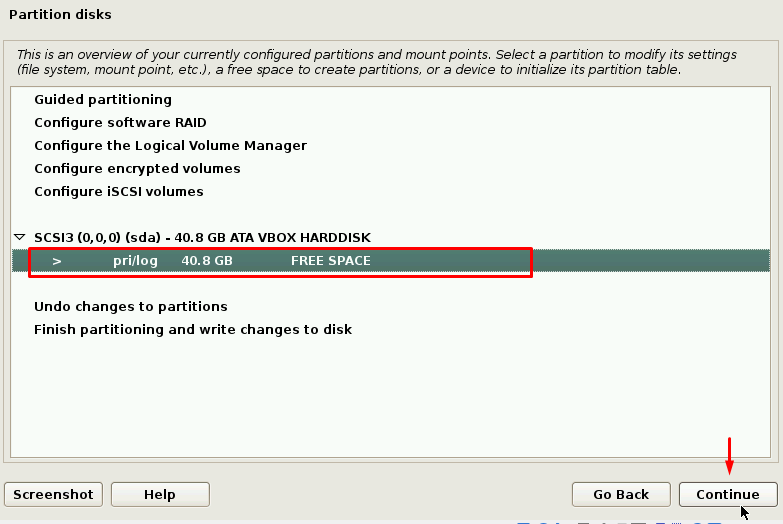
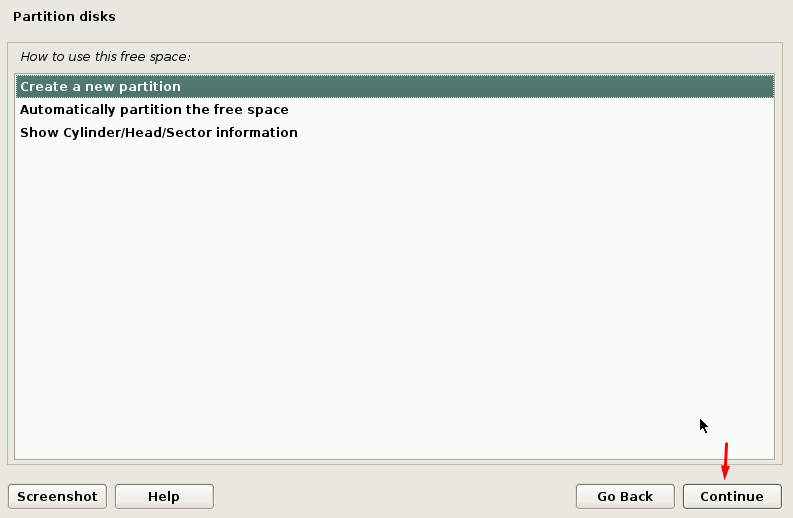
Step 10. Choose free space and click on the “continue” button.
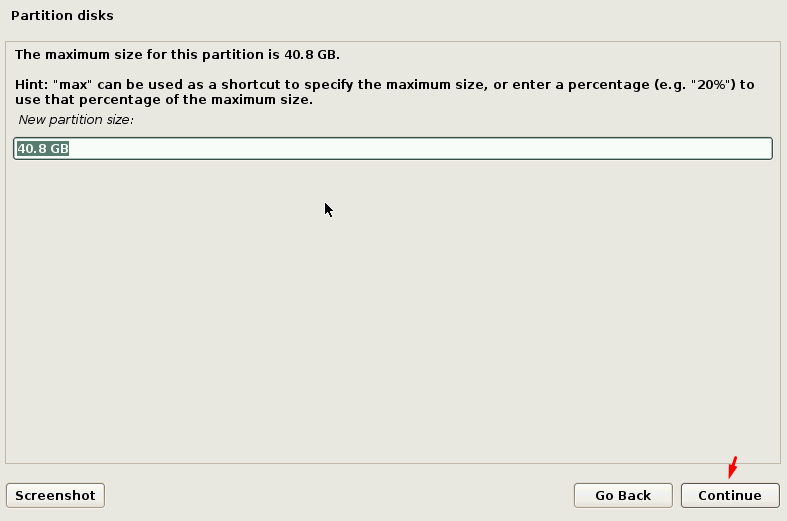
Step 11. now start to create new partition and select the size then go ahead till the end, here you can see in slideshow.
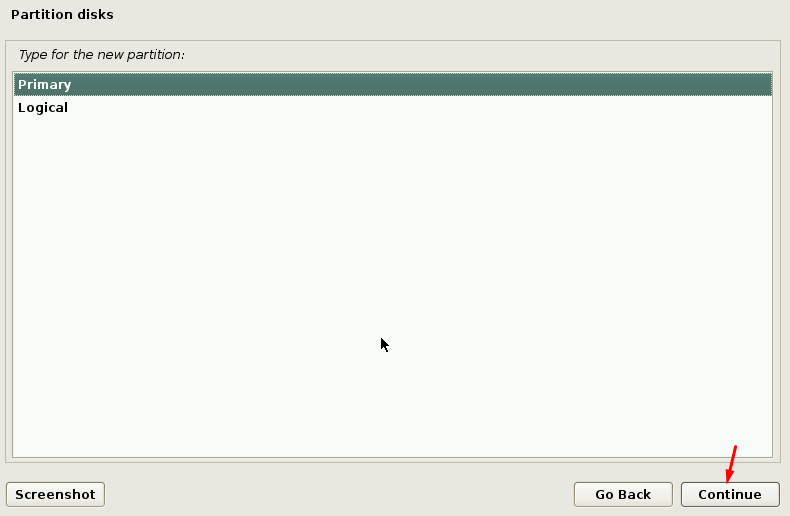
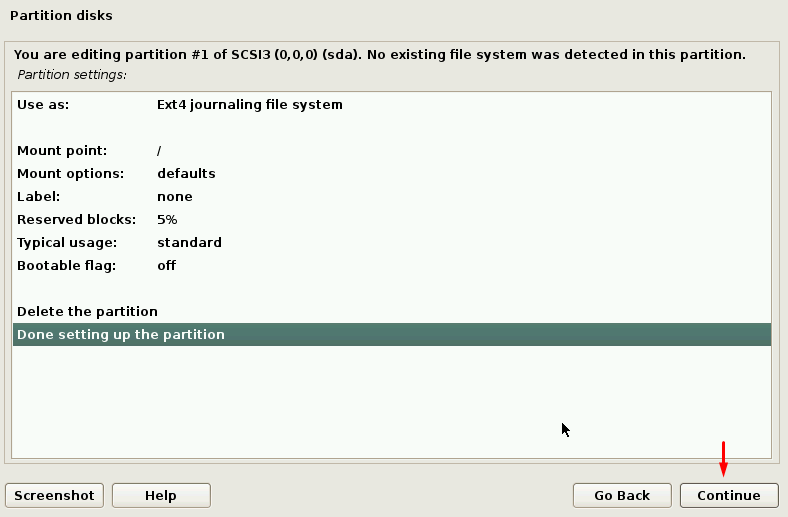
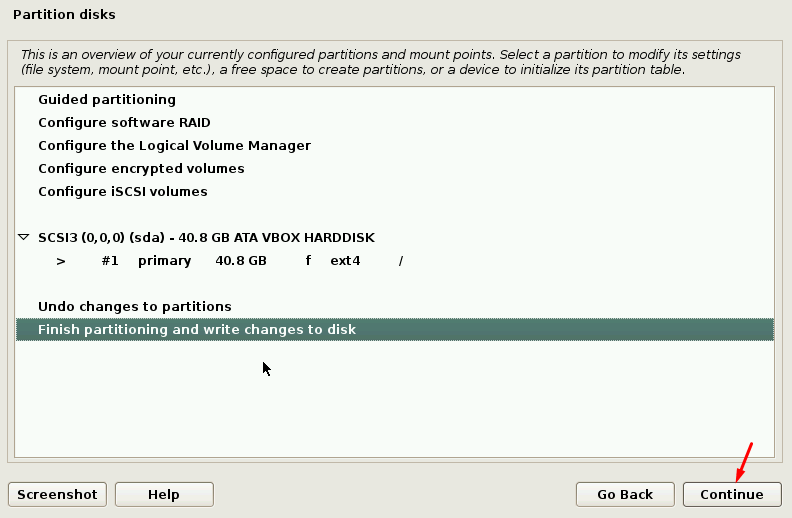
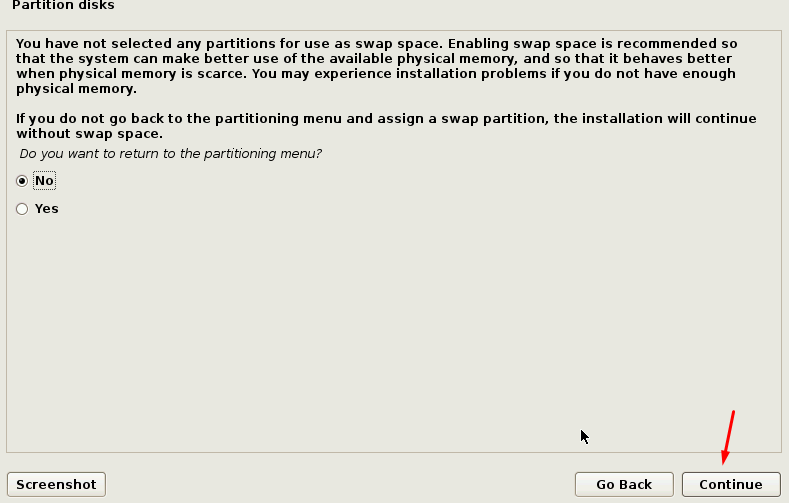
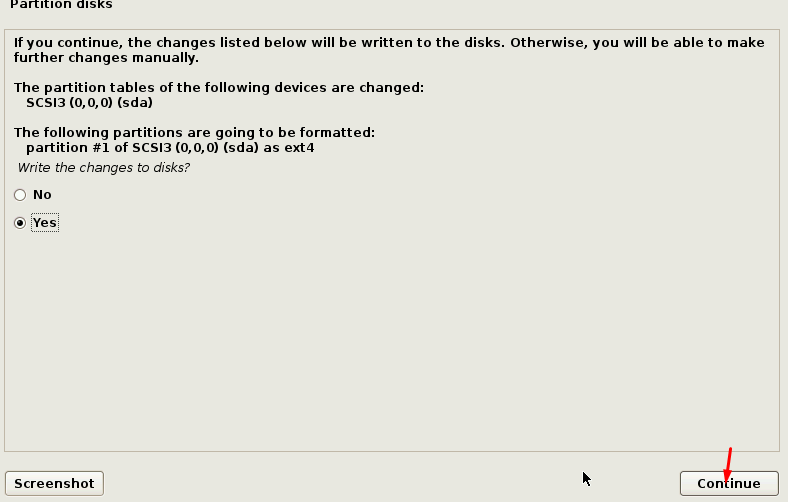
Step 12. this is the step to install Kali Linux on Virtualbox, just you need to follow the slideshow.

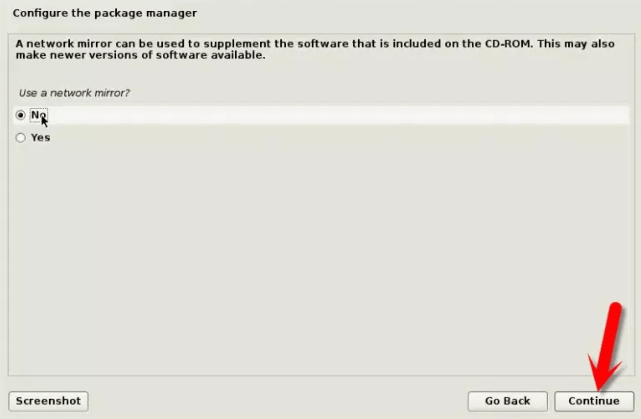
Step 13. if you don’t want to use a mirror then select no and continue
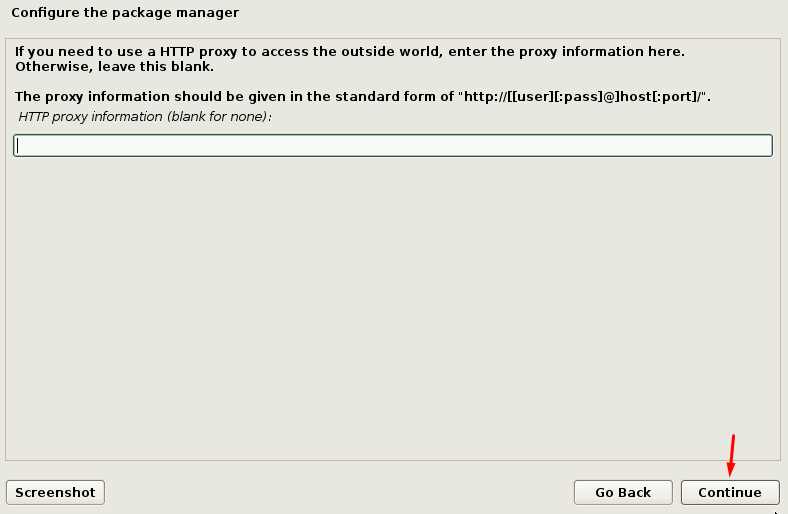
Step 14. if you need to use an HTTP proxy to access the outside world then enter the proxy info here. otherwise, leave this blank.
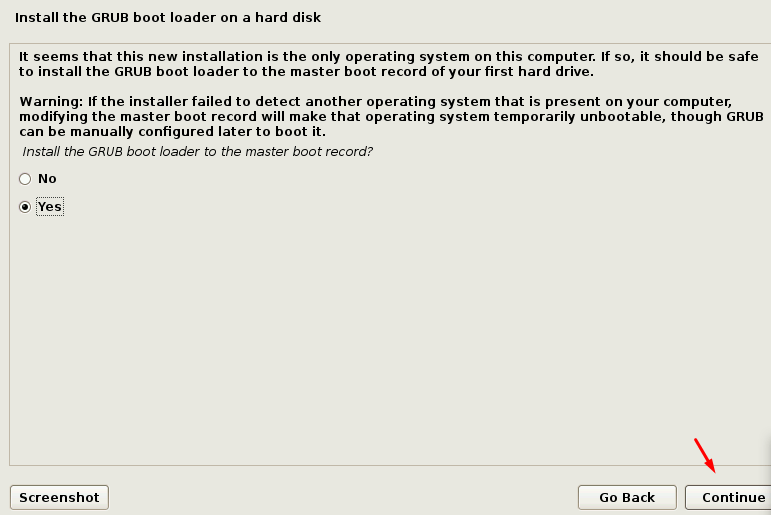
Step 15. install the GRUB boot loader on a hard disk then click Yes and continue.
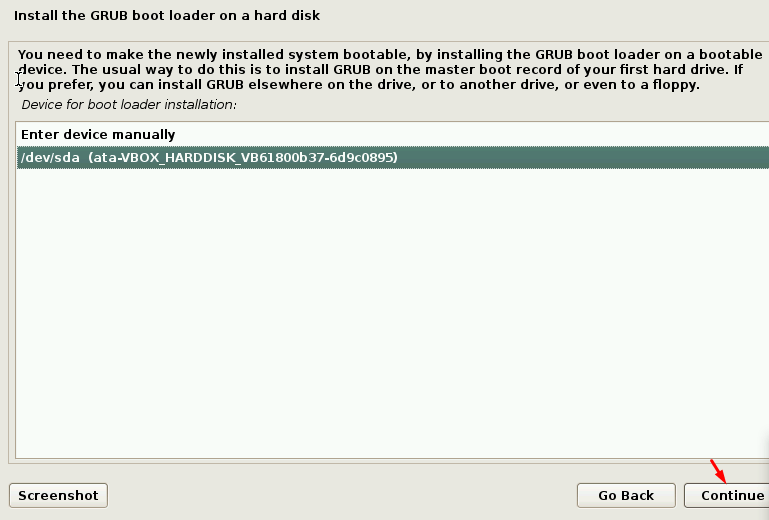
Step 16. select the second option and continue.
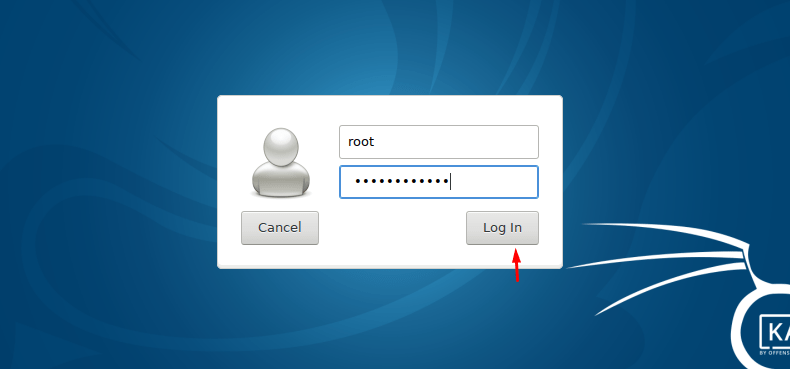
your installation is completed now you need to put your username and password. the username is root and the password is whatever you had given.
In conclusion
In this article, you have learned how to create a new virtual machine and besides that, you have learned how to install Kali Linux on Virtualbox. here I have told you deeply and I hope you understood well. if again you find any confusion then feel free to ask me, Thank to be with us.