How to Install Lubuntu on Virtualbox on Windows – Latest Version
Lubuntu is a fast and lightweight operating system with a clean and handy user interface. it is a well-known operating system which is in high demand from the legions of users. Lubuntu is a Linux system (which means that it is developed by Linux). however, Lubuntu uses desktop LXDE/LXQT and the selection of light applications. due to that, Lubuntu has very low hardware requirements, although Lubuntu is developed by Mario Behling and has been continuously for many years by Julien Lavergne. therefore, in this article, I will show you how to install Lubuntu on Virtualbox on windows.
As you know, Linux releases the latest version of Lubuntu which is 19.04 Beta, so, therefore, I will guide you on the installation of the latest version of Lubuntu. to test any operating system, you can go with virtualization software such as Virtualbox and VMware. it is the best way to try Lubuntu 19.04 on Virtualbox or VMware because if you install it on your original system then you have to take backup of your data.
But I recommend you to give it a try on Virtualbox or VMware, as I am going to guide you on the installation of Lubuntu 19.04 on Virtualbox. therefore, read the article attentively and follow my method to install Lubuntu on Virtualbox on windows.
How to Install Manjaro Linux on Virtualbox on Windows How to Install Zorin OS on Virtualbox on Windows How to Install Ubuntu 18.10 on Virtualbox on Windows How to Install Virtualbox 6.0.4 on Ubuntu 18.10
What is the Current Version of Lubuntu?
Every user wants to know about the latest version of Lubuntu and might be you, so, the latest and current version of Lubuntu is 19.04 which is released this week. so, this version has a good bit of new features and functionality that you will get into it. therefore, I will guide you about its new features and installation on Virtualbox using windows 10.
Features
- Fast-performing and energy-saving system using LXDE/LXQT
- it comes with light-weight office solutions
- Lubuntu is multimedia (you can listen to music and radio and watch movies)
- Graphics and Imaging
- System setting and preferences
- Accessories
How to Install Lubuntu on Virtualbox on Windows
Now, I will show you step by step the installation of Lubuntu 19.04 on Virtualbox on windows. so, read below carefully and follow me to not face difficulties.
Step 1. Download Lubuntu 19.04
Before, doing the below step, you need to download the Lubuntu 19.04 ISO file. however, you can download it from its official website but here below I will give you the link that you can download it easily. therefore, click the link below and download Lubuntu 19.04 latest version.
Step 2. Download and Install Virtualbox on your PC
Now that you downloaded the Lubuntu 19.04 ISO file then in the next step, you will need to download and install Virtualbox on your system. the installation is quite simple here I have uploaded an article about how to install Virtualbox on windows so, if you don’t have the idea then click the link and get know how to install Virtualbox on windows. or simply double click the setup and click the Next button till the time you will see the Install button. then click the finish button, here you have installed Virtualbox successfully.
Step 3. Create a New Virtual Machine
To create a new virtual machine launch Virtualbox and click the New button from the top.

#2. in this step, it will ask you to provide a virtual machine name, so, type a proper name for the operating system and select its type and version. as I have select Linux and Ubuntu (64-bit). after that, select 4GB for memory size, and Hard Disk select the second option and click the Create button.

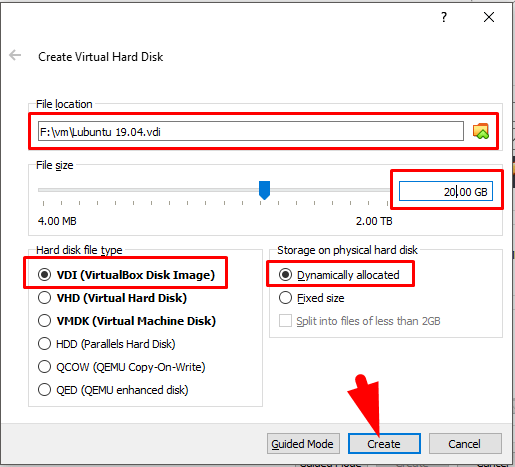
#3. after that, you will the below screenshot, so here, if you want to change the file location then click the file icon and set the new location for the virtual machine. then select 20GB for file size and I recommend you do not select less than 15GB. after that, select the first option for Hard disk file type and Storage on physical hard disk select Dynamically allocated and click the Create button.
Customize Virtual Machine
after that, you created a new virtual machine then here you will need some more steps to customize the created virtual machine. so, the steps are below and follow me.
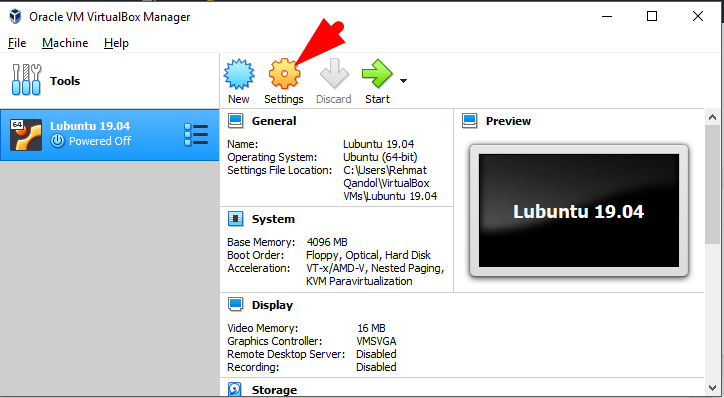
#1. select the created Virtual Machine from the left side of the window and click the Setting option from the top.
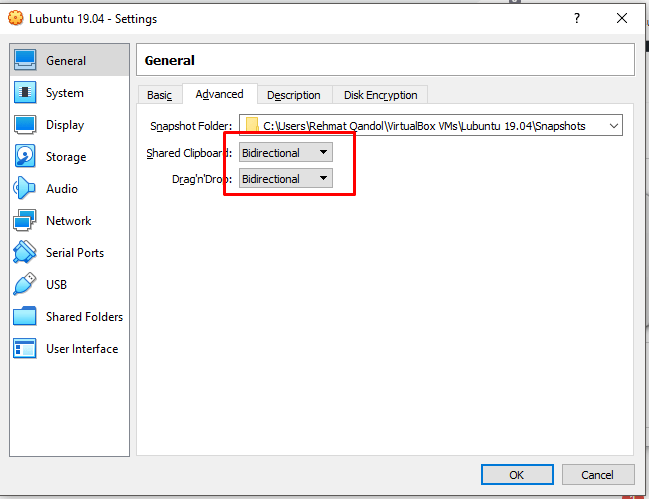
#2. in the first step, customize General -> Advanced Setting, so go there and select Bidirectional for Shared clipboard and drag-drop.
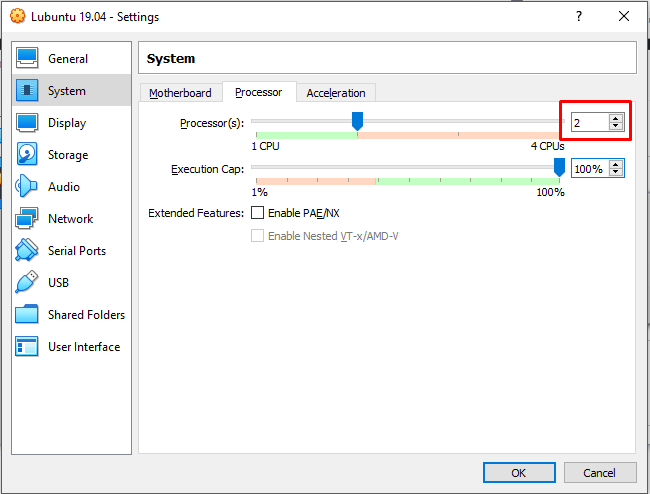
#3. after that, go to System -> Processor and increase the processor up to 2 CPU.
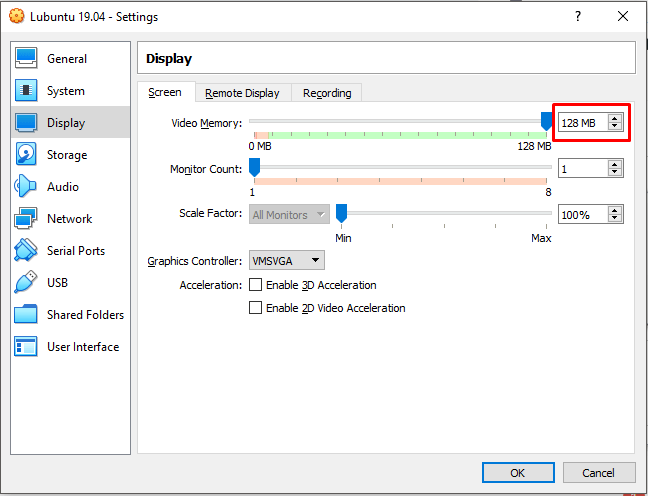
#4. then, go to Display and increase the Video memory up to 128MB.
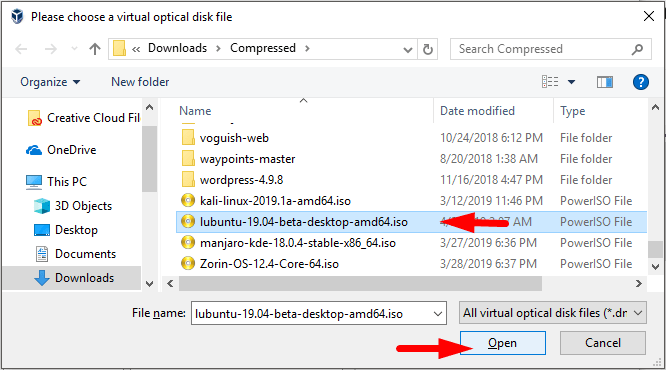
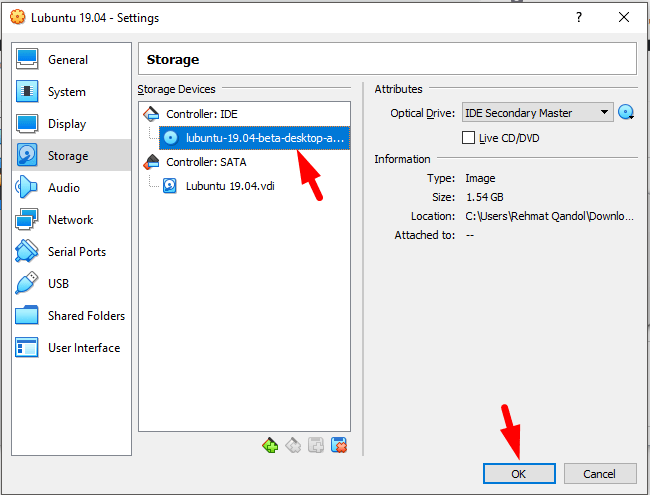
#5. in the last step, it will ask you to insert the Lubuntu 19.04 ISO file. so go to Storage and click the Empty option and click the small CD/DVD icon then select the Lubuntu 19.04 ISO file that you downloaded earlier and insert it. then click the OK button.
How to Downgrade macOS Mojave to macOS High Sierra How to Install macOS Mojave on Virtualbox How to Install macOS High Sierra on Virtualbox
Step 4. Install Lubuntu on Virtualbox
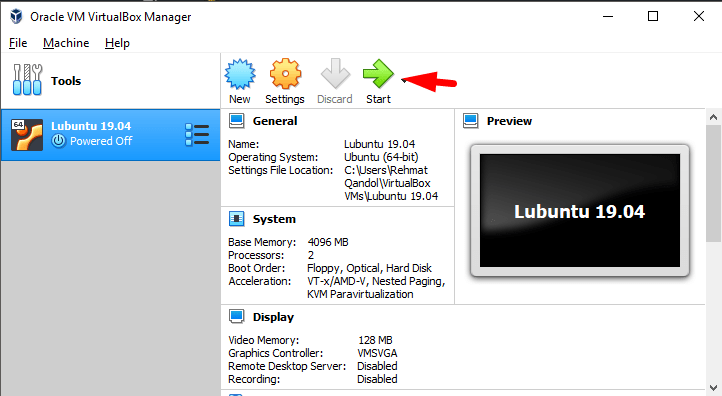
OK, now everything is ready and you can install Lubuntu on Virtualbox on windows. therefore, select Lubuntu Virtual Machine from the left side of the window and click the Start button.
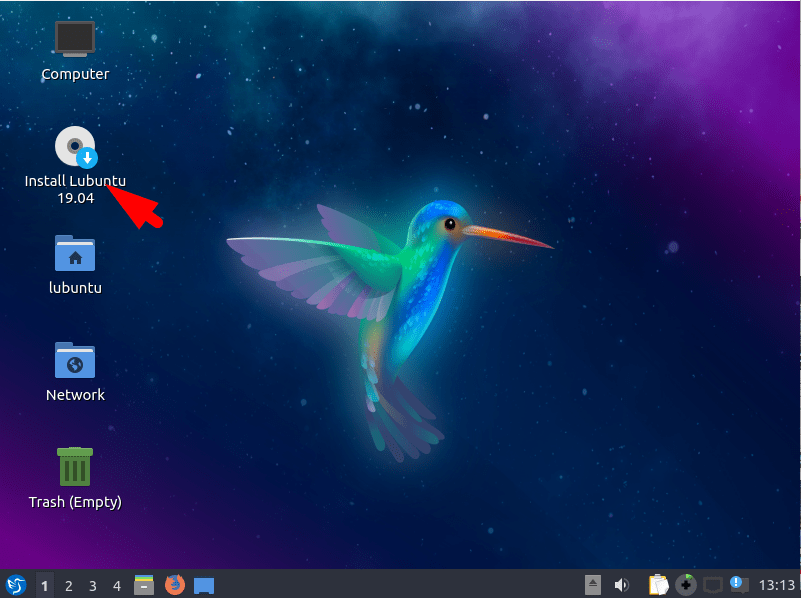
#2. while you start the operating system then you will see the below screenshot, so, here click the Install Lubuntu 19.04
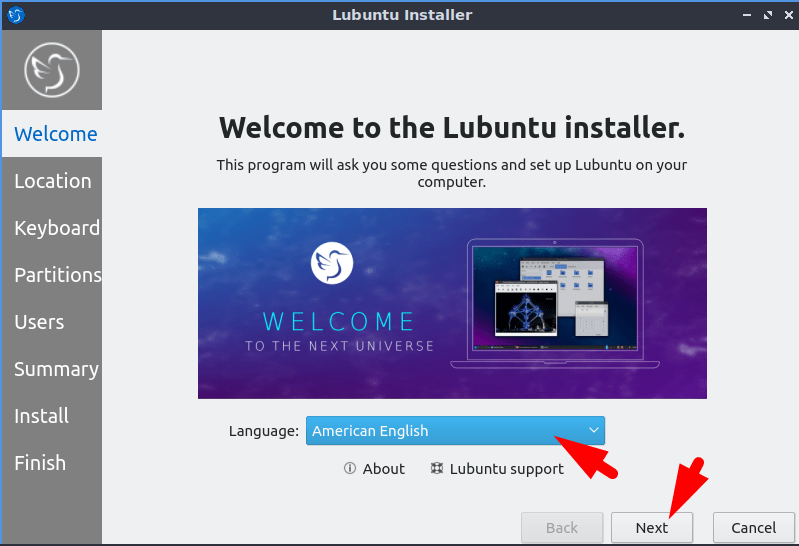
#3. after that, you will see the welcome page and besides that, it will ask you to select your language you want to install the program and click the Next button.
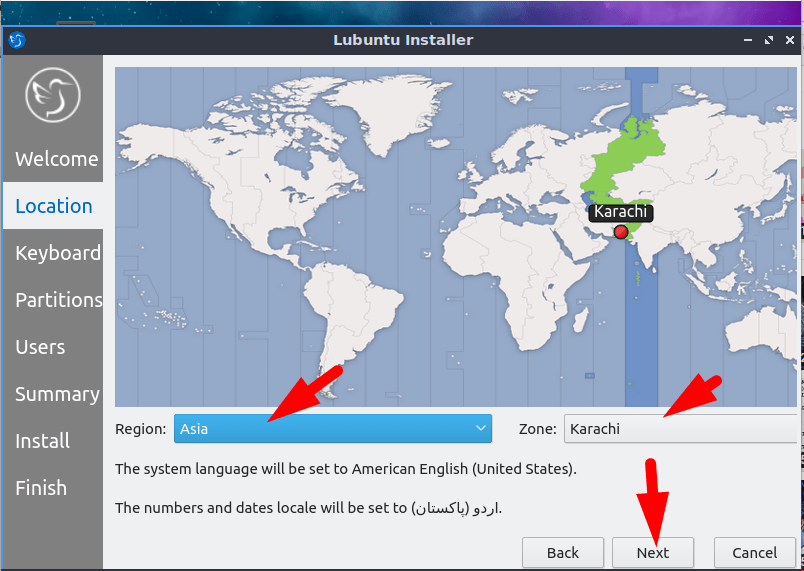
#4. so, here select your location where you live and select the time zone and click the Next button.
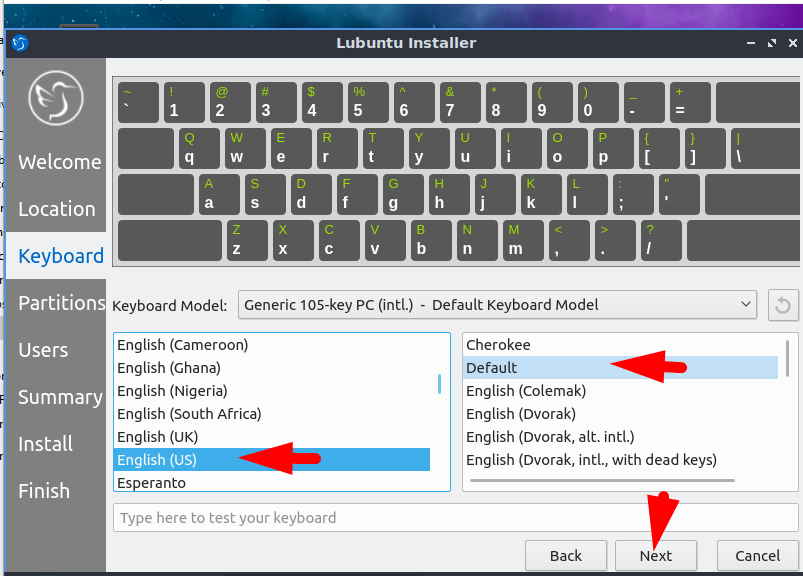
#5.now select your keyboard layout, here you will have several keyboard layout but chose the one you want and click the Next button.
#6. in this step, select Erase Disk, it will delete all your data but don’t worry, you don’t have any data inside Lubuntu just simply click the Next button.
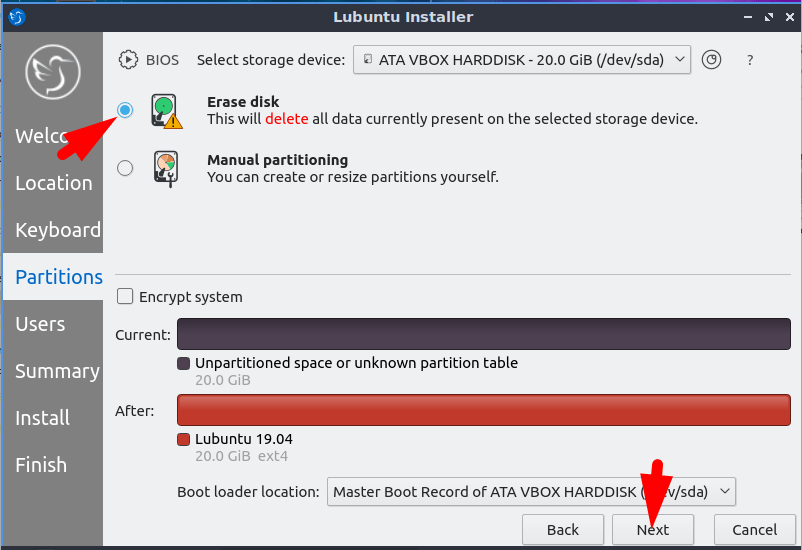
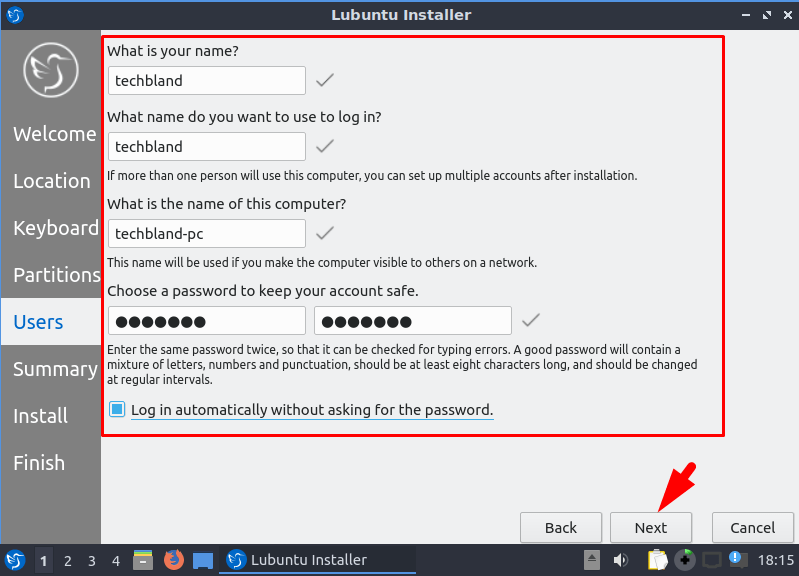
#7. now, create a new user for Lubuntu 19.04 so, here type your Name, User-name, Computer Name and provide a strong Password. moreover, if you want to log in automatically without asking a password, then make sure you have checked the last option. then click the Next button.
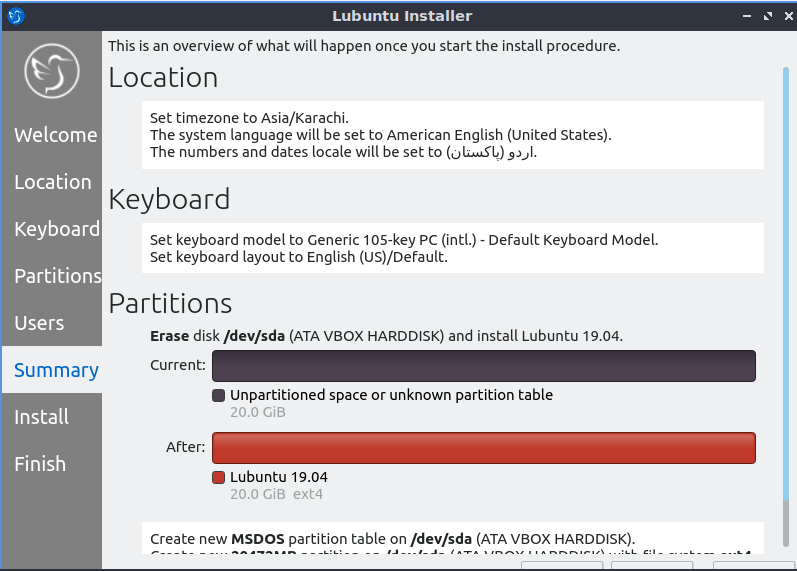
#8. this step will show you the Lubuntu 19.04 installation summary, so, check all the information that you did.
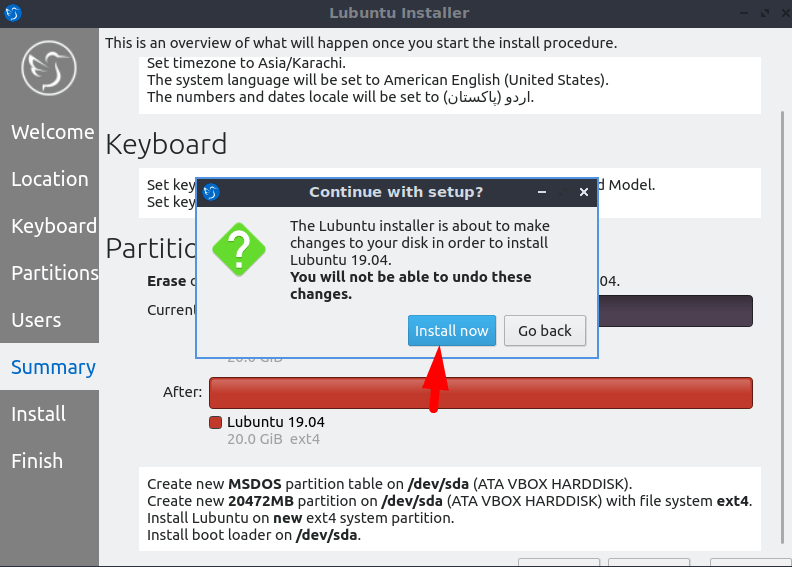
#9. now, the virtual machine is ready to install Lubuntu 19.04, therefore, click the Install button.
#10. wait for a while to complete the installation process.
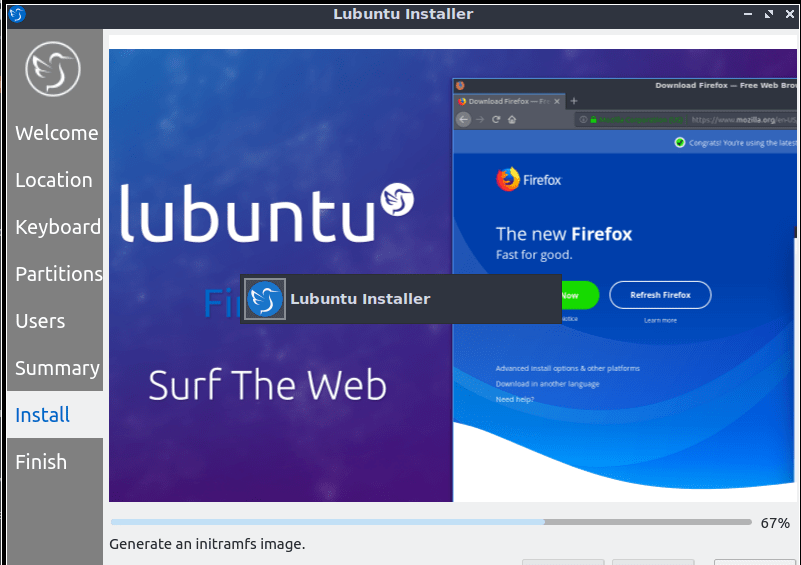
#11. after a few seconds, the Lubuntu installation will be completed and then restart the operating system.

#12. here you have installed Lubuntu 19.04 on Virtualbox successfully, so, now enjoy the Lubuntu 19.04 on Virtualbox.

Video Guide:
Conclusion
In this article, I guide you on how to install Lubuntu on Virtualbox on windows. so here you get the installation of Lubuntu latest version and we have installed successfully. therefore, start using Lubuntu and enjoy its latest version. moreover, if you get any kind of confusion or question then feel free to ask me in comments.


