What is Visual Studio Code? VS Code Details, Tips and Tricks
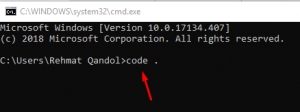
Visual Studio Code was developed by Microsoft for Window, Linux and Mac. It includes support for debugging, embedded Git control, syntax highlighting, intelligent code completion, snippets, and code refactoring. and it’s also customized for the user to change theme colour, keyboard shortcut, and preference. it’s free and open source and it supports a number of programming languages like C#, Python, C, C++, HTML, and many more. VS Code is one of the best HTML Editor in 2019, which is handy in programming life. its lightweight and has lots of features. in VS Code each Language has its own features and Extension if you know about an extension so you can easily install them because it will make easy for you to create your project and it will be transparent. and one cool feature it has that you can open it through command just open cmd or Git Bash and write code . plus press enter button and it will open Visual Studio Code for you its so easy way and quick way.
we have lots of IDE like Sublime Text, Notepad++, Atom and many more although each of them is good in its place each of them has good features and useful features. if we compare it with VS Code so they are not good as much as VS Code is good. if we ask from a programmer that which IDE you are using or which IDE I should use so I know 100% that they will give you VS Code option. one thing that I will suggest you if you are a programmer or you want to start coding so use VS Code and you can download it from here.
What is Sublime Text Editor? free download and software reviews 5 Best HTML Editor in 2019
Learn Step by Step about VS Code
- Download Visual Studio Code
- Install VS Code on PC
- Open Visual Studio Code
- Start with Visual Studio Code
- Keyboard Shortcut reference
- New updates
- History
- Features
- Extensions
Download Visual Studio Code:
Visual Studio Code for Windows Visual Studio Code for Mac
How to Install VS Code on PC?
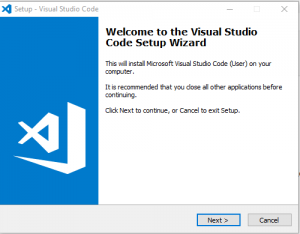
after downloading VS Code setup so now let’s install it on PC. first, go to your PC and open Download Folder and find the VS Code setup. if you find it so double-click on the setup and follow the steps.
after you open the setup then click on Next button.
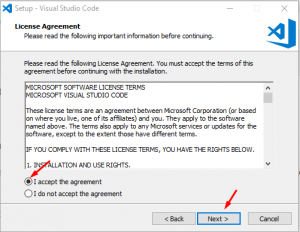
then accept the agreement and click on Next button.
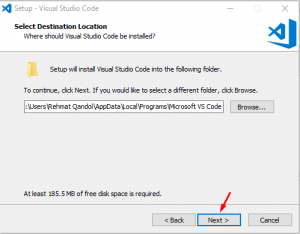
then set its path where you want and click on Next button
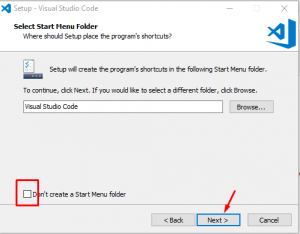
if you don’t want to create a start menu folder so leave the rectangle empty and click on Next button
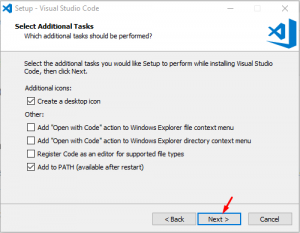
then click on Next button
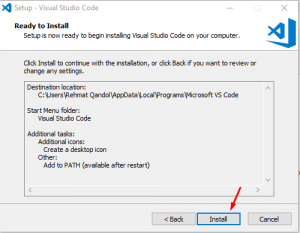
now the installation is ready, click on the Install button to install VS Code on your PC.
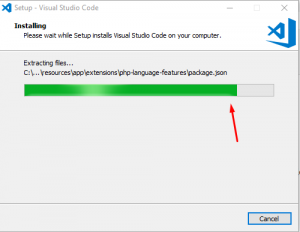
finally, VS Code installed successfully on your PC. click on Finish button.
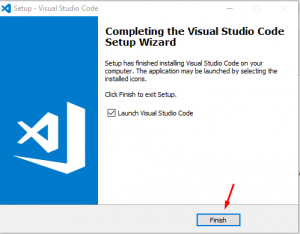
now you have VS Code on your PC. your installation is done successfully and ready to open.
Brackets | A modern html editor for Programmers to code Notepad++ free download and software reviews
How to Open Visual Studio Code?
you can open Visual Studio Code in three ways.
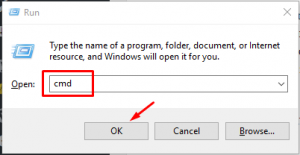
- Type (win+r) and write cmd and click on the ok button or use Git Bash and write code . and press enter button.
![screenshot cmd]()
![open vs code]()
- Click on (win) button and type Visual Studio Code and click on it.
- Go to your Desktop and find VS Code icon and click on it.
How to start with Visual Studio Code?
while you open VS Code so at the first you need to know about its menu that is located on the top of the page. as we have
- File
- Edit
- Selection
- View
- Go
- Debug
- Terminal
- Help
File Menu:
you can create a new file and new window. and you can open file and folder from your Desktop if you have in the case. in the file menu, you can save your current project and you can do many more things.
Edit Menu:
In the edit menu, we have a various option as we can cut, copy and paste our selected text. and we can undo and redo our work if we want, so in this menu, we have many more options too.
Selection Menu:
These menus are so transparent because it has a description like in this menu we can select our text, line and whole content.
View Menu:
In this menu, you can view to mistake, errors, debug and you can search for extension and many more.
Go Menu:
with this menu, you can switch to your next file and you can go to next file, folder, and symbol in the file.
Debug Menu:
you can easily start and stop debugging with help of this menu.
Terminal Menu:
as we have cmd, Git Bash etc, so like them VS Code has its own command by the name of a terminal you don’t need to use cmd or Git Bash because VS Code has a terminal in here you can use it in place of cmd.
Help Menu:
Every IDE has this menu so if you need any kind of help so go to this menu.
Visual Studio Code Keyboard Shortcut reference:
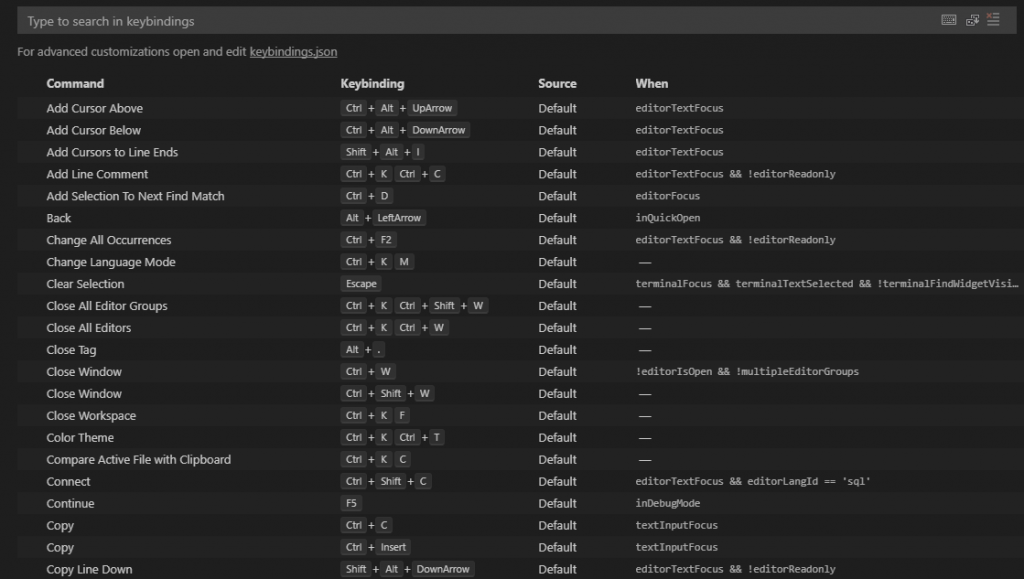
like other IDE VS Code also provide you with the keyboard shortcut. you can easily access any file using the keyboard shortcut. and you can customize keyboard shortcut yourself too. Go to > file menu > Preferences > keyboard shortcut. here is the keyboard shortcut in case if you want to change keyboard shortcut so double-click on the keyboard shortcut and give keyboard shortcut from your wish,
Visual Studio Code new updates:
VS Code is updated on October 2018 and the new version is 1.29. so here are the new updates, tools, and features that added to VS Code. you have to know about new features of VS Code which are below here.
- Multiline search – Search across files with regex multiline expressions.
- File icons in IntelliSense – Quickly distinguish file types in IntelliSense.
- Better macOS support -Full-screen mode control and Mojave Dark Mode support.
- Collapsible stack frames – Collapse uninteresting stack frames to clearly see your code.
- Improved Loaded Scripts view – Displays related resources such as original source files.
- Updated extension samples – Uniform style and structure, README, and API usage.
- CI recipe for extensions – Azure Pipelines build recipe for extensions.
- Preview: List All References – List All References view shows reference search results
The release notes are arranged in the following sections related to VS Code focus areas. Here are some further updates:
- Workbench – Platform specific end-of-line characters, highlight modified file tabs.
- Integrated Terminal – Split terminal cwd options, Cmd+Backspace to delete to start of the line.
- Languages – Display CSS Specificity on hover, handle unknown CSS properties.
- Debugging – Multiple debug consoles, starting with a stop on entry, style console.log messages.
- Extension Authoring – Active terminal API, more control over custom views.
Visual Studio Code History:
VS Code was announced on April 29, 2015, by Microsoft at the 2015 Build conference. A Preview build was released shortly thereafter. and on November 18, 2015, Visual Studio Code was released under the MIT License and its source code posted to GitHub. Extension support was also announced as now if we see it have lots of extensions that are so handy. and finally, on April 14, 2016, Visual Studio Code graduated the public preview stage and was released to the web.
Visual Studio Code Features:
VS Code is an open source code editor. and it has many features for a user which make easy for them to start with there project. in VS Code we can do with any language program because each of them has its own extensions and features. we don’t need to download from outside of IDE although it has inside of it. just you need to know about them.
here is some programming language that VS Code support.
C, C++, C#, Java, HTML, Javascript, Python, Go, CSS, PHP, Swift, Typescript, JSON, LESS, Ruby, SCSS, SQL, XML, YAML, Perl, Visual Basic and some others language.
In above all programming language is affordable and supportable in VS Code. you can use it and it has its feature.
Visual Studio Code Extensions:
as others IDE has an extension for each programming language so here VS Code has also extensions for each language and we can easily install it in VS Code. An extension is so helpful for a programmer and it makes your syntax more readable and you can code shortly too. like if you want to start with HTML code so you don’t need to code all the syntax just you need to type ! and press enter button so it will automatically create HTML syntax. so that why extension good for a programmer.
you can find an extension form left menu. you will see 5 menus and the last one is extension menu click on it and search your extension name then install it. once your extension installed then it will give you the information on how to use and how to apply.
I hope you learn something from this Article but again if you have any confusion so please feel free to let me know.

