How to Clear Cache on Windows 10 to Speed Up Computer?
You are not the only Windows user that facing slow performance with your computer. However, legions of users are curious to find solutions on how to clear the cache on Windows 10 to speed up its computer. Although, Microsoft recommends you to clear your Windows 10 cache to help your PC run faster and it will help you to employ more of your hard drive storage space for applications, games, and certain files. So, the cache is a set of temporary files held by Windows 10 application, software, or the OS itself. In case, if your cache increase over time, it can slow down your PC performance.
You can find the temporary files in the Disk Cleanup program located in the File Explorer menu options in Windows. Windows 10 mostly uses temporary files that can help to make future requests or to help the operating system function. However, the Cache is data that stored on your Windows 10 computer that can help to make further requests for that data faster.
There may be times cache gets corrupted or is not functioning efficiently. So, it is highly recommended to clear out the cache periodically to free up space on your drives, Troubleshoot issues on your PC, and improve overall the system performance.
In this article, I will show you several ways to clear the cache on your Windows 10 to improve performance. Therefore, pay attention and follow the instructions one by one.
How to Clear Cache on Windows 10 to Speed Up Computer?
If you notice your Windows 10 PC is running slower than normal or you think your PC is not performing well. Then, you have to apply the below methods to clear the cache to speed up your computer.
Clear Cache using Disk Cleanup
The common cache every user knows is about temporary files and you can clear temporary cache files using disk Cleanup. Therefore, press the Win key or click the Win icon located at the left corner of the screen.
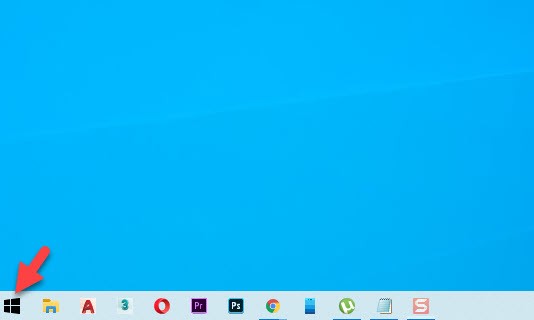
Here, search for Disk Cleanup and press the Enter key to open the Disk Cleanup utility.
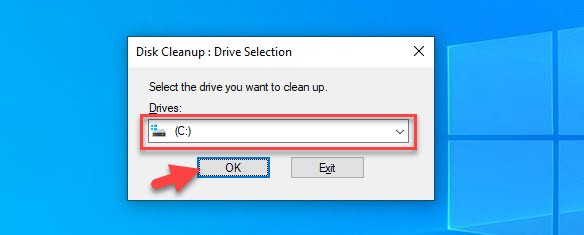
On Drive selection, make sure you have selected the C Drive of the operating system and click on the Ok button.
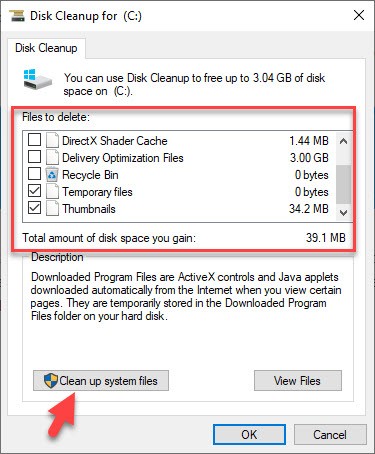
Now you will see several files with different names. So, you need to scroll down and select the Temporary files. Besides that, you can select other files that take space on C drive. Once you are done then click on Clean Up System Files and click on the Ok button.
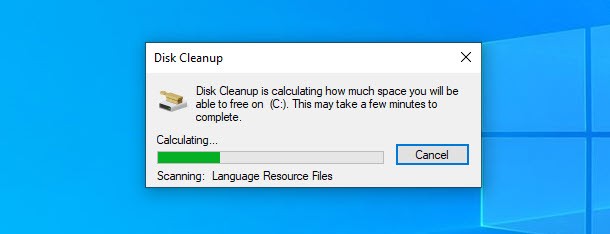
Here Disk Cleanup is calculating how much space you will be able to free on C drive. Simple wait for a while to complete the process.
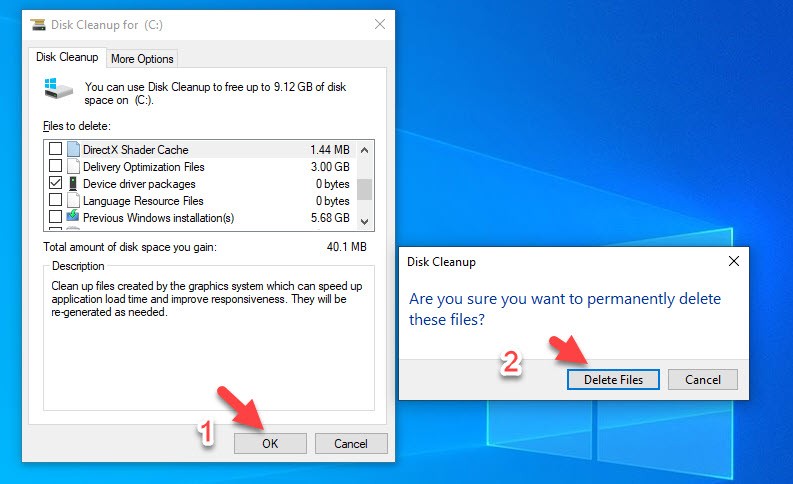
Now click on the Ok button and click on Delete Files, it will delete the temporary files and free up to 9.12GB of Disk space on C.
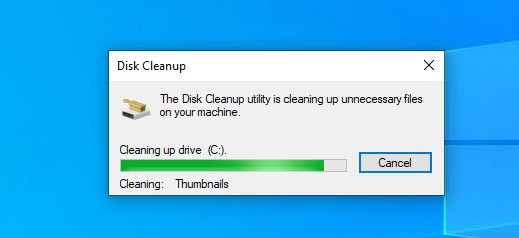
The Disk Cleanup utility is cleaning up unnecessary files on your machine. wait for a while and the process will be done. So, this is the first method to clear the cache on Windows 10.
Microsoft Store Cache
If you are facing issues with downloading or installing an application from Microsoft Store or Windows Store. On the other hand, if the store app is not launching itself. Then, you need to clear and reset the cache to fix the issues, don’t worry, it won’t delete any of your installed apps.
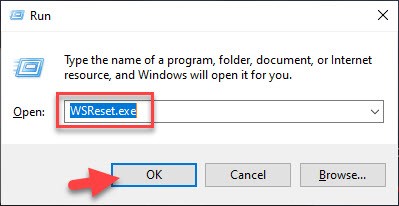
If the store app is open, close it, and press Win+R to open the command prompt. Type WSReset.exe and press the Enter key or click the OK button.
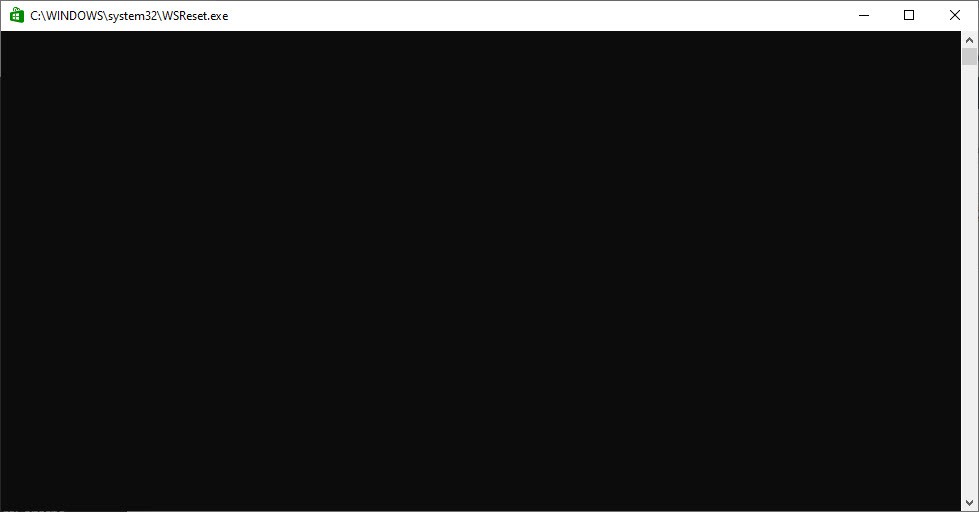
Here you will see a black screen that deleting the store cache on the background. You don’t need to do anything, simply wait for it. Once the cache is deleted then the Store App will open automatically.
DNS Cache
In case you have a problem with the internet connection or you have issues accessing certain websites or server. Then, you might have a corrupt local DNS cache. The DNS stands for Domain Name System like www.microsoft.com to an IP address. However, sometimes the problem occurs such as DNS cache poisoning, spoofing, or some other issues. So, flushing the DNS cache can sometimes fix those problems allowing your PC to connect properly.
Therefore. go to Win and search for CMD and run it as an administrator.
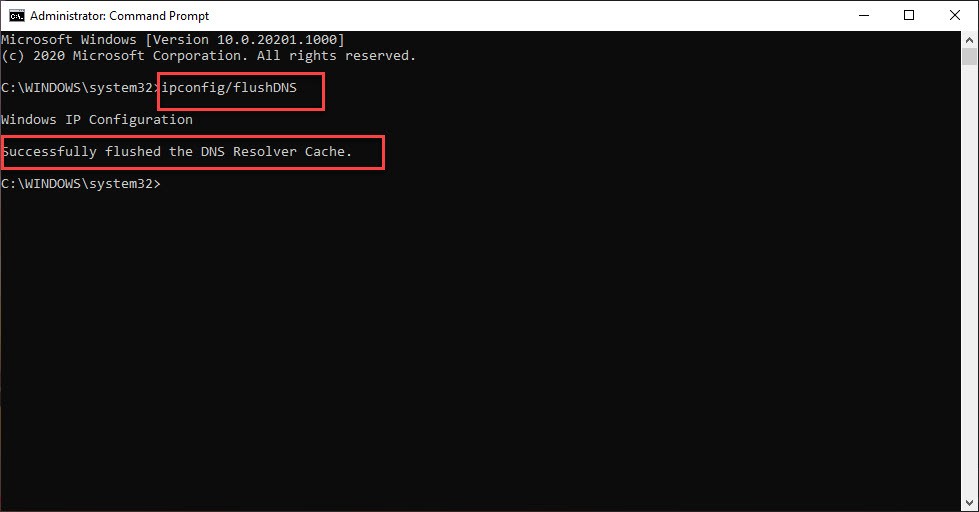
Here, run the command code ipconfig/flushDNS and press the Enter key. If you get the answer of “Successfully flushed the DMS Resolver Cache”. Then, it means the DNS cache cleared successfully.
Web Browser Cache
If you have a problem with your PC webs browsers like having a slow experience on opening certain websites or overloaded cache. Then, you need to clear the web browser cache on your PC. Here, I will show you the most useful web browser on Windows 10 which is Google Chrome.
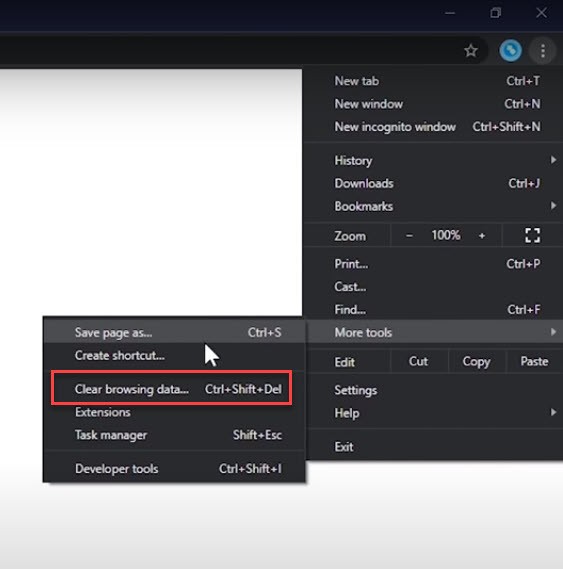
Open the Google Chrome web browser and click on the Three-dot option located at the right-top corner of the screen. After that, move down and click on More Tools > Clear Browsing Data. You can use a shortcut key for clear browsing data which is Ctrl+Shift+Del.
Here, you have two options to clear data, You can select a certain folder from the Basic option or if you want to have more options to clear data then go to the advanced option. Select the folder you want to delete the cache and click on Clear Data.
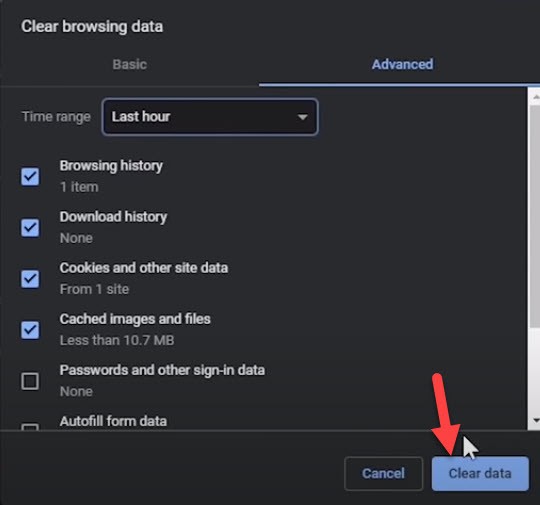
You can use the same method for the Firefox web browser or other web browsers on Windows 10.
File Explorer Cache
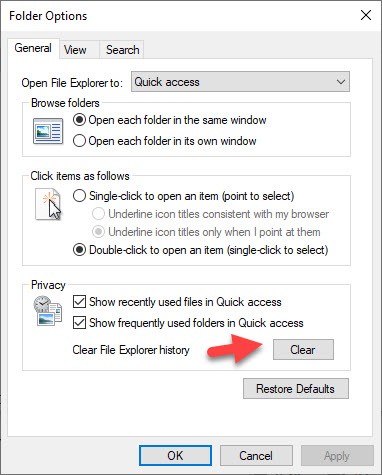
If you notice the file explorer folder or any other files is not working properly and it is showing its slow performance. Then, you need to clear the file explorer cache. Therefore, open File Explorer (you can press the Win+E shortcut key to open the file explorer).
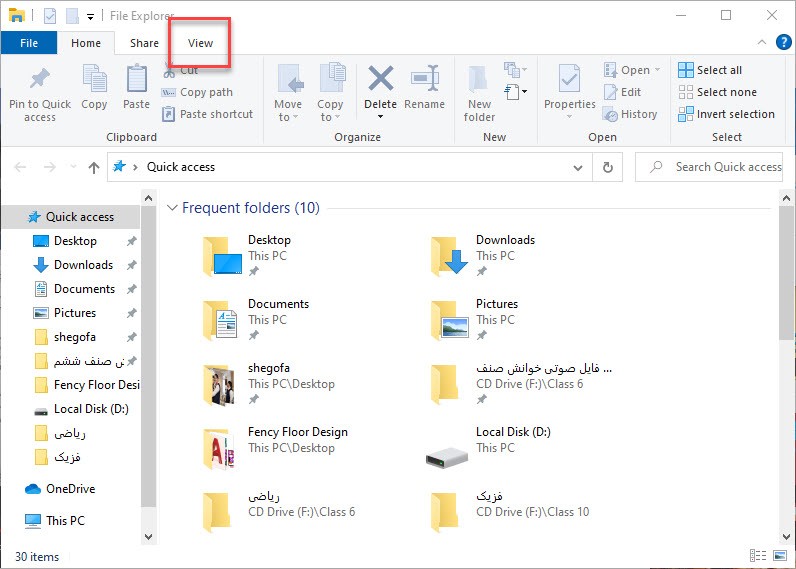
Now, click on the View option located at the top menu.

Here click on the Clear option to clear the file explorer cache and speed up your folders and files to perform well. After that, click ok to close the folder.
Location Cache
In case you turn on your location in your computer settings then the program and other services will detect it and the location cache will be stored for 24 hours. But the problem is, sometime the cache will be corrupted and it will show the wrong location. Therefore, you need to fix it following the below method.
Go to Start Menu or press the Win key to open the start menu and search for Privacy Settings and open it.
On the left-hand side under the app permission click on Location.
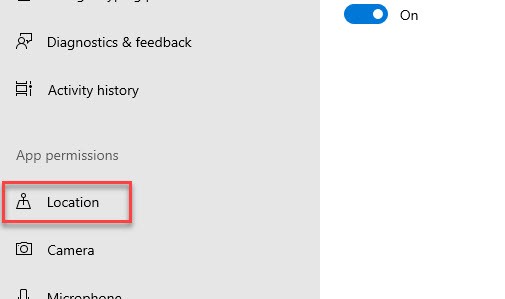
On the location section, scroll down and find ou Location History. Here you need to clear the location history by clicking on the Clear button. Once you clicked then you will see a Tick icon, it means the location cache cleared successfully.

Clear Cache using Wise-Care Software
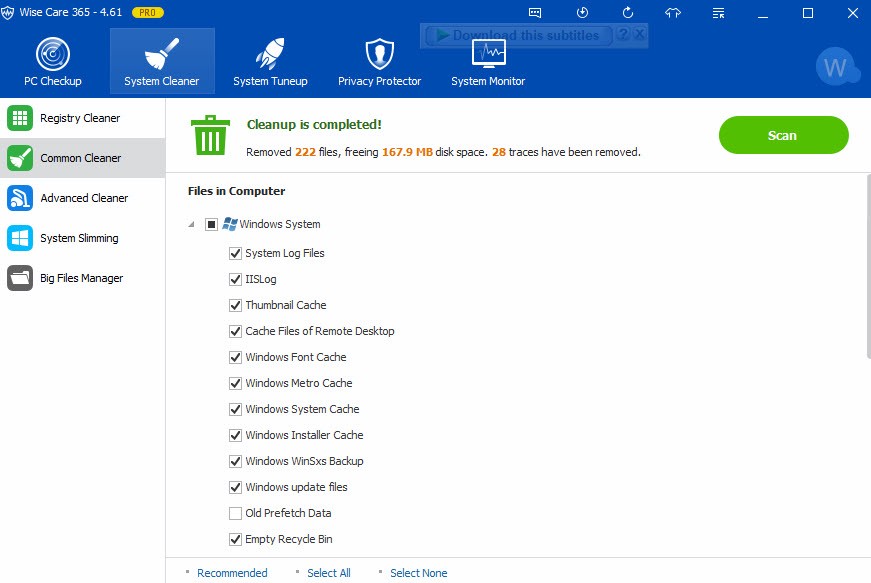
You have checked the above handy methods to clear the cache on Windows 10 to speed up your computer. I know there are several steps to do that in order to clear the Windows 10 cache. But, the Wise-Care 365 software will clear all your windows 10 system cache and it will delete all types of caches including Windows system cache, Windows Installer cache, Google Chrome Cache, and other caches with one click. Therefore, download and install the software then scan for cache and delete all the caches.
Read Next:
- How to Link Android phone to Windows 10 PC
- How to Run Mac apps on Windows 10 PC
- Install Windows 10 on Android Phone
Conclusion
The best methods that help you to clear your Windows 10 cache to have a fast performance were shown in this article and I hope it was helpful for you. However, deleting your system cache will be the best option to speed up your computer. Therefore, always clear your Windows 10 cache to have a fast performance.
