How to Fix MacOS Catalina Screen Resolution on Virtualbox
Whenever we are installing any Mac operating system on any virtualization software like Virtualbox or Vmware then after the installation we will face the screen resolution problems which is a very important issue to solve it. However, when you install MacOS Catalina 10.15 on VirtualBox then after that you will face with screen resolution which is one of the most important parts of using the operating system. Actually, when you install then the screen resolution is definitely bigger than the default screen resolution of the operating system. for that, you would like to test full-screen resolution when you have a larger screen. Therefore, in this article, I will guide you on How to Fix MacOS Catalina Screen Resolution on Virtualbox.
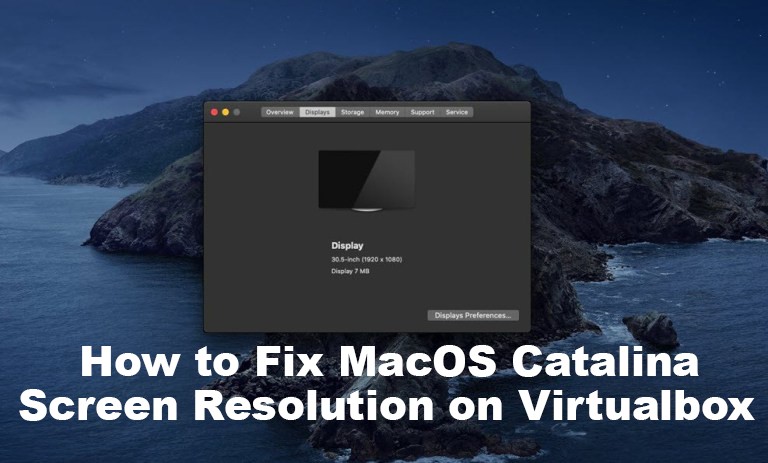
Well, to fix the screen problem in Vmware is not that much hard because whenever you install macOS on Vmware then you need to install Vmware tool which will fix several features on VMware but with Virtualbox, it will be somehow difficult to fix screen resolution. So, don’t worry, here I will show the trick to fix the screen resolution on MacOS Catalina.
Related Article:
- How to Create MacOS Catalina USB Installer
- New Features of macOS Catalina 10.15
- Install MacOS Catalina on Vmware on Windows
How to Fix MacOS Catalina Screen Resolution
Ok, let’s fix the screen resolution on Virtualbox, there are some steps that help you to solve the problem which you are facing now. However, I will guide you through explanation without a picture but one thing I should tell you, without a picture guide, you will get and you will fix the issue I know because I will give you deeply explanation on each step.
Step 1. If you are on Virtualbox and you launch the virtual machine then close the Virtualbox by clicking on the X button, after that, it will ask you, how you want to close the Virtual machine, therefore, select Power Off Machine and click on the OK button.
Step 2. In the next step, you will need to edit MacOS Catalina screen resolution key, Therefore, attach a single file code to the Screen resolution key and modify to your Virtual Machine. Therefore, download this file macOS Catalina Screen Resolution when the download has been done then open the file and replace MacOS Catalina with your virtual machine name that you created for MacOS Catalina.
Note: Replace the name properly otherwise you won’t be able to fix the screen resolution.
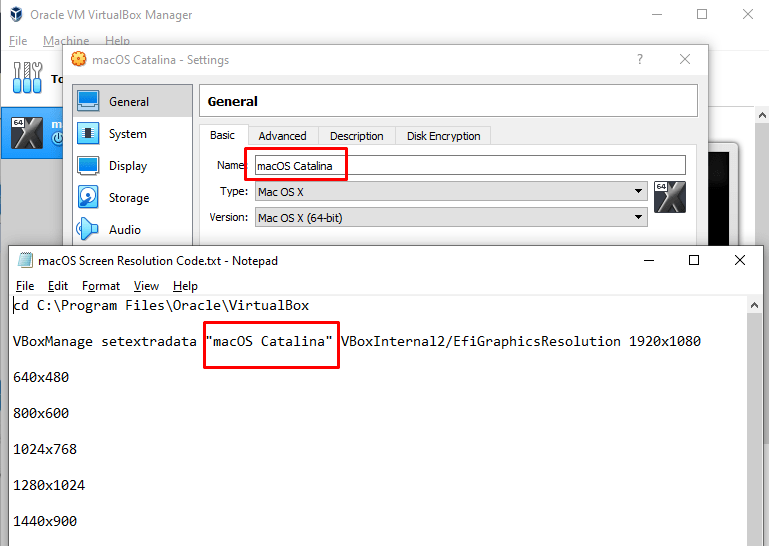
Step 3. While you have replaced the name with the name of Virtual Machine then it is time to close Virtualbox in order to apply the MacOS Catalina Screen Resolution code to the CMD.
Apply macOS Catalina Screen Resolution
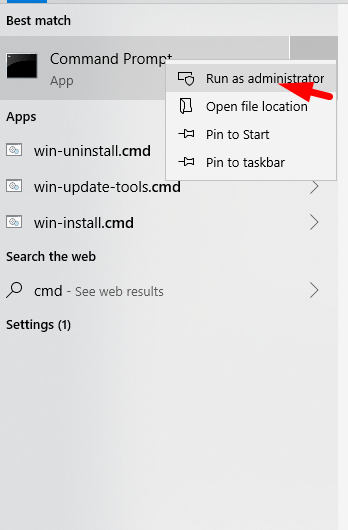
Step 1. Now, you will need to apply MacOS Catalina Screen resolution code to the CMD, for that, search CMD in the search bar and open it as an administrator.
Step 2. When you open the CMD then open the downloaded file of MacOS Catalina Screen Resolution. after that copy the first code line and paste it on the CMD and press enter button.
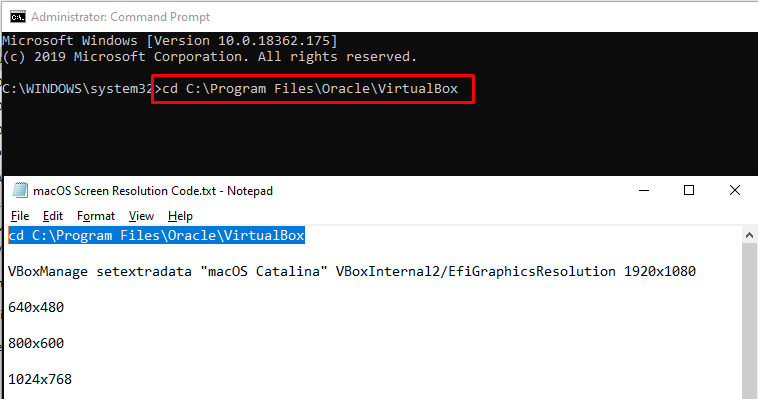
Step 3. Now copy the second line of command and paste it to the CMD and hit the enter button. Actually, this command line will fix the screen resolution from default resolution to your desired resolution.
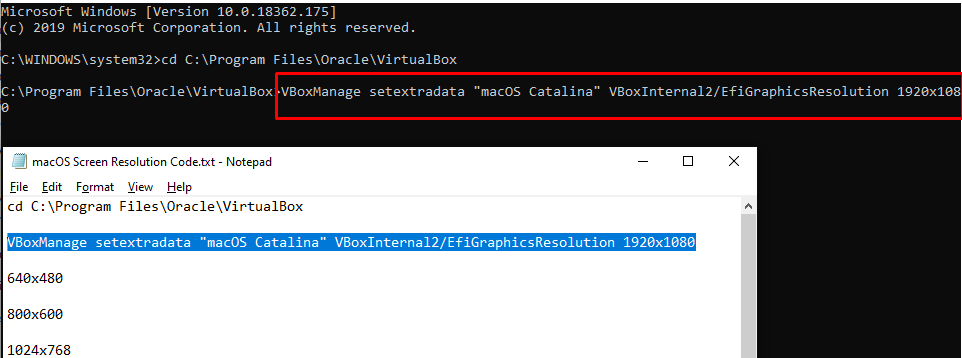
Congratulation, you have fixed the macOS Catalina 10.15 screen resolution with the help of this trick. now check your MacOS Catalina screen resolution and enjoy it. because the screen resolution has been set permanently.
Download MacOS Catalina VMDK file Download MacOS Catalina Image File For Virtualbox & Vmware How to Install MacOS Catalina on MacBook Pro and Air
Conclusion
That’s all about How to Fix macOS Catalina Screen Resolution on Virtualbox. So, with this trick, you can fix the screen resolution easily and you won’t face any problems. Therefore, follow all the steps properly and enjoy the screen resolution from now. Moreover, if you get any kind of question then feel free to ask me and don’t forget to give your feedback.
