How to Downgrade MacOS Mojave to MacOS High Sierra – Easiest Way
Do you become bored of Macos Mojave? or you don’t like it while you are using? so don’t worry, in this article, I will guide you step by step with pictures to downgrade from MacOS Mojave to MacOS High Sierra. there are legions of Mac user who don’t have the idea of how to downgrade from Mojave to Sierra. as there are good bit methods to downgrade from MacOS Mojave and it is quite time consumers but you have to be patient and read this article attentively and follow each step one by one in order to not face with difficulties.
One good news is for you that the methodology I am going to apply is the best and handy but remember this method will work for any kind of Mac OS versions. you can apply the same method to downgrade from any other MacOS versions. ok, now let’s look toward downgrading from Mojave to High Sierra.
Related Articles:
How to Install MacOS Mojave on Virtualbox on Windows How to Install MacOS High Sierra on Virtualbox
Why do you need to Downgrade?
There can be a different reason but in my opinion, you have thought that MacOS Mojave might be the best operating system and you made up your mind to download and install it on your system or any guest Virtual Machine. while you started using Mojave and when time goes by you might dislike it because it works slowly and some of the applications might not work properly on the system. therefore, you are trying and looking for the method to downgrade from Mac OS Mojave to High Sierra. so, dear friends, don’t depress my article will help you to downgrade from Mojave to High Sierra.
Why Should I Downgrade to High Sierra?
Well, there are lots of good reason to use high sierra and as you know every operating system has it’s pros and cons but what I think MacOS high Sierra is the best Operating System. due to that, I prefer you to use high Sierra and one thing more if you want to downgrade from high sierra then you can do it. as people are searching how to downgrade MacOS High Sierra to El Capitan or how to downgrade from Macos High Sierra.
How to Check your Debian Linux Version How to Install Debian 9 on VMware Workstation on Windows How to Install Kali Linux On VMware Workstation How to Install Debian 9 on Virtualbox on Windows 10
How to Downgrade MacOS Mojave to MacOS High Sierra
In below I will show you step by step on how to downgrade Mojave to high sierra. so, focus on each step and follow all of them perfectly. ok, let’s get started
Note: well, in order to downgrade your MacOS you will need to reformat your hard drive (it means you will lose your all data) so please backup all of your data before you begin. moreover, you will need an empty USB flash drive for this task.
How to Install Virtualbox 6.0.4 on Ubuntu 18.10 How to Install Ubuntu 18.10 on Virtualbox on Windows How to Install Kali Linux in Virtualbox How to install Oracle Virtualbox 6.0 on Windows 7/8/10
Step 1. in the first step, you will need to download the MacOS that you want to downgrade to. so, you can download it from the App Store just you need to click the Get button.
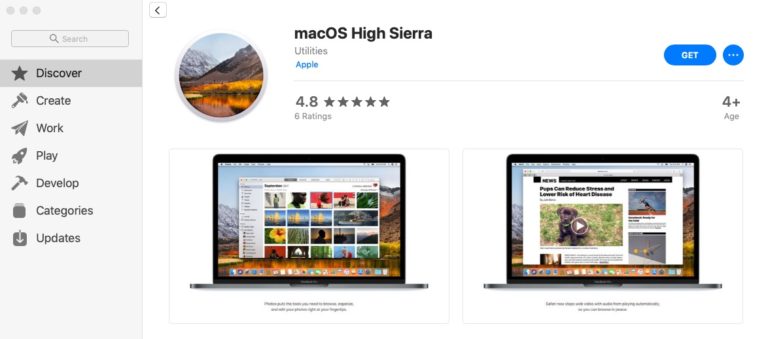
Step 2. now in here click the download button to start the downloading and remember this step will take a while to complete the download.

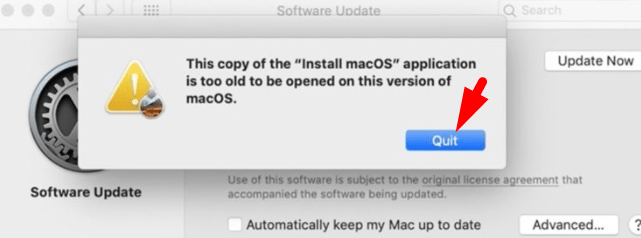
Step 3. if you get this error message then don’t worry just hit the Quit button because the system will not let you install the old version.
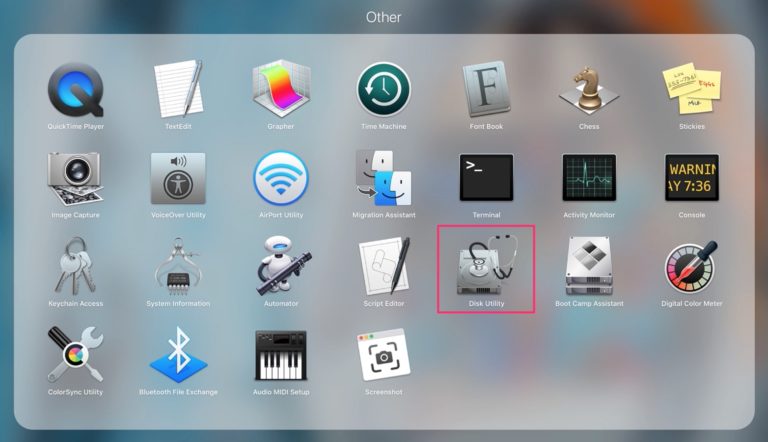
Step 4. now we will need to create a bootable USB flash drive so, connect your USB to your computer and open Launchpad then go to other and finally go to Disk Utility.
Step 5. in here, you will see two option on the left side but you have to select the 16GB and click the Erase button.
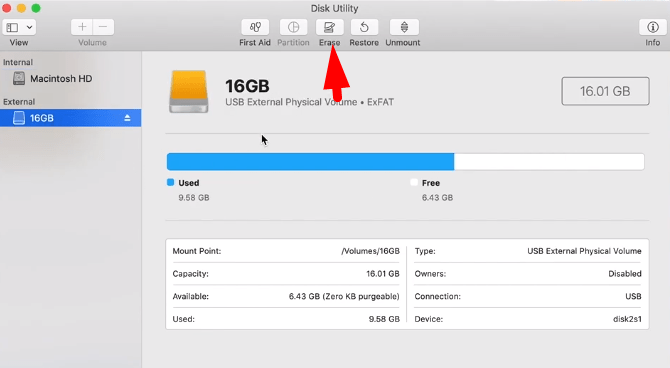
Step 6. in here you have to give a proper a name and the name should be in lowercase. then for format select Mac OS Extended (Journaled) then click the Erase button.
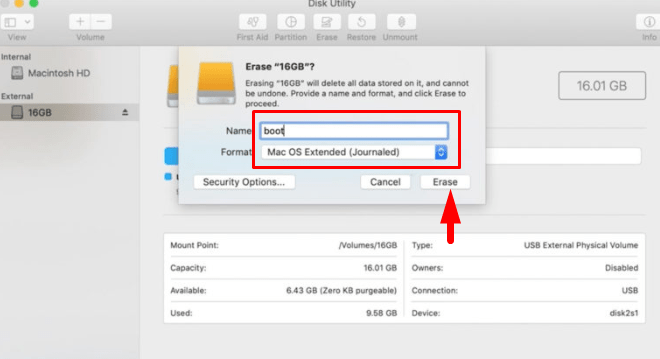
Step 7. while it is finished then click the Done button.

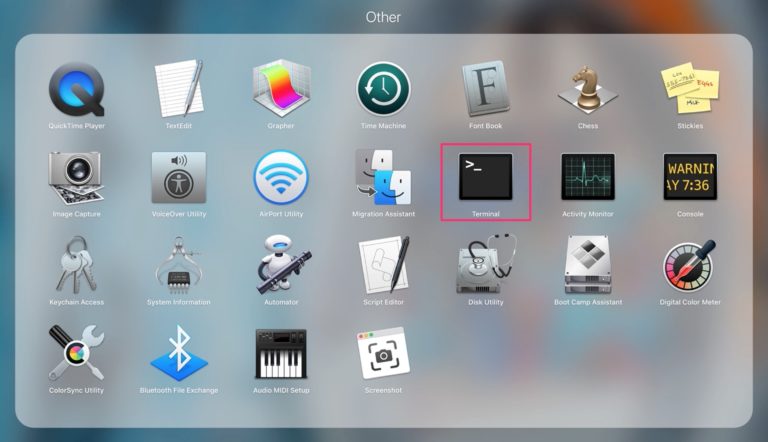
Step 8. now go to Launchpad then go to Other and open terminal.
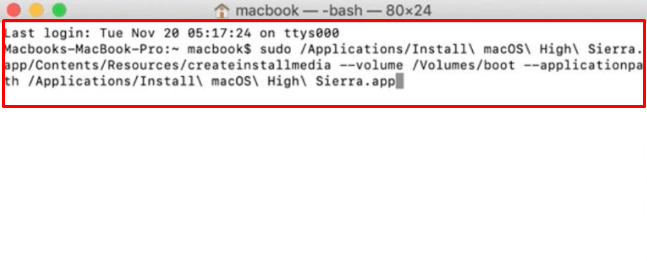
Step 9. now in Terminal copy and paste the following code that corresponds to Macos version that you are downgrading to. while you paste the code then press Enter key.
sudo /Applications/Install\ macOS\ High\
Sierra.app/Contents/Resources/createinstallmedia --volume /Volumes/boot --
applicationpath /Applications/Install\ macOS\ High\ Sierra.app
Step 10. it will ask you to enter your Password for your system and press Enter key.

Step 11. after waiting for a few seconds then it will ask you to press Y so press Y and press Enter key.
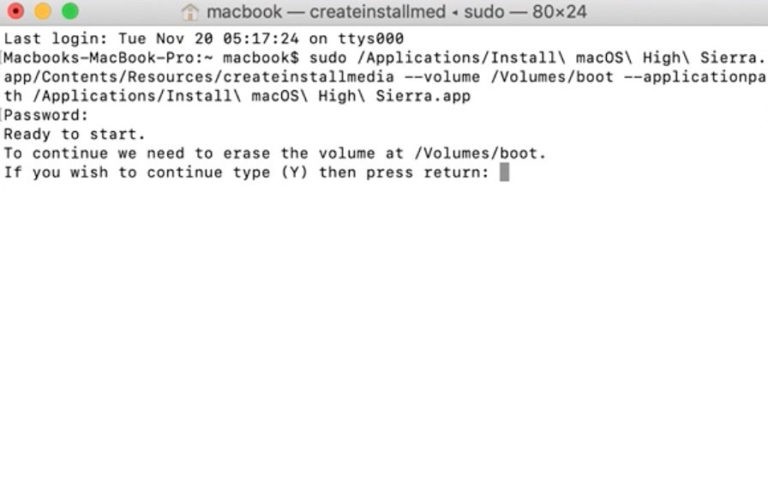
Step 12. so, here wait for a few seconds and while it is completed then Exit the Terminal.
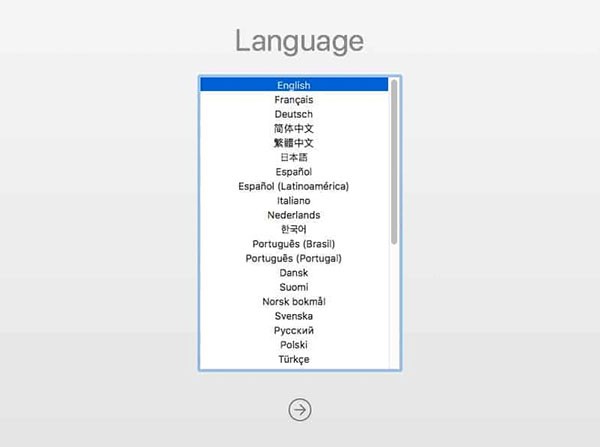
Step 13. in this step, restart your computer and hold down Command + r on your keyboard while the computer boots up.
Step 14. well, you have to see this screenshot after holding Command + r if you didn’t see it then go back and restart it again and hold down Command + r to see this screenshot. so, here select your language and Continue.
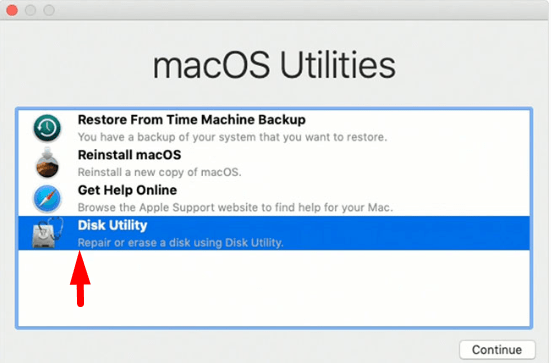
Step 15. inside this screen select Disk utility and click the Continue button.
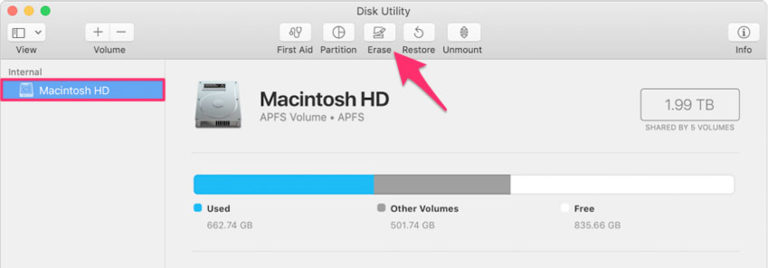
Step 16. now select Macintosh HD from the left side of the window and click Erase button.
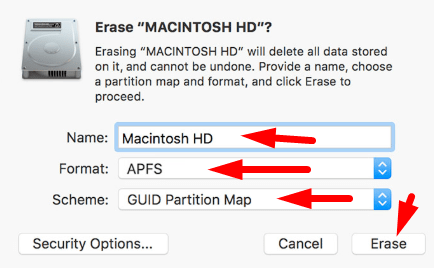
Step 17. in here check the name and make sure you have selected APFS format and click
Step 18. once the process is completed, then restart your computer and hold down the option / Alt key while the computer boots up.
Step 19. if you have done everything properly then you will see the install window. install MacOS High Sierra, so press Enter button and wait for it.
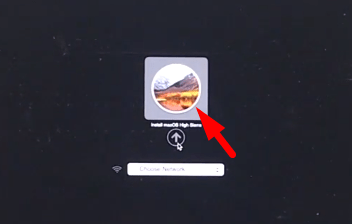
Step 20. Select your language and Click Continue

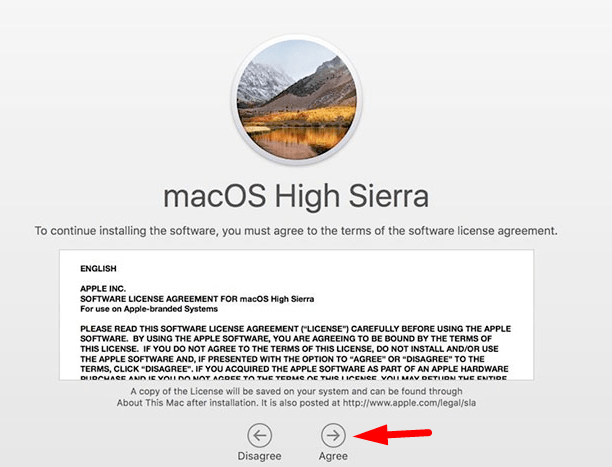
Step 21. in here accept the MacOS software license agreement by clicking the Agree button.
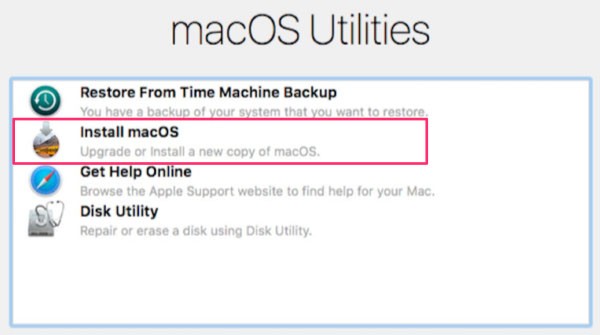
Step 22. in here select your Hard drive and click the Install MacOS.
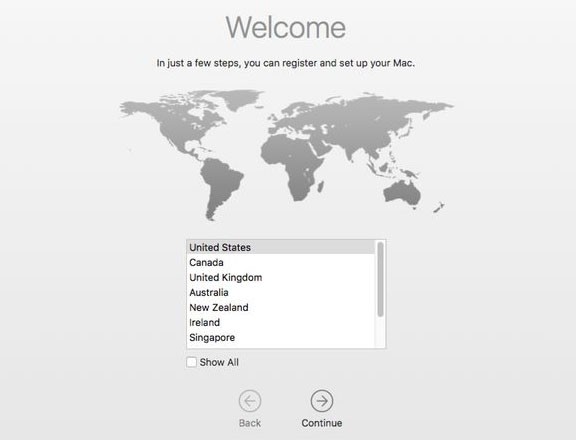
Step 23. Ok, here select your country and click the Continue button.
Step 24. while you selected your country then choose the keyboard layout and click the continue button.
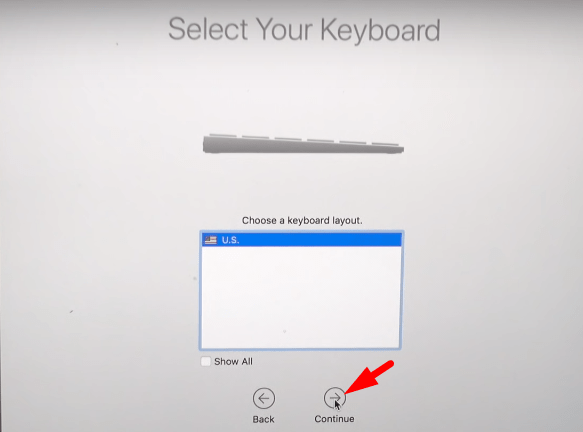
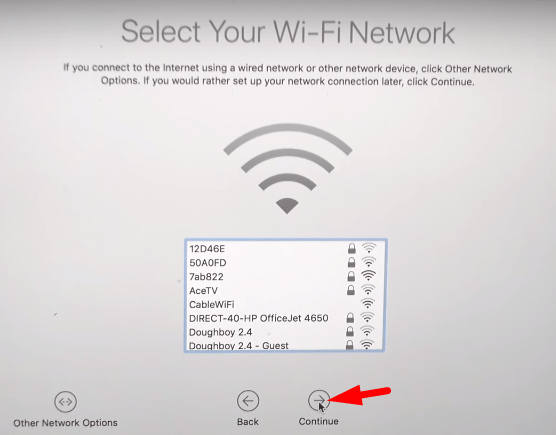
Step 25. in here select your internet and click the Continue button.
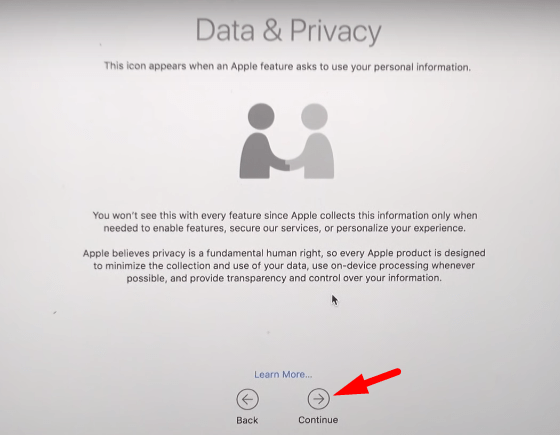
Step 26. it will as your about data and privacy so simply click the Continue button.
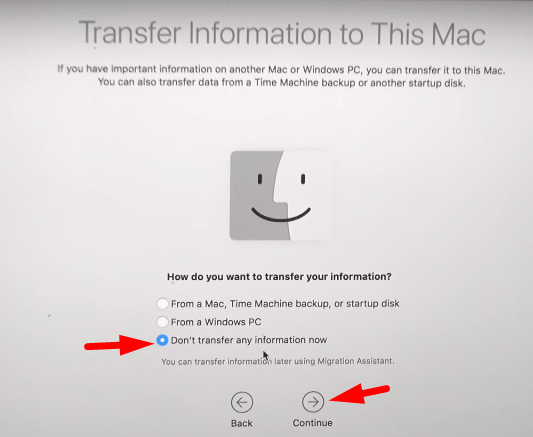
Step 27. if you don’t want to transfer information to the Mac then select the last option and click the Continue button.
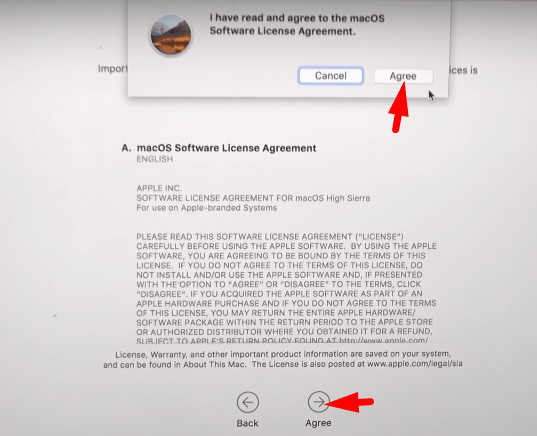
Step 28. it will ask you to agree on the MacOS software license agreement so click the agree button.
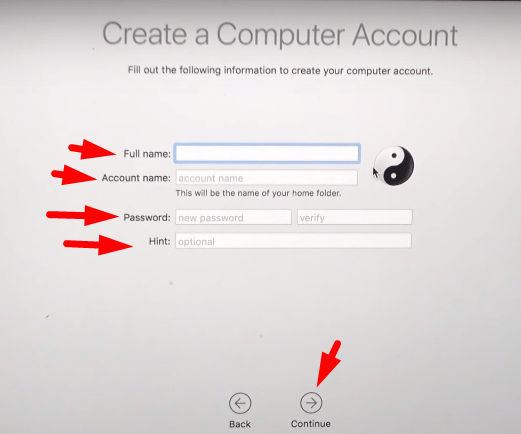
Step 29. in this step, provide your details as it is asking for computer account then click the Continue button.
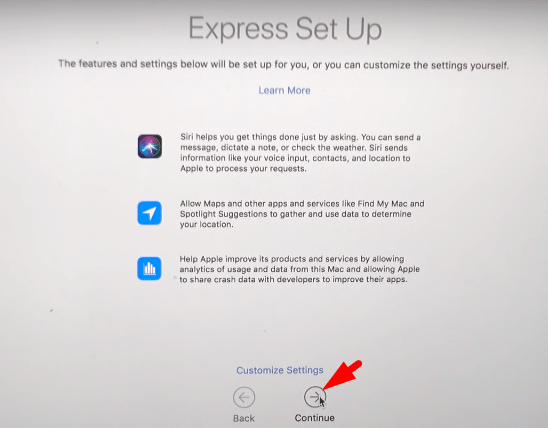
Step 30. for express setup click the Continue button.
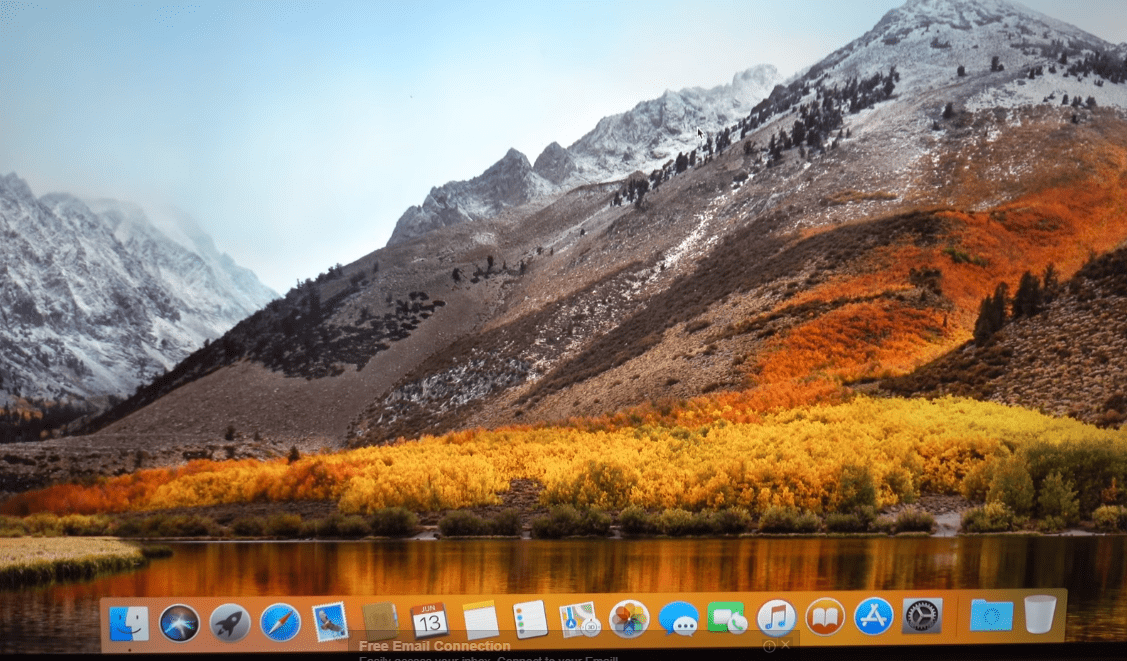
Step 31. congrats dear, you have downgraded from Mojave to High Sierra successfully. now enjoy the new Operating system on your computer.
In Conclusion
In this article, you have learned how to downgrade Mac os Mojave to High Sierra, so here I show you the easiest method and the methodology I have guided you is the best and it will work with all MacOS versions. so try it once and if you get any kind of problems then feel free to ask me.
