Once Apple released macOS Big Sur 11.0 for its users, then, all the Mac lovers are curious to give it a try and check all the new features and updates. Before macOS Big Sur, macOS Catalina was the advanced Apple operating system having several new features. Perhaps, you upgraded to the latest macOS Big Sur operating system. The macOS Big Sur has multiple handy features that are more attractive. You have a clue, Apple roll out the macOS Big Sur betas for its developers and public users. But, the betas have various kinds of errors that users face and roll back to macOS Catalina.
However, your macOS Big Sur gets multiple time software updates because Apple releases the betas and there are some bug fixes. This time, you have to install the new software update and during the updates, you forget to backup your files. It’s not your problem because no one can wait for the stable version of macOS Big Sur. Therefore, while updating the latest version of macOS Big Sur, you might be lost your data or files. Hands down, always back up your Mac before updating to any Mac versions.
Don’t worry, in this article, I will guide you on the best methods to recover your deleted files on macOS Big Sur and these methods work 100%.
How to Recover Deleted Files on macOS Big Sur?
If you are the one who loses their data while updating or upgrading to macOS Big Sur from macOS Catalina. Then, you can check the below methods. The below methods will work 100% and you can backup or restore your deleted files on macOS Big Sur.
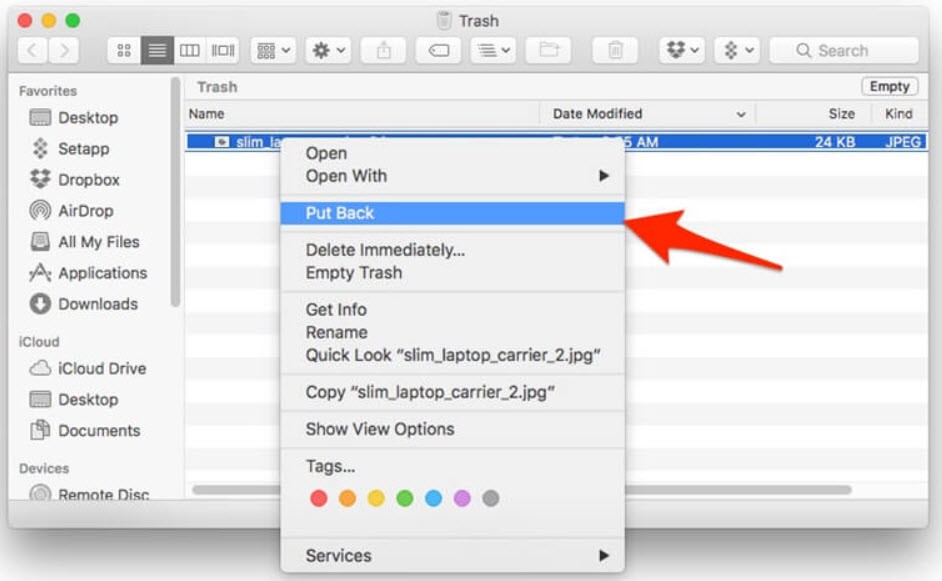
Method 1: Recover Deleted Files from Trash Bin Folder
The bad habit of users is they are using Command + Delete keys from keyboards which will delete the files permanently. So, if you are doing the same process then don’t use these shortcut keys. You can use only the Delete key to delete the files and later on you can restore it back from the Trash folder.
Trash or Recycle Bin is a folder where your deleted files will be stored and you can recover it back. Therefore, the first method is to recover lost data on macOS Big Sur is by checking the trash bin. Open the trash folder and check your deleted files. Once you find your lost files then right-click on the file and click on Put Back. Doing this will recover the files on its original directory.
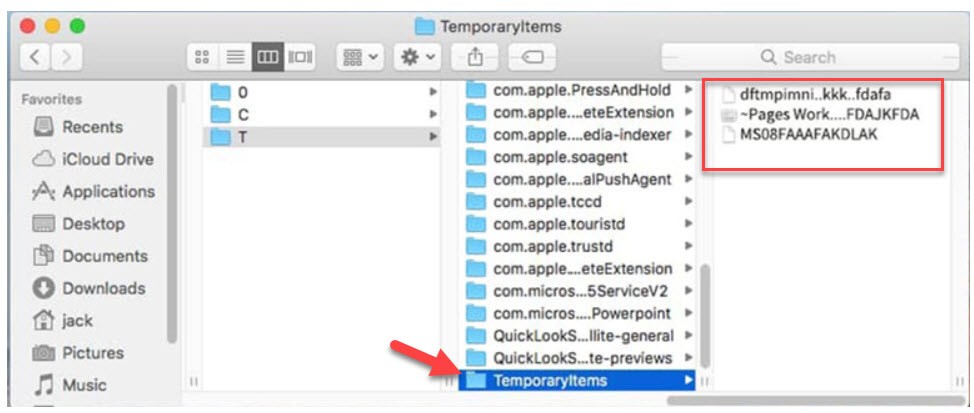
Method 2: Recover Deleted Files from TemporaryItems Folder
Still, you are looking for your lost files. if yes. Then, check your deleted files in TemporaryItems Folder. It can be rare but not impossible. On the TemporaryItems folder, you will find your unsaved files and you can restore it back. So, go to Applications and open the Terminal window. Or open Spotlight and search for Terminal and open it. On Terminal, type $TMPDIR and press enter. This command line will open the TemporaryItems folder where you can check your lost files. If there are your files then save to your Mac.
Method 3: Restore Lost files using Time Machine
If the 2 above methods don’t work then follow this method. In this method, we are going to use the Time Machine Backup App to find out our lost data. Remember, this method will work when you have Time Machine backups. Otherwise, you cannot use Time Machine. So, follow the below steps to backup your lost data.
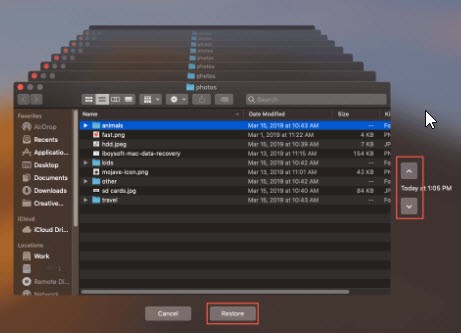
Step 1: Restore Specific Files/Folder
If you want to recover specific files or folder using Time Machine Backup. Then, follow the below procedure.
#1: Open Launchpad and go to Other.
#2: Here, find the Time Machine icon and click on it.
#3: Now, use the arrows at the bottom and timeline on the left to browse the backups.
#4: After that, select the files or folder that you want to restore and click on the restore button.
Step 2: Restore your Mac from Time Machine
During installing or upgrading to macOS Big Sur or other Mac OS, if your Mac crashes and you lose all your data. Then, use Time Machine backups to recover your Mac.
#1: Restart your Mac and hold down the Command + R keys simultaneously. This will bring the macOS Recovery Mode and you will see the macOS Utilities window.
#2: Now, select Restore from Time Machine Backup and click continue.
#3: Here, you will get the details of Restore your System. Read the info and continue.
#4: As I said this method only works if you have Time Machine backups. So, select the disk that contains the Time Machine backup and click continue.
#5: In this window, you will see a list of all versions of backups in the form of APFS. Therefore, choose the latest backup of your hard disk and click continue.
#6: After that, your Mac will restore the Mac from the selected version of backup and then Restart your Mac.
Method 4: Recover Deleted Files from iCloud Backup
In case the Time Machine backups don’t work then I recommend you try iCloud backup drive. In IOS and Mac computers, users use the iCloud drive to store their personal files in order to reduce the local storage space. You can recover deleted/lost files like Photos, Videos, Contacts, Bookmarks, Calendars, and Reminders from iCloud backup.
#1: Go to iCloud.com in your favorite web browser and log in with your account.
#2: Now, click on the Settings icon then scroll down to the bottom of the page that appears.
#3: On the left side click on Restore Files under the Advanced section.
#4: Here, select the files you want to restore or click select all if you want to restore all files. After that, click the Restore button to recover them to iCloud Drive.
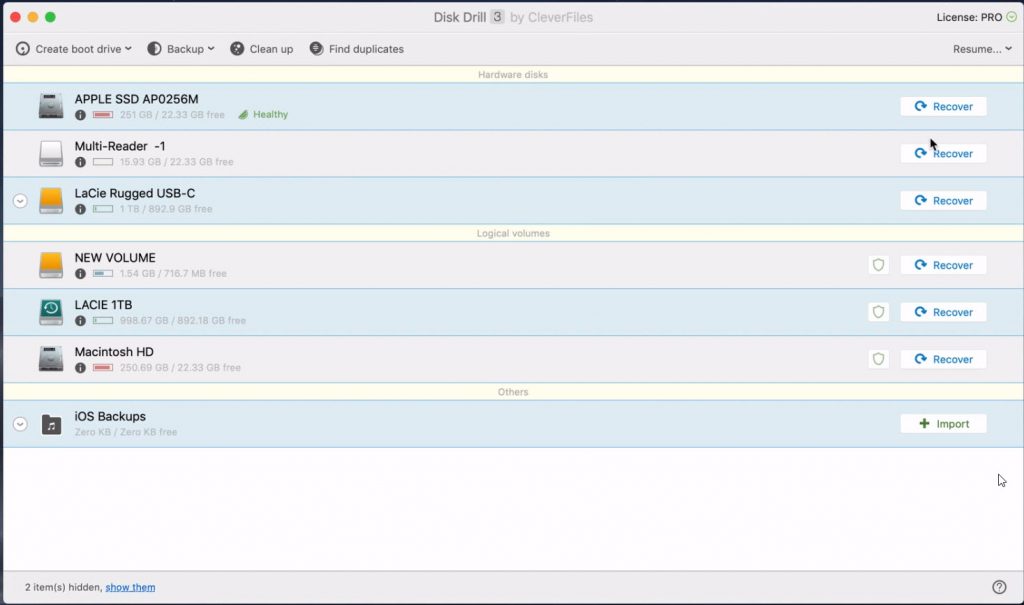
Method 5: Restore Deleted Files with Best Data Recovery Software
If the above methods don’t work for you, then, the last chance and method is to use the best recovery data software. There are several data recovery software for macOS and the best one is Disk Drill. Therefore, download Disk Drill data recovery software and install it on your Mac computer. Once you are done with installation then follow the below steps.
#1: Now, go to Spotlight and search for Disk Drill and open it. Here, you will the Disk Drill window. Now, select the disk you want to recover and click on the Recover button.
#2: Once you click on the recover button then it will start scanning the disk and will find all the deleted files. Here you can check your lost files and can restore it back.
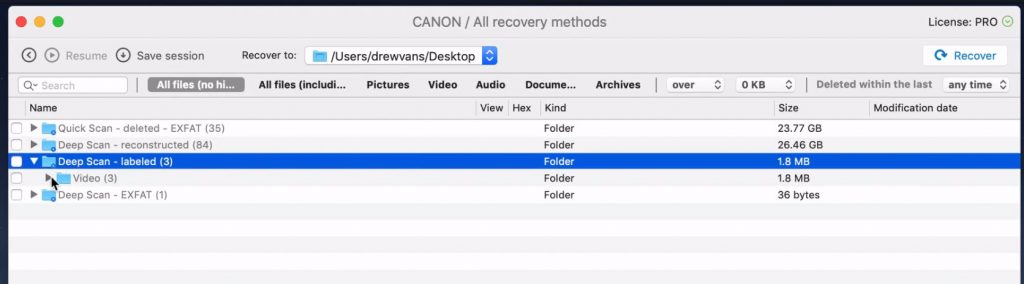
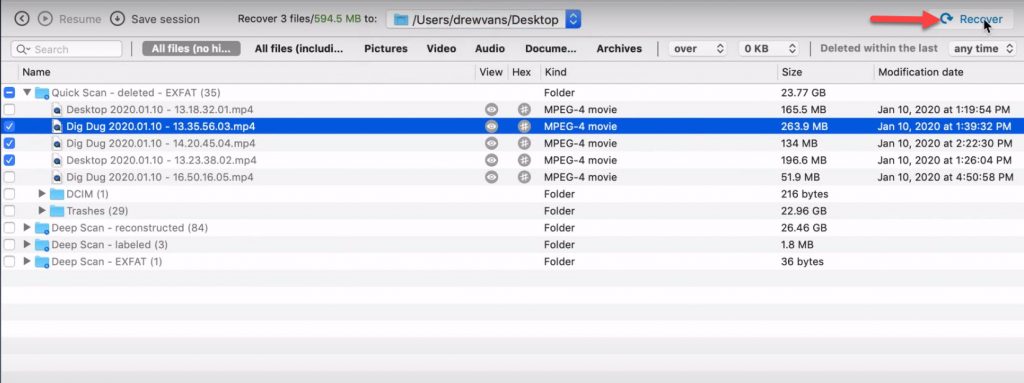
#3: Here, select the files you want to recover and select the destination of the files. After that, click the recover button to restore the lost files.
Read Next:
- How to create a bootable USB for macOS Big Sur
- How to remove temporary files on macOS Big Sur
- Use picture-in-picture mode on macOS Big Sur
Conclusion
You don’t need to worry about losing data while upgrading to macOS Big Sur or downgrading to macOS Catalina from macOS Big Sur. Because the above methods will help you to recover your deleted files on your macOS Big Sur. These methods will work with any Mac OS versions.