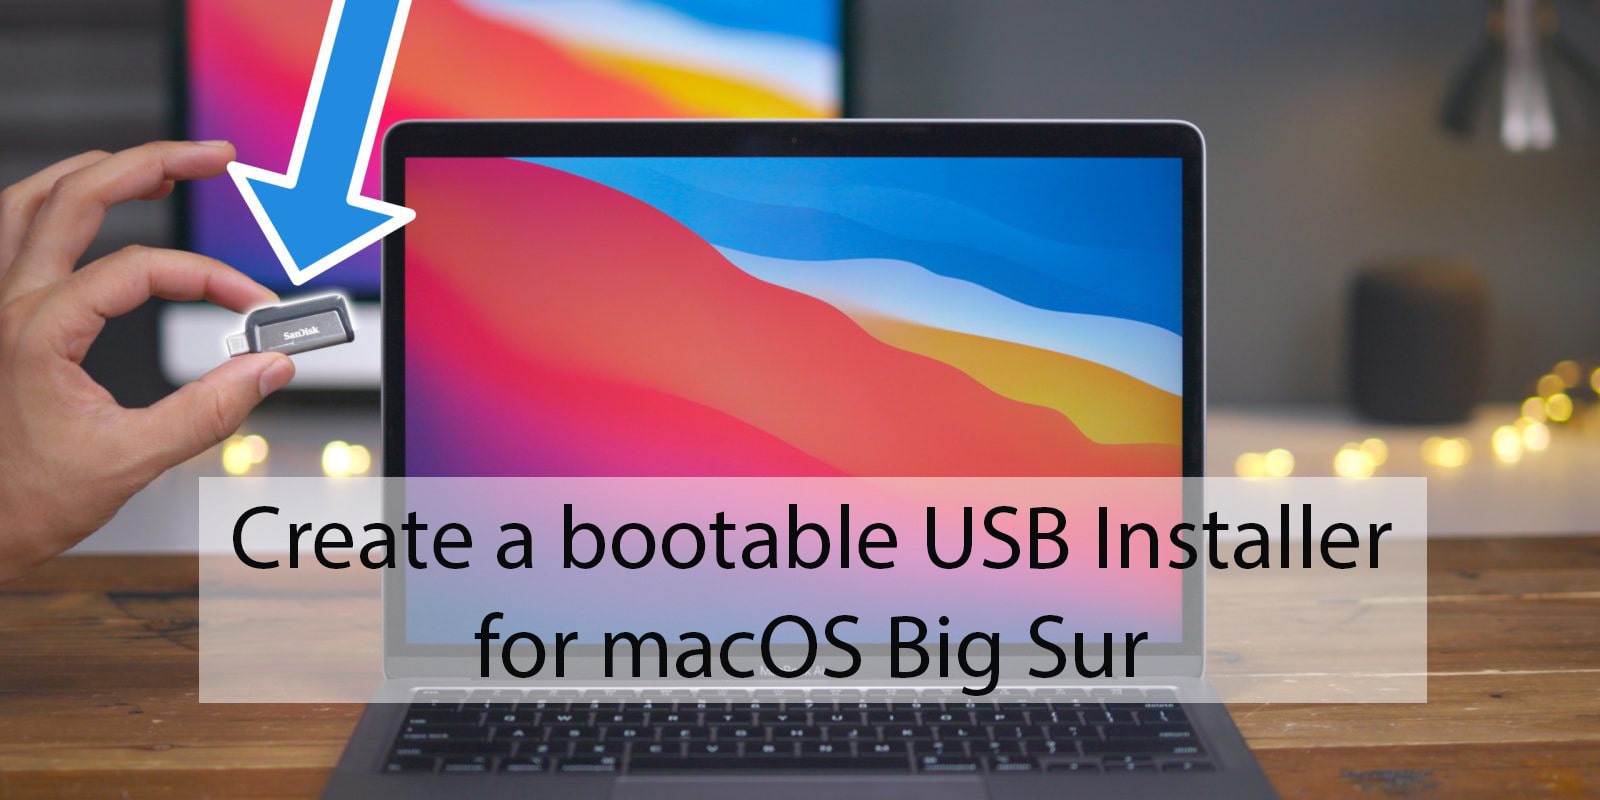
As a row, in 2020 Apple released its new biggest operating system called macOS Big Sur 11.0. This is the latest and current Mac OS having several new features and updates. In macOS Big Sur, Apple updated Notification Center, Control Center, Safari Web Browser, Messages, Maps, and much more. Like you, there are legions of users that want to try macOS Big Sur. Hands down, macOS Big Sur is advanced than previous Mac operating systems.
You have experience with macOS Catalina installation on various devices. So, the same process and devices are available for macOS Big Sur and you can install macOS Big Sur on your Mac computer. To install macOS Big Sur, you will need a macOS Big Sur installer file. The file is available on the App Store. Every time you want to install macOS Big Sur on your Mac, you need to download its installer file. It might be silly and will hurt you each time.
The best way to perform a clean installation of macOS Big Sur on your Mac is to create a bootable USB installer for macOS Big Sur. Using a bootable USB installer drive, you can install macOS Big Sur on your Mac or other devices anytime. This will help you to have a clean install of macOS Big Sur and you don’t need to download macOS Big Sur every time you are going to install. As well as the ability to use Disk Utility to partition and erase a machine, perform Time Machine restorations, and more.
The steps in this article will work for any macOS Big Sur versions whether its betas or stable version. You can use the below method in the future to create a bootable macOS Big Sur USB installer drive.
Required Files
- 16GB USB flash drive for making a bootable USB drive for macOS Big Sur
- Download macOS Big Sur installer file from Apple Beta Software Program
- A Compatible Mac where you are going to install macOS Big Sur
First of all, you will need to download the macOS Big Sur installer file if you don’t have it. After that, use the best USB drive that can support USB-C as you can check the below best USB drive. Besides that, these steps include terminal command codes. So, you should have knowledge of using terminal because the wrong instruction can erase your hard drive. Therefore, pay attention and follow the same as I did in this article.
If you don’t have a USB drive, then check out the above best USB drive and purchase your favorite one.
How to Create a Bootable USB Installer for macOS Big Sur?
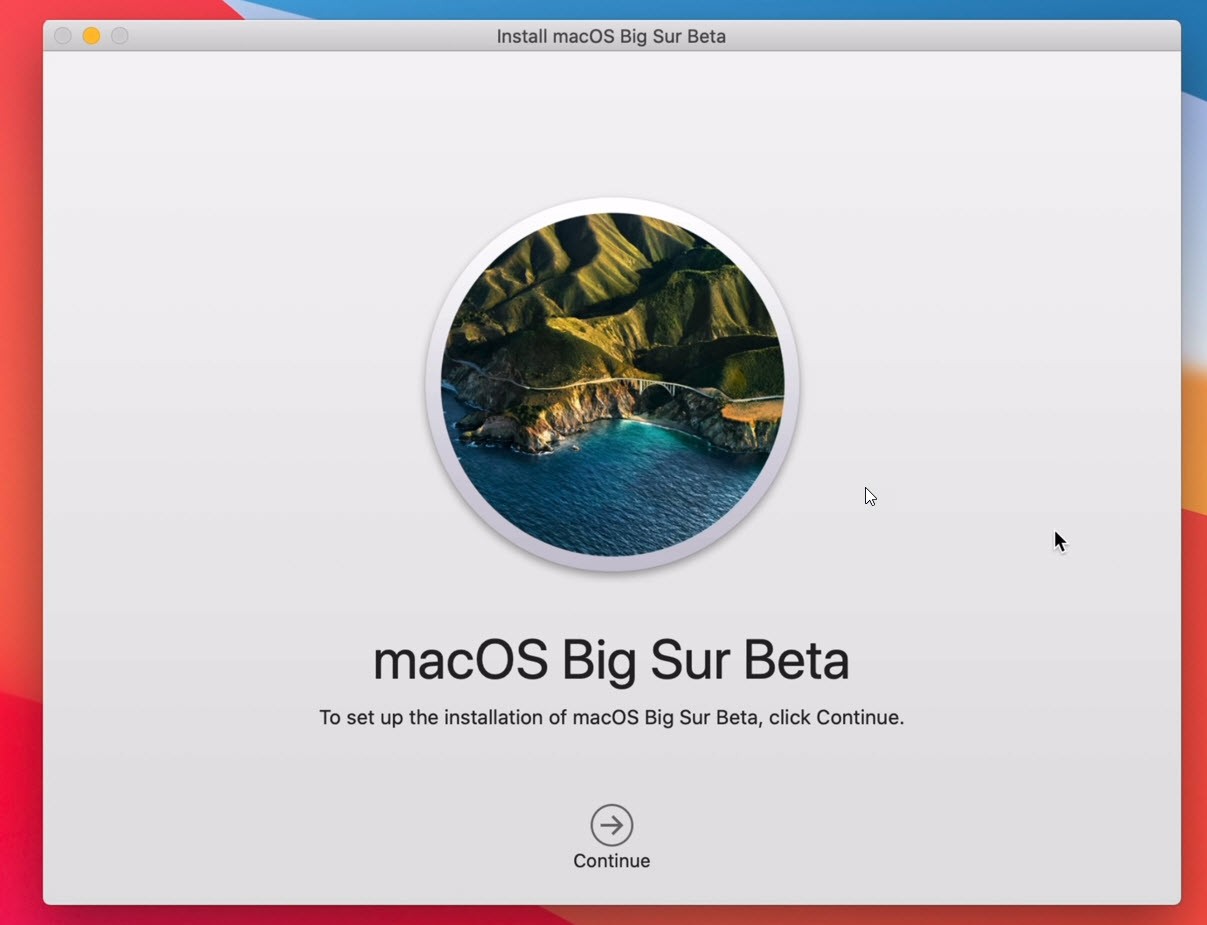
Step 1: Download macOS Big Sur from the above link and once the downloading is done then the installer will automatically launch. Close the installer.
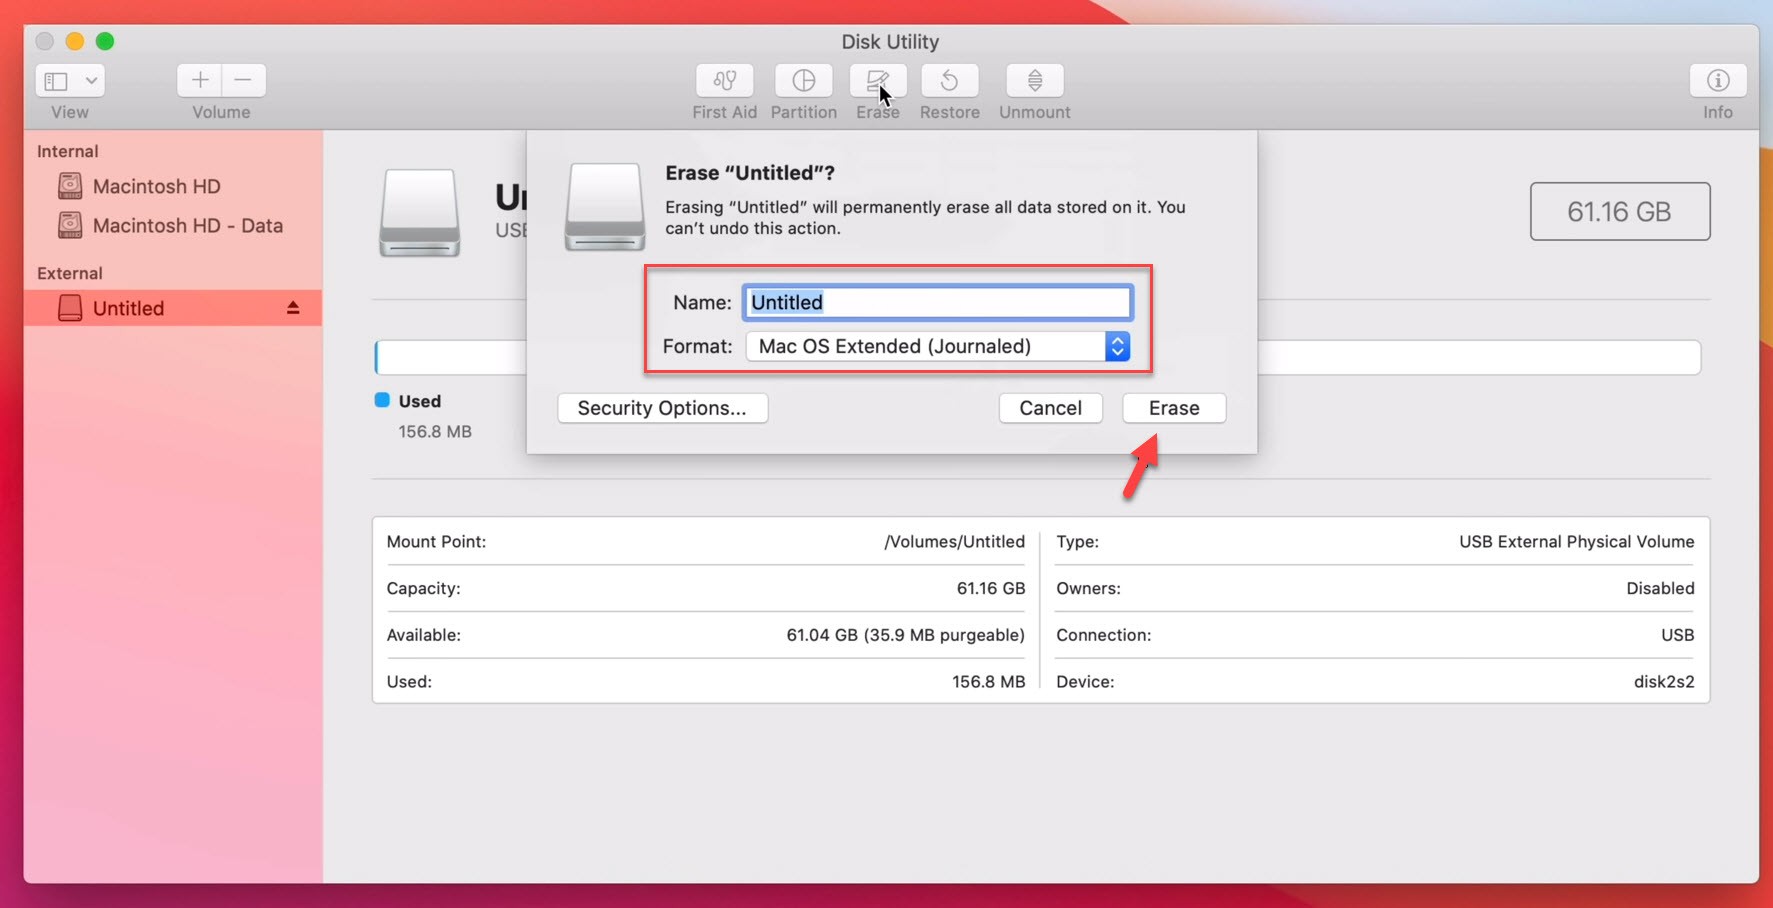
Step 2: Insert your USB drive and go to Disk Utility and select your USB under the external section from the left side of the screen. After that, click on the Erase option from the top menu and format your USB drive as Mac OS Extended (Journaled). Then, click the Erase button and wait for a while.
After that. Click on the Done button and close the disk utility.
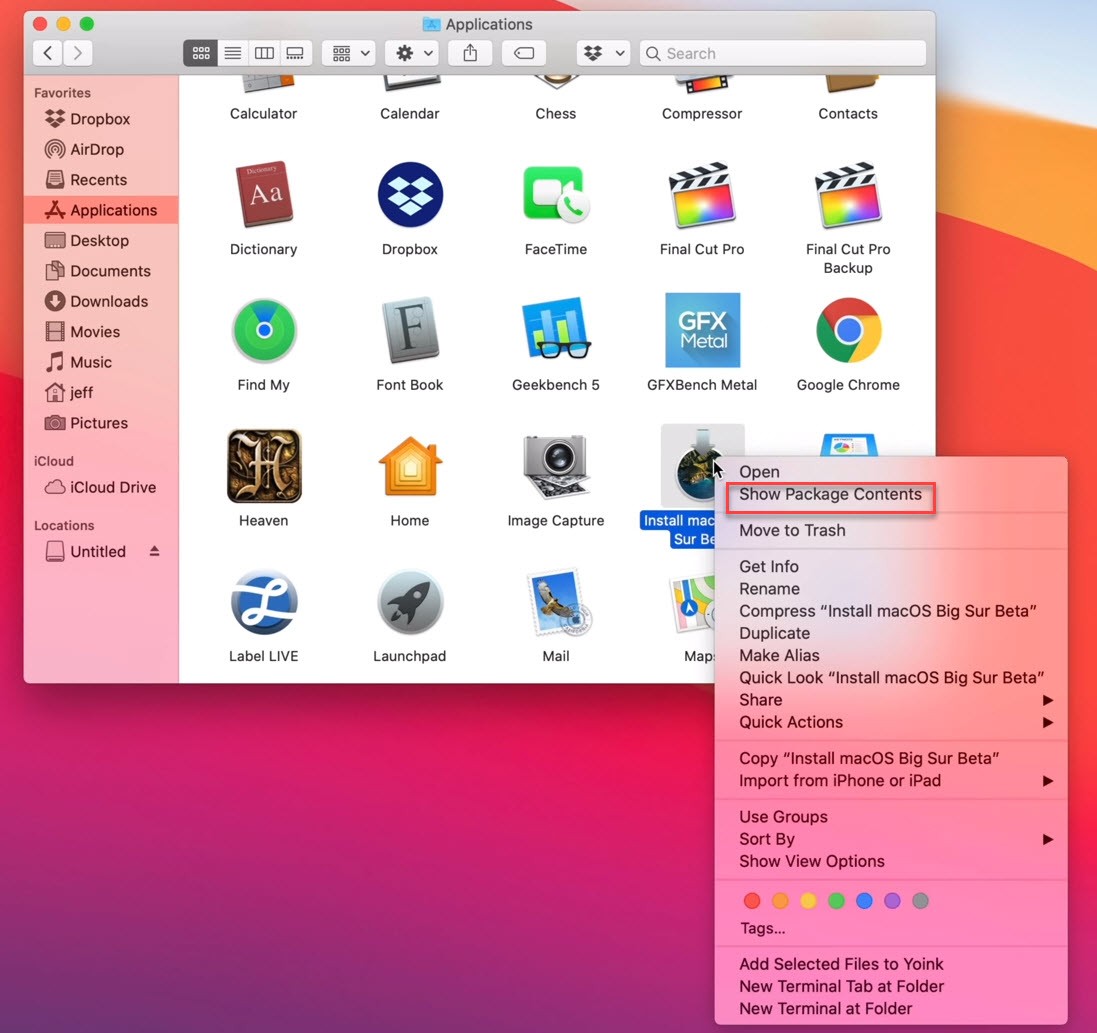
Step 3: Now, go to Finder > Applications and right-click on Install macOS Big Sur, and click on Show Package Contents.
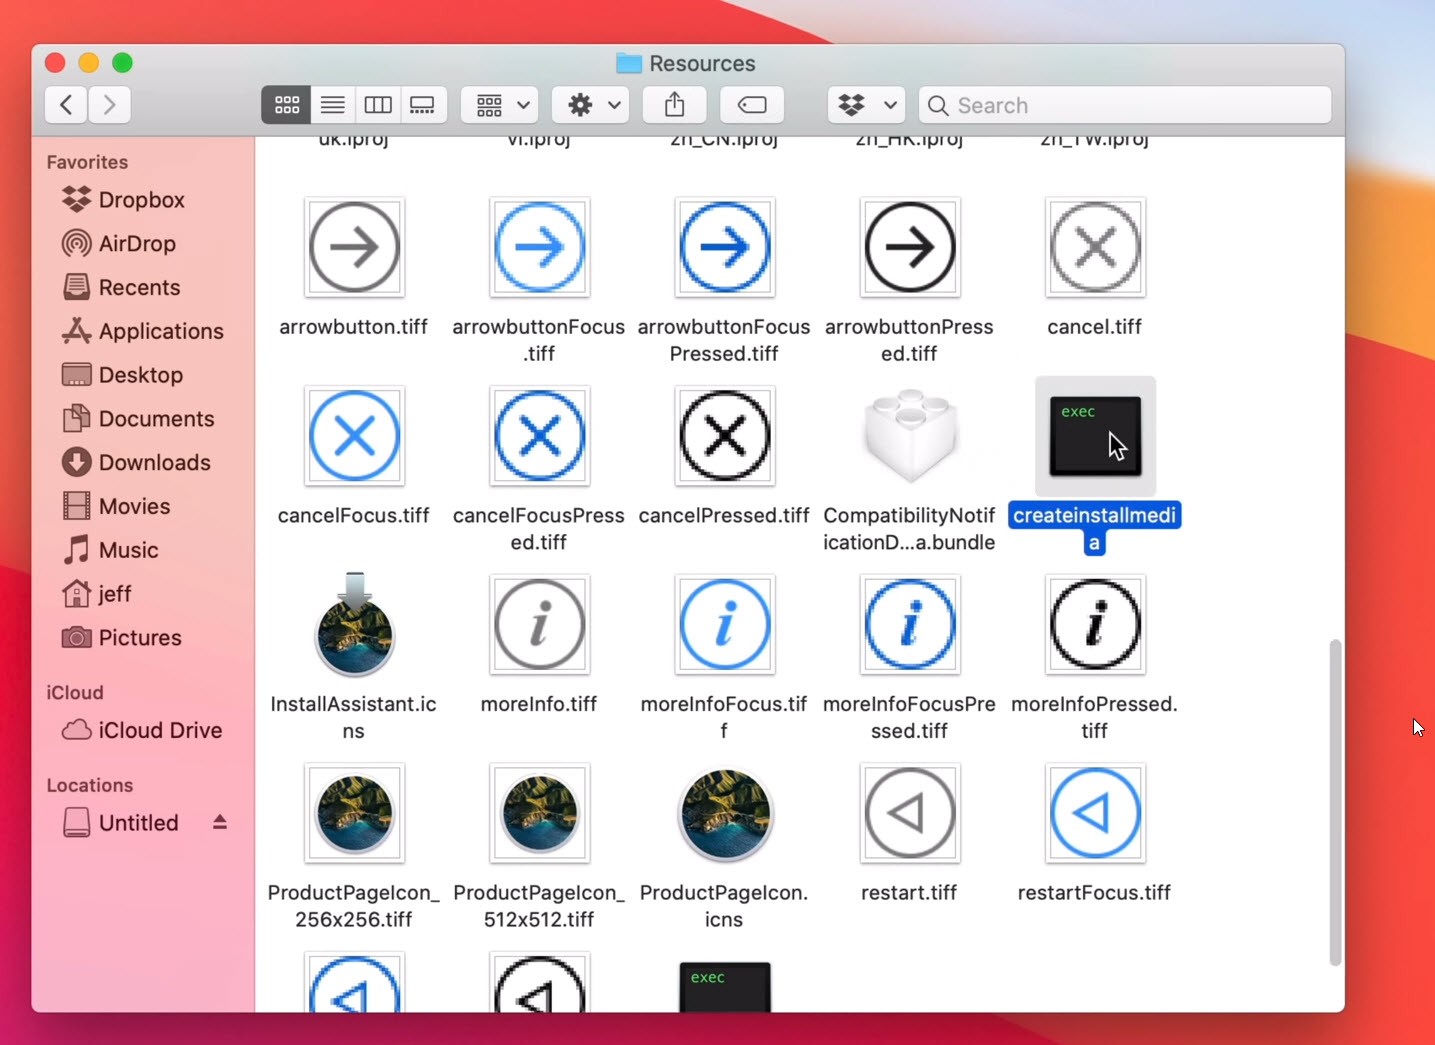
Step 4: After that, open Contents and click on Resources and find “Createinstallmedia”.
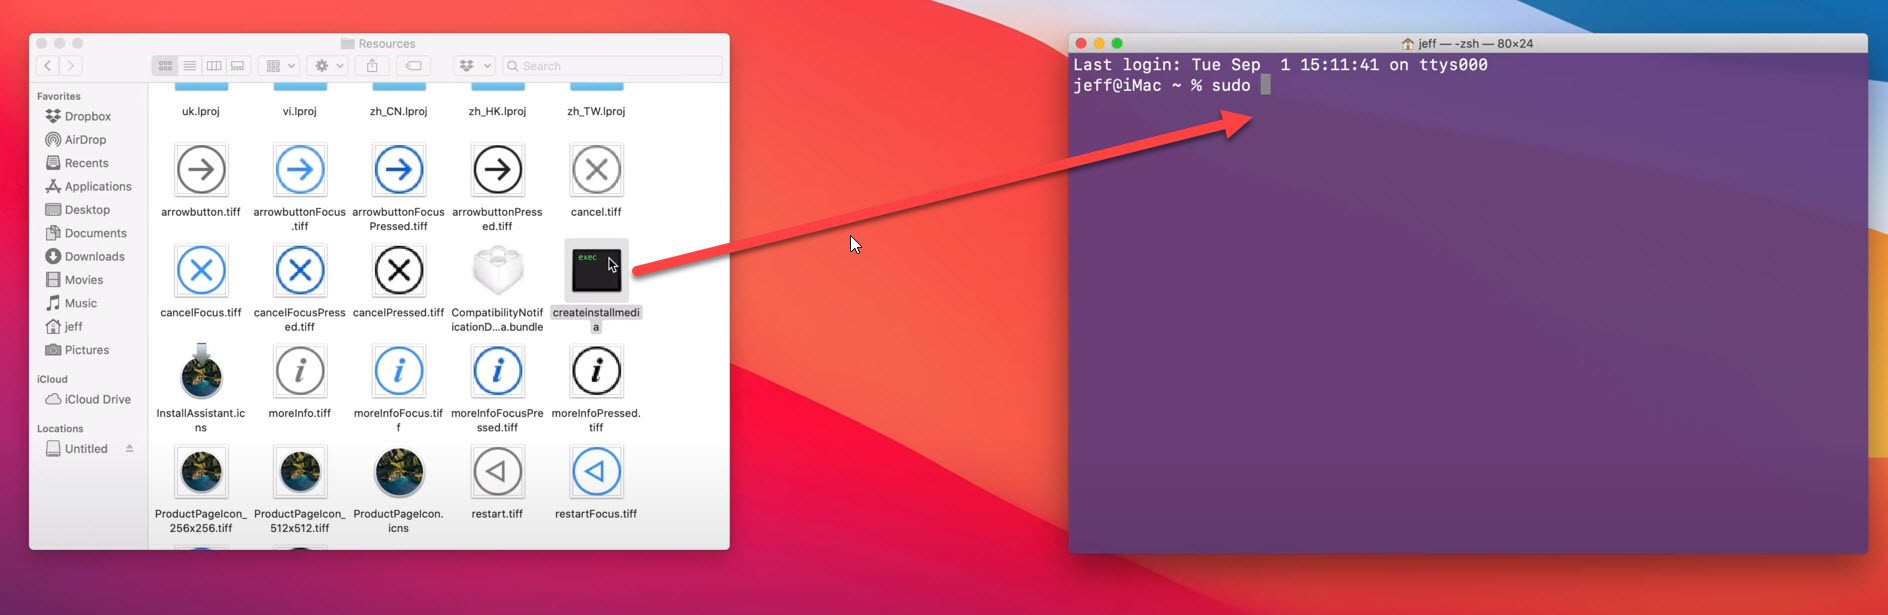
Step 5: Now, launch Terminal by going to Applications > Utilities > Terminal. Or, open Spotlight and search for Terminal and open it.
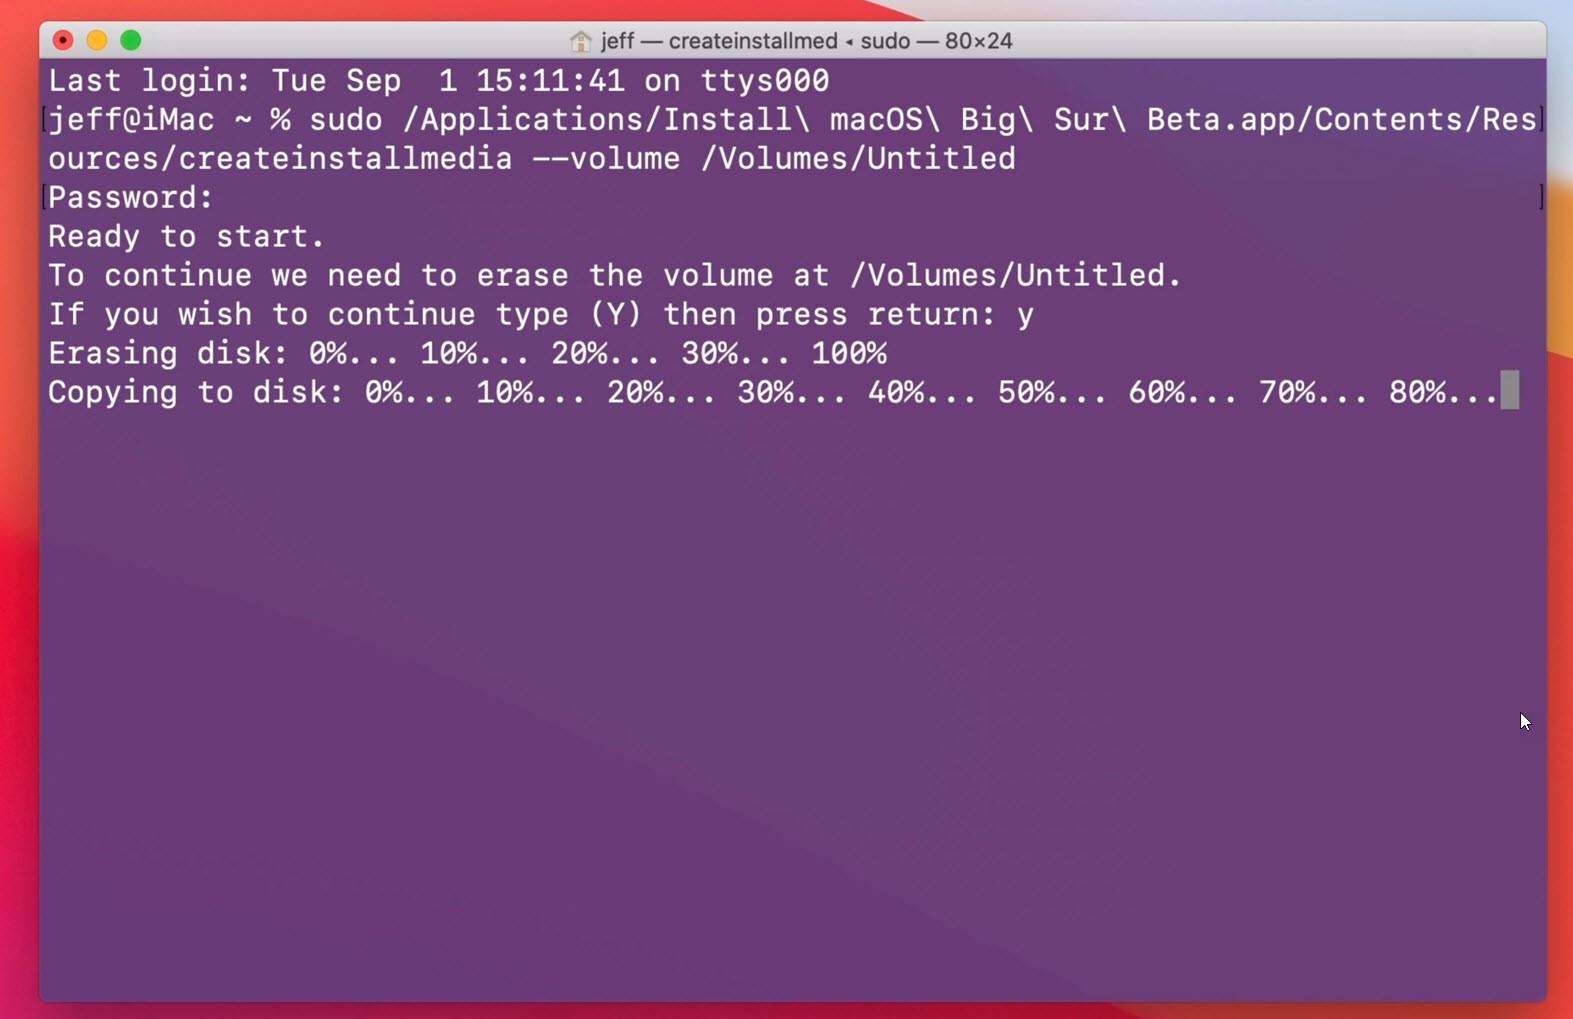
Step 6: On the terminal, type sudo and press the space button from the keyboard.
Step 7: Here, drag createinstallmedia to the terminal from the resource folder.
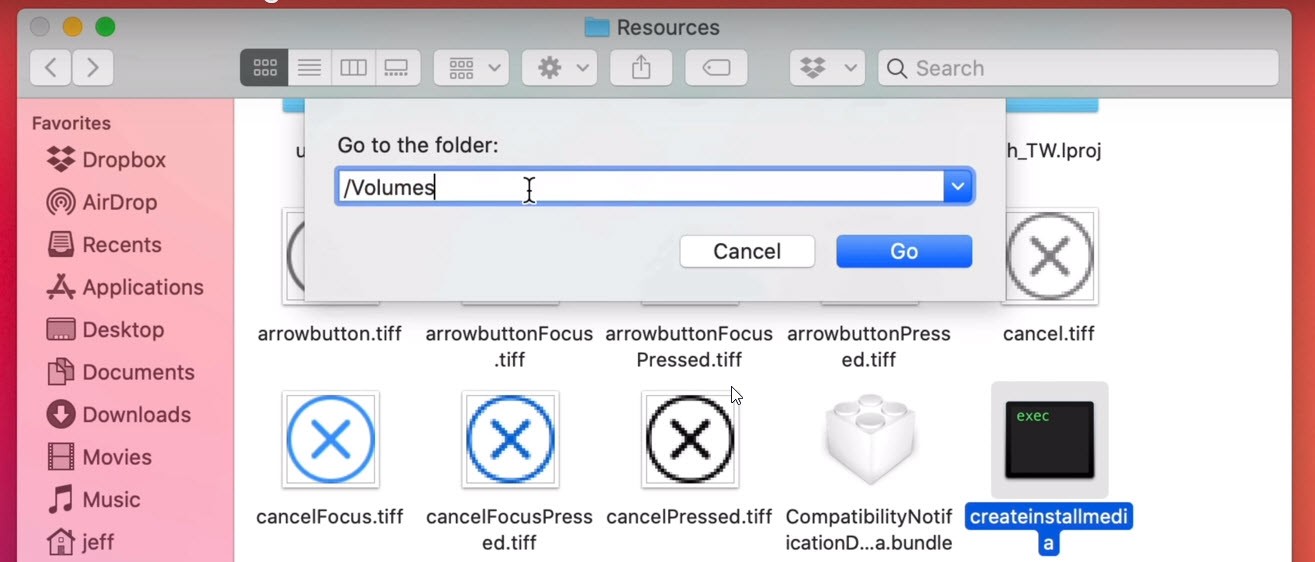
Step 8: After that, type –volume and press the space key from the keyboard.

Step 9: Then, go to Finder > Go > Go to Folder.
Step 10: In the “Go to the Folder” type /Volumes and click the Go button.
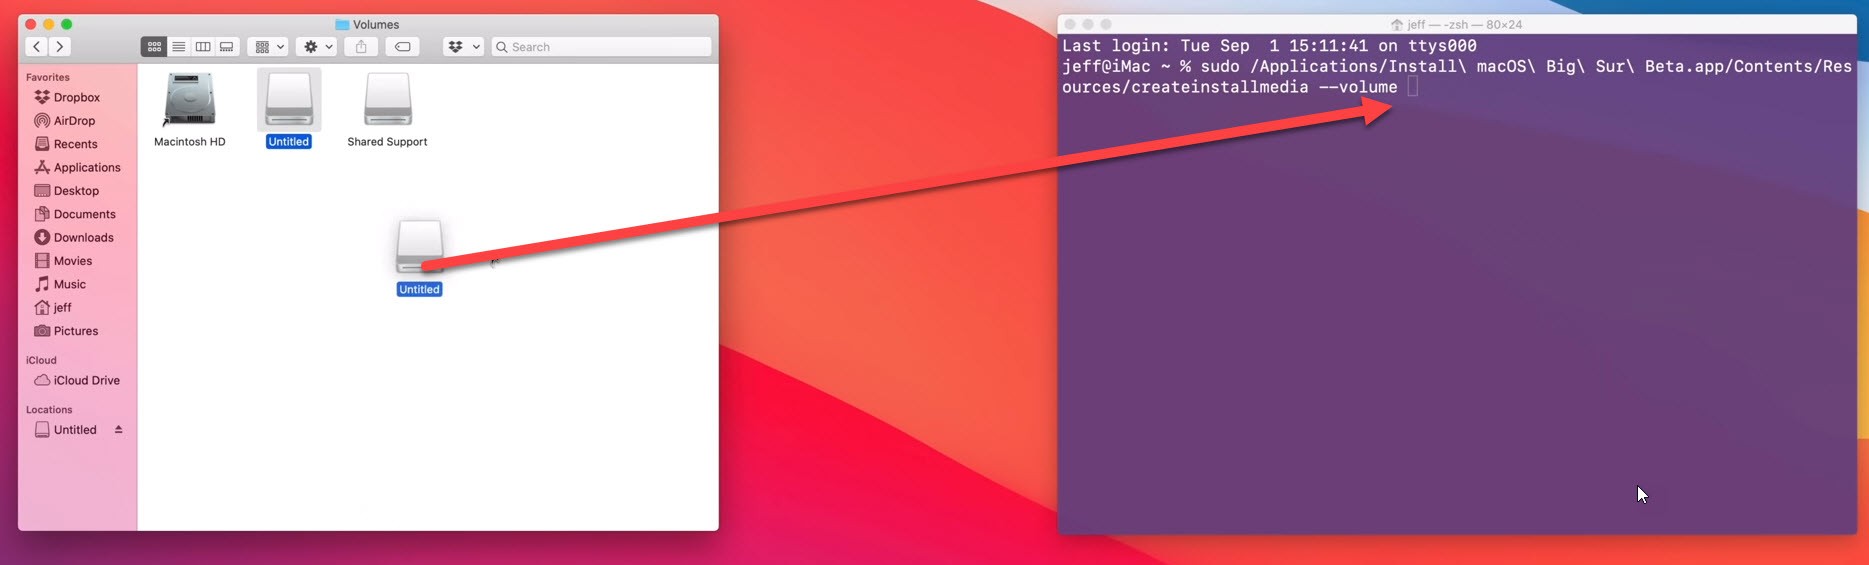
Step 11: Now, connect your USB drive and it should appear in the Finder window.
Step 12: Here, drag the USB drive volume into the Terminal and press enter.
Step 13: Now, it will ask you to enter the administrator password. So, type the password and press return.
Step 14: To continue it need to erase the volume at /Volumes/USB Name. If you wish to continue type (Y) then press return.
Step 15: Once you press return then it will start erasing the disk and copying the file to disk. It will take several times. Once it’s done then close the terminal window.
Finally, you have created a bootable USB installer for macOS Big Sur successfully. Go to your USB and check the macOS Big Sur installer. Now, you can boot macOS Big Sur from the bootable USB drive and perform a clean installation on your Mac.
Change Security Settings
To use the bootable USB drive for macOS Big Sur installation you need to change the security settings. Although, your Mac computer might be set not to allow the use of an external startup disk. Therefore, check the below steps and change the security settings.
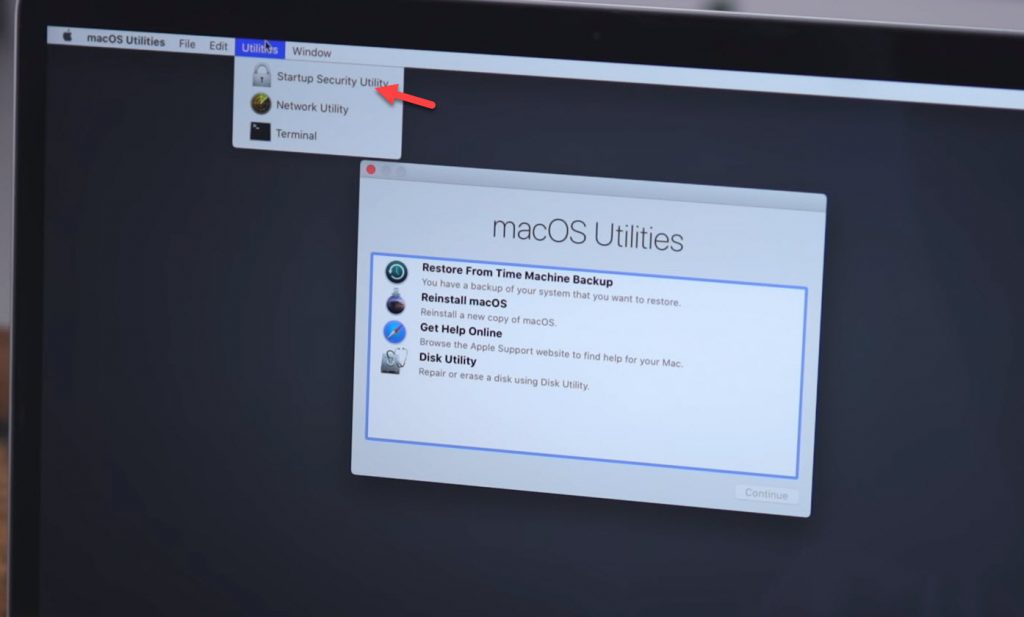
Step 1: Restart your Mac and hold down Command+R during the boot process.
Step 2: Here, you should see the macOS Utilities. Click on the Utilities menu from the top and go to Startup Security Utility.
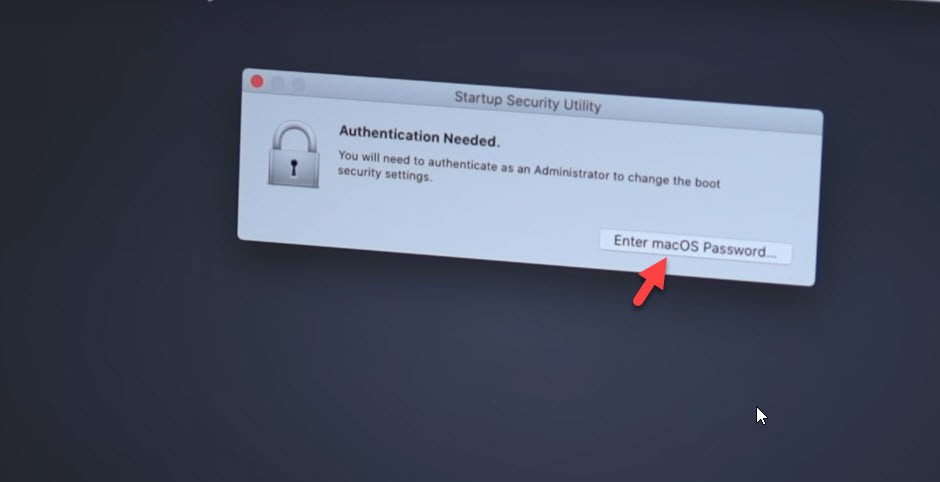
Step 3: After that, you will see the Authentication window. You will need to authenticate as an administrator to change the boot security settings. So, click on Enter macOS Password and type your Mac password and click OK.
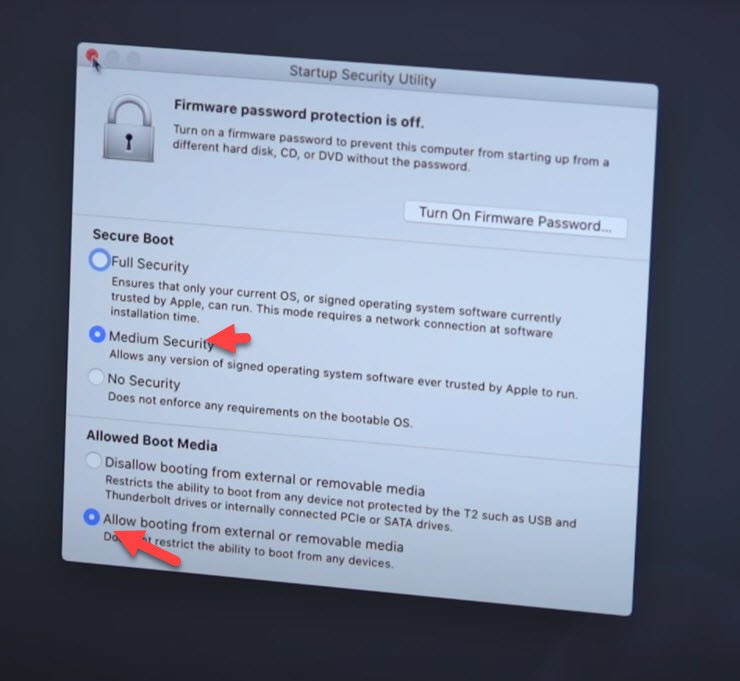
Step 4: In the last step, you will need to change a few settings. On Secure Boot select Medium Security. On Allowed Boot Media, select Allow booting from external or removable media. After that, close the page.
Boot macOS Big Sur from Bootable USB Installer
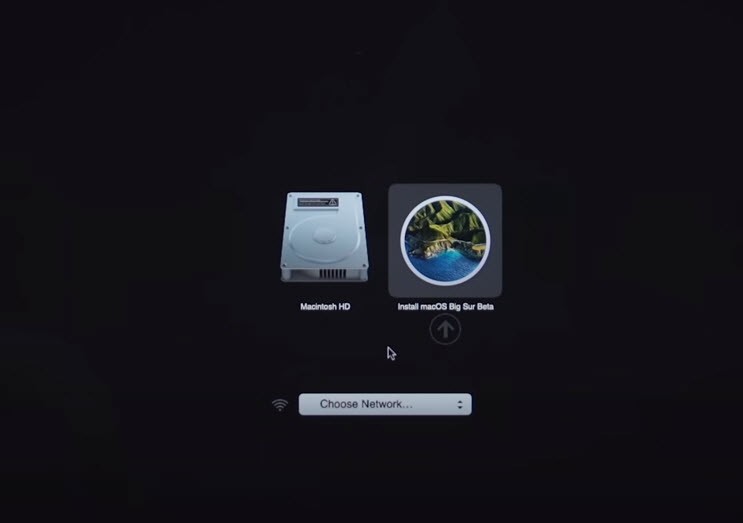
Step 1: Plug the bootable USB drive and restart your Mac computer and hold down the option key.
Step 2: Here, select the USB drive and continue.
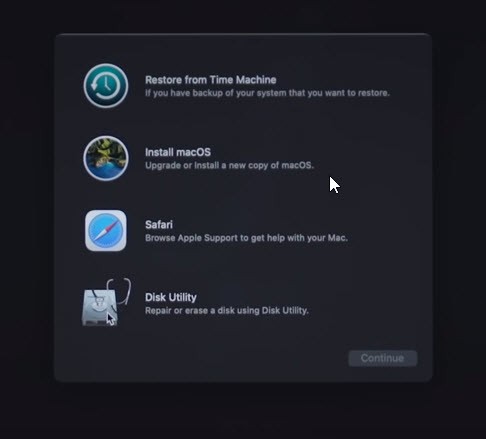
Step 3: You should see the Recovery Mode having four options. So, if you want to install macOS Big Sur and leave the data intact. Then, select Install macOS Big Sur. Or if you want to start over and wipe out the data then you need to go into Disk Utility to reformat the external drive and then install macOS Big Sur. So, select the option and continue.
Step 4: To set up macOS Big Sur installation click Continue.
Step 5: To continue the installation you must agree to the term of software. Click the Agree button and follow the other instructions.
Read Next:
- How to create a bootable USB from Android
- How to create macOS Big Sur bootable USB on Windows
- Create a bootable USB for macOS Catalina on Windows
- How to Create bootable USB for macOS Mojave on Windows
Conclusion
This was the best method to create a bootable USB installer for macOS Big Sur to have a clean install of macOS Big Sur on Mac. This method will work for all versions of macOS Big Sur the previous betas and the future updates.