macOS Big Sur is one of the current and advanced Apple operating system that introduced on 22 June 2020. Meanwhile, Apple released the first developer beta for developers to give it a try and send their feedback. During the months, Apple released several betas updates which have certain errors. Finally, on 13 November 2020, Apple released the latest version of macOS Big Sur which is free of cost for users with compatible mac computers.
Hands down, macOS Big Sur has tons of new features and updates that you want to check out and get a better experience. There are new updates in Control Center, Notification Center, Messages, Maps, Safari web browser, and much more. The macOS Big Sur has more attractive features than the previous Apple operating systems like Catalina and Mojave.
Perhaps you have tried macOS Big Sur on several platforms like Mac computers and virtual machines. Installing macOS Big Sur is the same as you have done for macOS Catalina. So, it is better to perform a clean installation of macOS Big Sur on your Mac desktop. A clean installation is the opposite of a macOS upgrade. This will format your hard drive and delete the previous macOS. However, your macOS perform faster, you get rid of apps you don’t use, and persistent issues may go away.
To have a clean install of macOS Big Sur on Mac, you will need to do some steps. First of all, you should make a backup of your Mac data in order to not lose further. Later on, create a bootable USB for macOS Big Sur because we are going to install macOS Big Sur via USB. So, let’s start today’s article and pay attention to each step.
Is your Mac Compatible with macOS Big Sur?
Before going to the steps, let’s check if your Mac computer is compatible with macOS Big Sur. In the new operating system, Apple dropped some older Mac desktops which means they cannot support macOS Big Sur. Although they can’t get any updates of macOS Big Sur. However, we have written an article on how to install macOS Big Sur on Unsupported Mac Devices. You can check this article and have the latest Apple OS.
So, below are the compatible Mac lists that support macOS Big Sur.
- 2015 and later for MacBook
- 2013 and later for MacBook Air
- 2013 and later for MacBook Pro
- 2014 and later for Mac Mini
- 2014 and later for iMac
- 2017 and later for iMac Pro
- 2013 and later for Mac Pro
Major Features of macOS Big Sur
Safari: is one of the main web browser of macOS systems. However, in macOS Big Sur Apple updated the Safari web browser. You can customize the Safari start page and make it your own. Besides that, you can set a new background image and select your favorite sections to display on the start page.
You know there are several web browsers like Google Chrome, Safari, Opera, Firefox, and much more. But, Safari is on the top for Mac users and this time it is 50% faster than Chrome.
Apple updated Notification Center on macOS Big Sur and redesigned all your notifications and widgets into a single dedicated column. Now, you will see all the notification like Calendar, Stocks, Weather, Reminders, Notes, and Podcasts. Moreover, you can customize the widgets to the notification center by clicking edit widgets.
Control Center in macOS Big Sur is inspired by IOS and designed just for Mac. So, Control Center allows you to access the most commands that you used. Plus you can customize Control Center like add controls for the app and features.
Messages are updated in macOS Big Sur and now you can pin your favorite conversations to the top of your list and access quickly. This feature allows you to pin multiple conversations and even you can search for any conversation. However, you can share your name and photo/group photos, and mention an individual in a group conversation.
Steps to Perform a Clean Installation of macOS Big Sur on Mac
Step 1: Backup your Mac Laptop
In the first step, you need to back up your Mac data because doing a clean installation of macOS Big Sur will erase all your Macintosh data. Therefore, make sure to back up your Mac with Time Machine. However, the Time Machine is the in-built backup feature of your Mac. To create backups with time machines follow the below article.
Step 2: Download macOS Big Sur Installer File
To install macOS Big Sur, you will need its installer file as we have macOS Big Sur ISO, DMG, and VMDK files while installing on virtual machines. Therefore, to download macOS Big Sur go to Mac App Store and download the macOS Big Sur file. Or you can download it from the below link.
Step 3: Create a Bootable USB Drive for macOS Big Sur
To create a bootable USB for macOS Big Sur you need a 16GB USB drive because the file is 12GB. Plug the USB and follow the below steps.
Now, go to the Applications folder and open Disk Utility. After that, select your USB drive from the left side of the screen and click on the Erase button from the top menu bar.
Replace Untitled with your USB name and select Mac OS Extended (Journaled) and click on the Erase button.
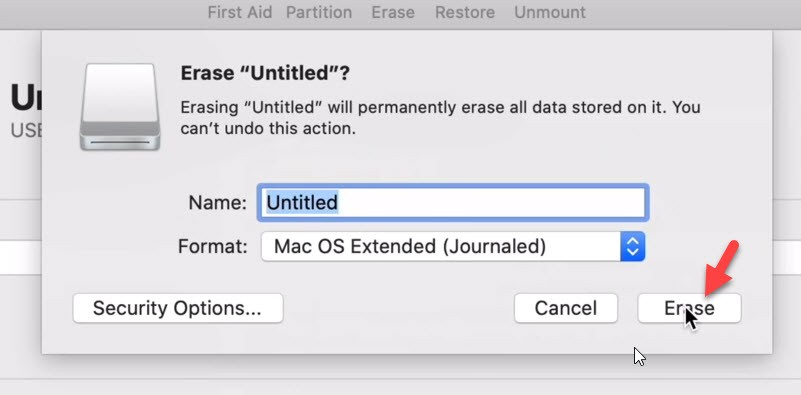
While the USB is erased completely, then click the Done button and close the Disk utility.
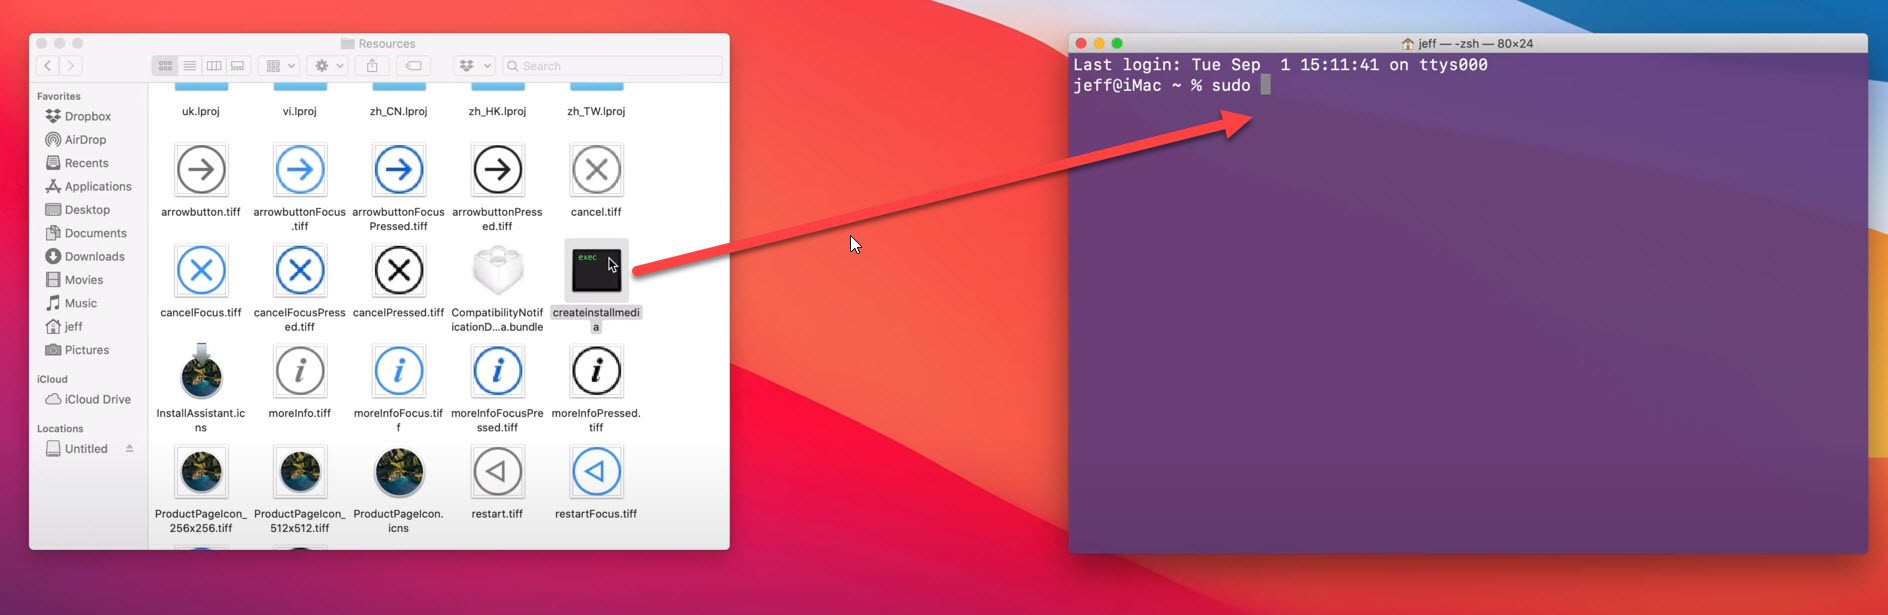
Now, go to Applications and find the macOS Big Sur installer file that you downloaded later. Right-click on it and click on Show Package Contents. Here, open Content and go to Resources folder and find createinstallmedia file. Remember, just keep this folder because we will be back within a minute.
Open Spotlight and search Terminal and open it. On terminal type sudo and drag the file to the terminal. Or copy the code and paste it on the terminal. Remember, Untitled is the USB drive name if you changed the name then type that name.
sudo /Applications/Install\ macOS\ Big\ Sur.app/Contents/Resources/createinstallmedia --volume /Volumes/Untitled
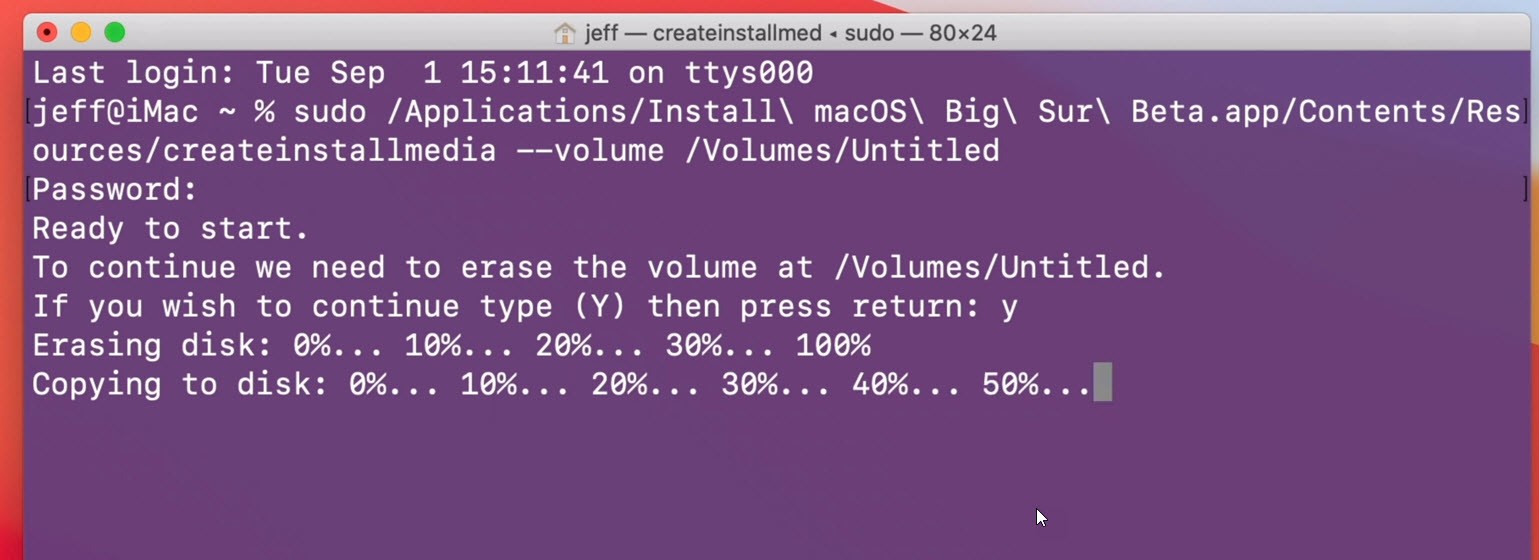
After all, press Enter and it will ask you to type your Mac password. So, type the password and press enter.
Then, you will be asked if you want to continue the process. Therefore, type Y and press enter.
Now, it will copy the macOS Big Sur installer file to the bootable USB drive. It will take some time.
Step 4: Perform a Clean Installation of macOS Big Sur Mac
Now your bootable USB drive is ready to boot macOS Big Sur and you can install macOS Big Sur on your Mac using the Bootable USB drive. So, insert your USB drive and restart your Mac laptop.
#1: While restarting, Hold Down the Option key to open the boot option.
#2: Here, select the USB installer drive and continue.
#3: On Utilities screen, go to Disk utility.
#4: In Disk Utility, select the USB drive or create a new volume for macOS Big Sur. Anyhow, click on the Erase button and follow the below parameters.
- Name: Big Sur
- Format: APFS
After that, click on the Erase button and wait to complete the process.
#5: Once done, then click on the Done button and close disk utility.
#6: on Utilities, click on Install macOS and continue.
#7: To Set up the installation of macOS Big Sur beta, Click Continue.
#8: Agree to the terms of the software.
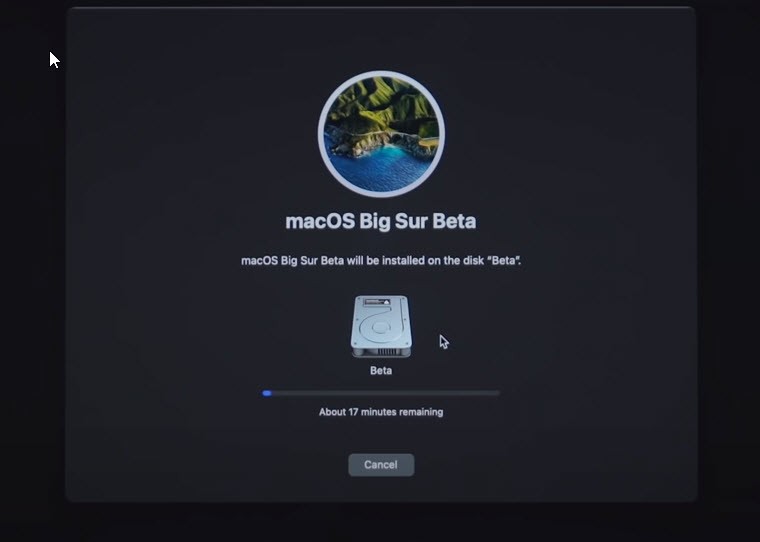
#9: Now, select the destination you want to install the macOS Big Sur and continue.
Read Next:
- How to install macOS Big Sur on PC-Hackintosh
- How to Install macOS Big Sur on Acer Laptop
- Install macOS Big Sur on Virtualbox on Windows
- 3 Ways to Install macOS Big Sur on Windows 10
Conclusion
Instead of upgrading or updating macOS Big Sur is better to perform a clean installation of macOS Big Sur on your Mac computer. This method will help you to have a better operating system with fast instructions. There are four steps to clean install macOS Big Sur on Mac and I hope you understand all of the steps.