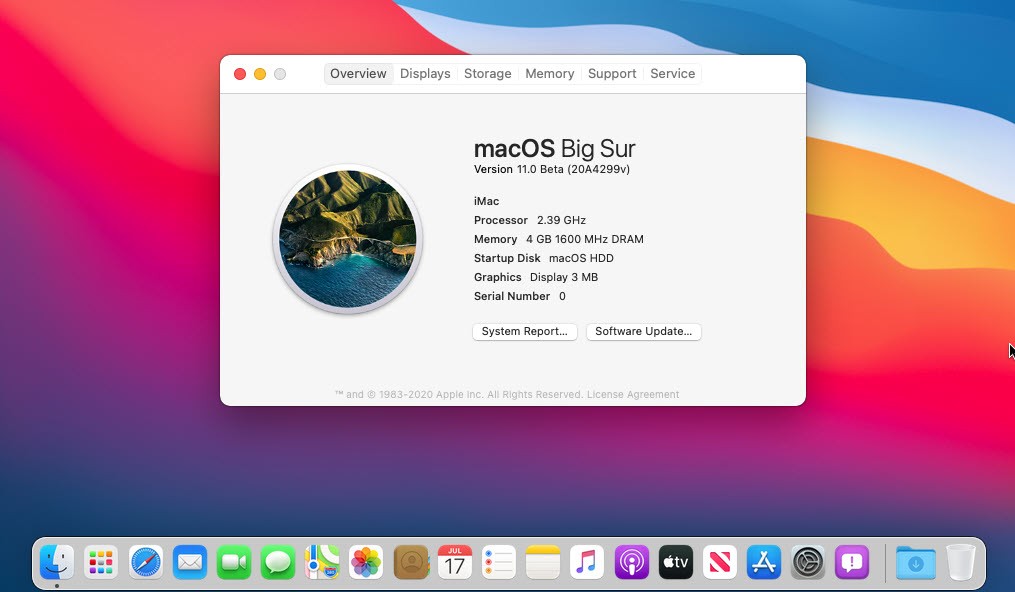
Good news for all users who are running the macOS operating system on their system. No matter, if you are Windows, Linux, or Mac user. But, this is the best day for you to learn about the new update of the Apple operating system. However, Apple released the macOS 11 Big Sur at WWDC June 2020 in online events. This Macintosh operating system has several new features that are better than previous Mac OS.
Apple has included tons of new features and improvements on macOS Big Sur. The main update comes in Safari Web Browser (Apple said, Safari is 50% faster than Chrome while you visit the website). Improvements in Maps, New interface of Messages App, Update in Memoji with face mask, Support of iOS control center, Widgit in the home page, Notification center in macOS Big Sur, Update in Mac Catalyst, iOS 14 and iPadOS 14 Apps in macOS Big Sur, and several more features.
At WWDC June 22, Apple released the first developer beta version where you can download and install macOS Big Sur on your Mac. The developer beta is not free and it is only for developers to check it out and send their feedback. Although, the public beta is coming in July and it is free-of-cost.
In this article, you will learn how to Install macOS Big Sur on Virtualbox on Windows using a new method. This method will work with all macOS Big Sur installer versions whether it is developer beta, public beta, or final version. However, macOS Big Sur developer beta is available and you can use the developer version to install the macOS Big Sur on Virtualbox on Windows. Remember, we will update the article whenever Apple announces a new update of macOS Big Sur. Therefore, bookmark this article and check it when the new update is released.
macOS Big Sur Compatible Macs List
The macOS 11 Big Sur is an amazing Apple operating system and many new changes in colors, icons, menu bars, notification, etc are updated. But, some of the Mac computers can’t support macOS 11 and Apple dropped the older Mac desktop. So, check the macOS Big Sur compatible list and if your Mac can support the latest OS. Then, follow this article.
- MacBook 2015 and later
- MacBook Air and Pro Late 2013 and later
- Mac mini 2014 and later
- iMac 2014 and later
- iMac Pro 2017 and later (all models)
- Mac Pro 2013 and later
The below older Mac computer is dropped and can’t get the macOS 11 Big Sur updates. Don’t worry, you can install macOS Big Sur on Unsupported Mac device. Even, you can install macOS Big Sur on your system using virtual machines as we are showing in this article.
- MacBook Air 2012
- MacBook Pro 2012, Early 2013 MacBook Pro
- 2012 Mac mini 2012
- iMac 2012, 2013 iMac
Steps to install macOS Big Sur on Virtualbox on Windows
Step 1: Required Files to install macOS Big Sur
To install macOS Big Sur on Virtualbox on Windows. you will need to download below required files.
- Download macOS 11 Big Sur ISO or dmg (Both macOS Big Sur installer will work with this method. As I used macOS Big Sur ISO file)
- Download Virtualbox latest version
- WinRAR or 7Zip
Step 2: Install Virtualbox on Windows
- Once you download the Virtualbox installer file then go to Download folder and Double-Click on the installer file.
- On Welcome Setup Wizard page click Next.
- Click Next.
- Again Click Next.
- You will see warning Network interfaces, Here click the Yes button.
- The installer is ready to install VirtualBox, So, click the Install button.
- Once the installation is done then click the Finish button.
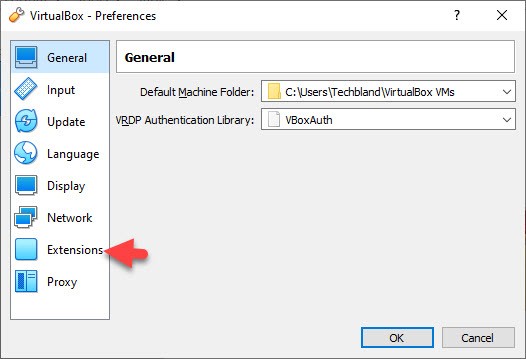
Once the Virtualbox installation is done successfully then you need to install or update the Virtualbox extension pack. If you have installed macOS previous version on Virtualbox then you have face mouse and keyboard stuck while using the Mac OS. Therefore, to fix mouse and keyboard stuck you should install the Virtualbox extension pack. So, Download the VirtualBox extension pack and follow the below steps.
#1: Open Virtualbox and tap on File > Preferences.
#2: From the left menu, tap on Extension.
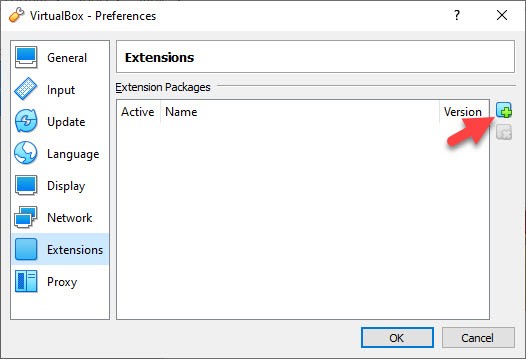
#3: On the Extensions page, click the plus icon and browse the Virtualbox extension pack setup that you downloaded earlier.
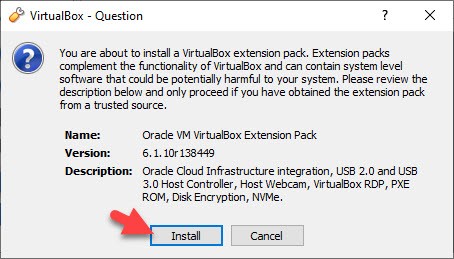
#4: Once you inserted the Virtualbox extension pack setup, then, the installation menu will pop-up. Here, click the Install button.
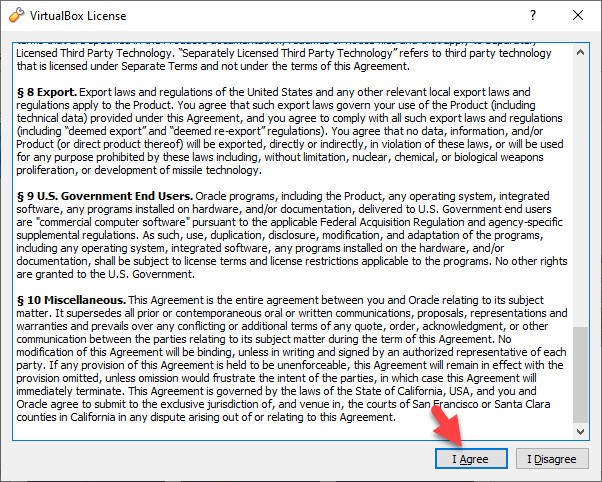
#5: Scroll down and tap on I agree.
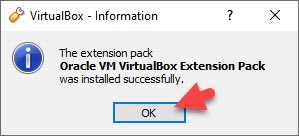
#6: Wait for a while to complete the installation. Once the installation is done, click on Ok and tap on Ok to close the Extension window.
Step 3: Extract macOS Big Sur Compressed File
While you download the macOS 11 Big Sur dmg file then the file is compressed and you need to extract it using WinRAR or 7ZIP software. The download link for WinRAR and 7ZIP were given on the required file section. So, download any of the software and extract the macOS Big Sur installer file.
To extract macOS Big Sur dmg file, Right-Click on macOS Big Sur dmg file and tap on Extract Here. Now the macOS Big Sur file is ready for installation.
Step 4: Create a new Virtual Machine for macOS 11 Big Sur
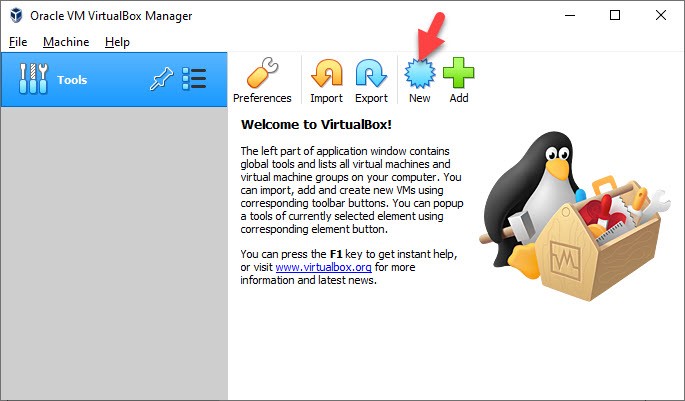
For installing any Mac OS in VirtualBox, you need to create a new virtual machine for the Mac OS. Therefore, to create a new VM for macOS Big Sur, Open Virtualbox, and tap on New.
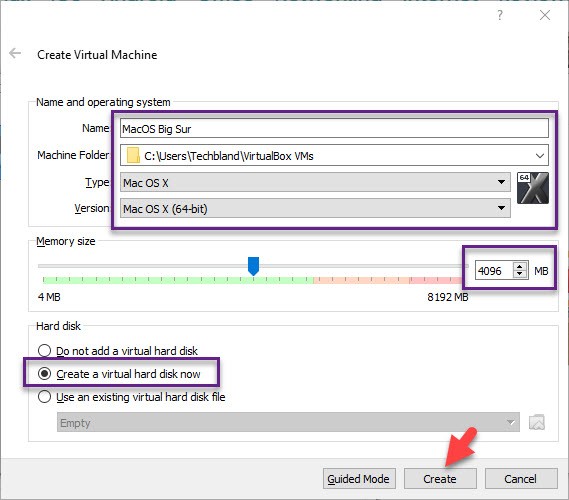
#1: While you tap on New then click on Expert Mode. After that, you will see the below screenshot. So, for Name and Operating System type the macOS Big Sur and leave other options as it is. Then, for Memory Size, give 50% of your main memory size to the Virtualbox machine. For Hard Disk, select Create a virtual hard disk now and click on Create.
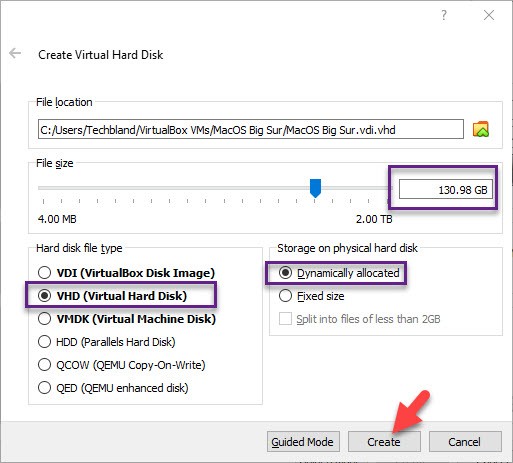
#2: The next step is to create a virtual machine hard disk for macOS Big Sur. So, the file location is fine, In case, you want to change the macOS Big Sur destination folder then change it. Then, increase the File Size and select VHD for the hard disk file type. And select Dynamic Allocated for storage on a physical hard disk. After that, click on Create.
Bring Changes to Virtual Machine Settings
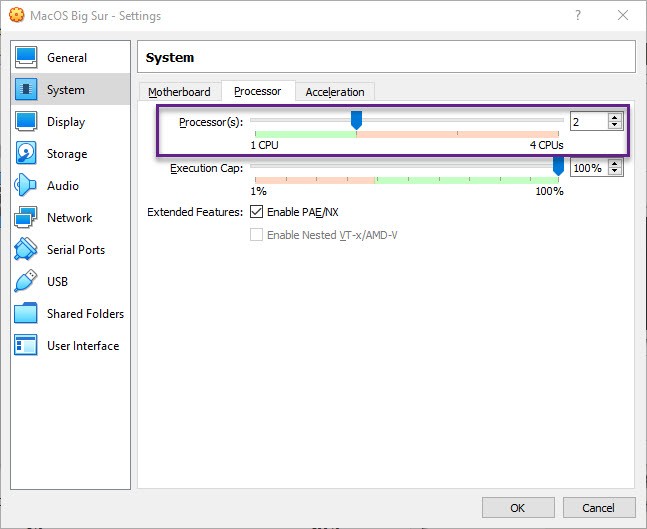
#3: Now tap on Settings and click on System > Processor. Now, according to your main computer CPU increase the processor CPU for macOS Big Sur.
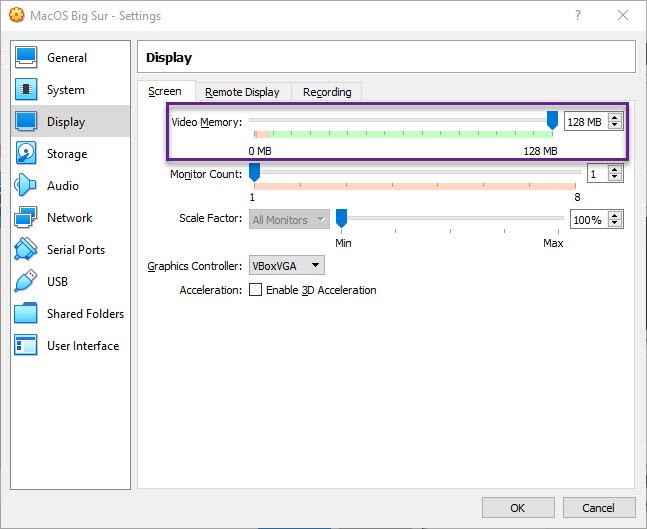
#4: Now, tap on Display and increase Video Memory to 128MB.
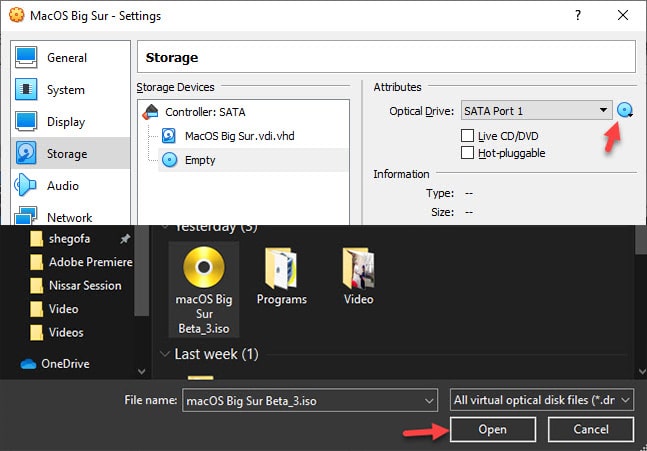
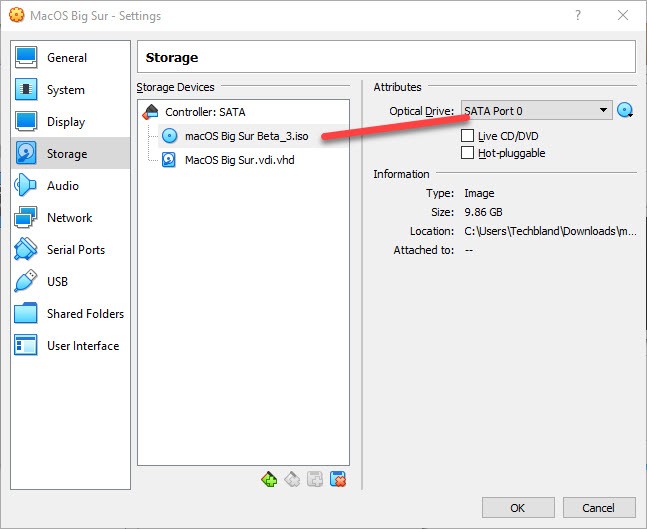
#5: Jump to Storage and tap on Empty, Then, click on small CD icon > choose/create an optical disk > Add. Now, browse the macOS 11 Big Sur installer file you have downloaded form this article.
#6: Once you inserted macOS 11 Big Sur dmg file or ISO file. Then, set macOS 11 Big Sur SATA Port 0. If the macOS Big Sur is not set to 0 then the virtual machine will not boot macOS Big Sur. Finally, click the Ok button to close the page.
Now, close the Virtualbox to apply the Virtualbox code to the command prompt. to close the Virtualbox go to File and click on exit.
Step 5: Run Virtualbox Code
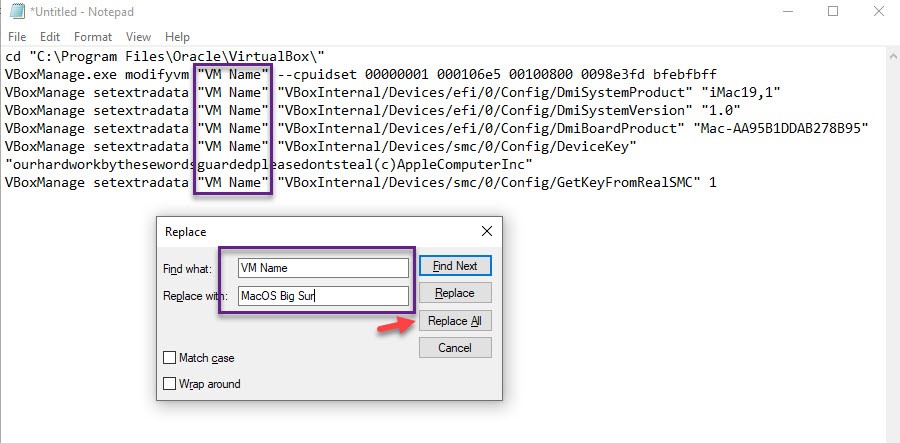
You have created and customized the macOS Big Sur virtual machine and you have inserted the macOS Big Sur installer file. Now, it is time to run Virtualbox code in order to install macOS 11 Big Sur on Virtualbox. Therefore, copy the below code and paste it to notepad or other code editors.
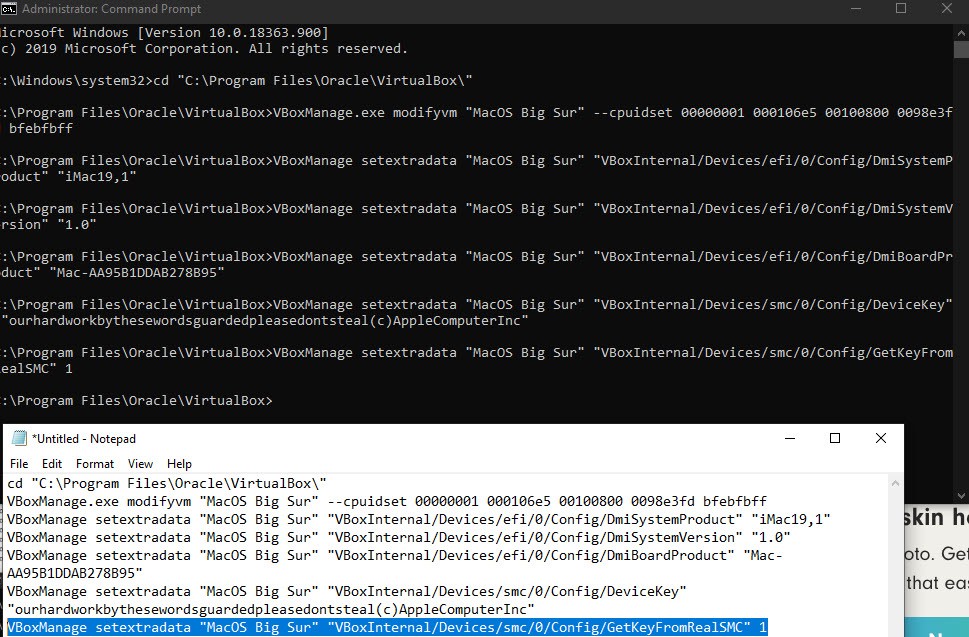
cd "C:\Program Files\Oracle\VirtualBox\"VBoxManage.exe modifyvm "VM Name" --cpuidset 00000001 000106e5 00100800 0098e3fd bfebfbffVBoxManage setextradata "VM Name" "VBoxInternal/Devices/efi/0/Config/DmiSystemProduct" "iMac19,1"VBoxManage setextradata "VM Name" "VBoxInternal/Devices/efi/0/Config/DmiSystemVersion" "1.0"VBoxManage setextradata "VM Name" "VBoxInternal/Devices/efi/0/Config/DmiBoardProduct" "Mac-AA95B1DDAB278B95"VBoxManage setextradata "VM Name" "VBoxInternal/Devices/smc/0/Config/DeviceKey" "ourhardworkbythesewordsguardedplea sedontsteal(c)AppleComputerInc"VBoxManage setextradata "VM Name" "VBoxInternal/Devices/smc/0/Config/GetKeyFromRealSMC" 1
Once you paste the code on notepad then use the replace function to replace the VM Name with your virtual machine name which is macOS Big Sur. Make sure, you have replaced the name correctly otherwise you can not continue to run the VirtualBox code.
Once you change or replace the VM Name with your virtual machine name. Then, copy and paste the code one by one to command prompt (CMD) and press enter. To open CMD, press Windows Key and type CMD and run it as administrator.
Step 6: Run Virtual Machine
Everything was done till here and your Virtualbox with new virtual machine is ready to install macOS Big Sur. Installing macOS Big Sur is somehow different from the previous macOS version. So, pay attention and follow each step.
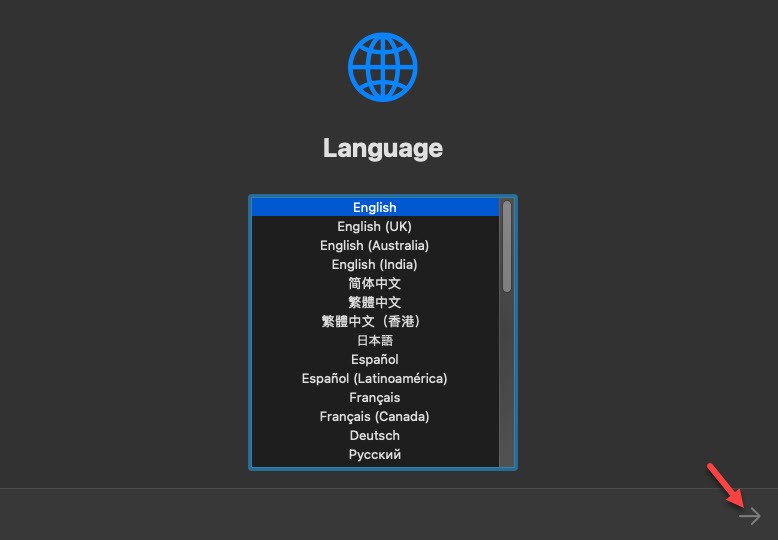
#1: Launch Virtualbox and select macOS Big Sur virtual machine and tap on the Start button from the top menu.
#2: You will see a black and white screen for a few seconds, Don’t worry about that just be patient. After a while, you will see the first screen that will ask you to select your Language.
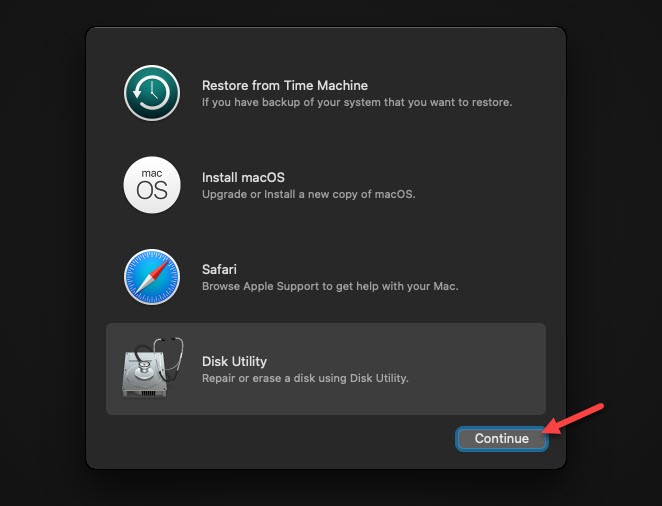
#3: Select Disk Utility and Continue.
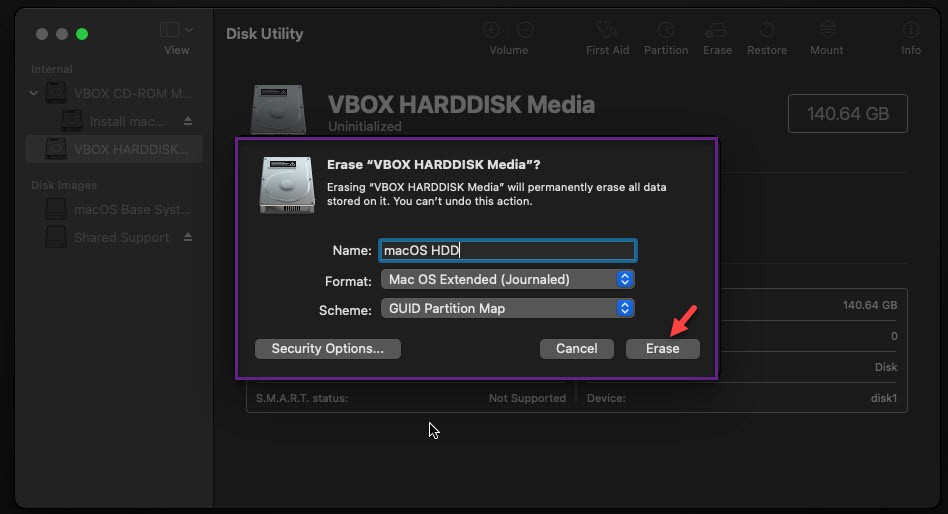
#4: Now, you need to erase the Virtualbox Hard Disk. So, select the Virtualbox hard disk and tap on Erase from the top menu. After that, give the name to the hard disk and click the Erase button.
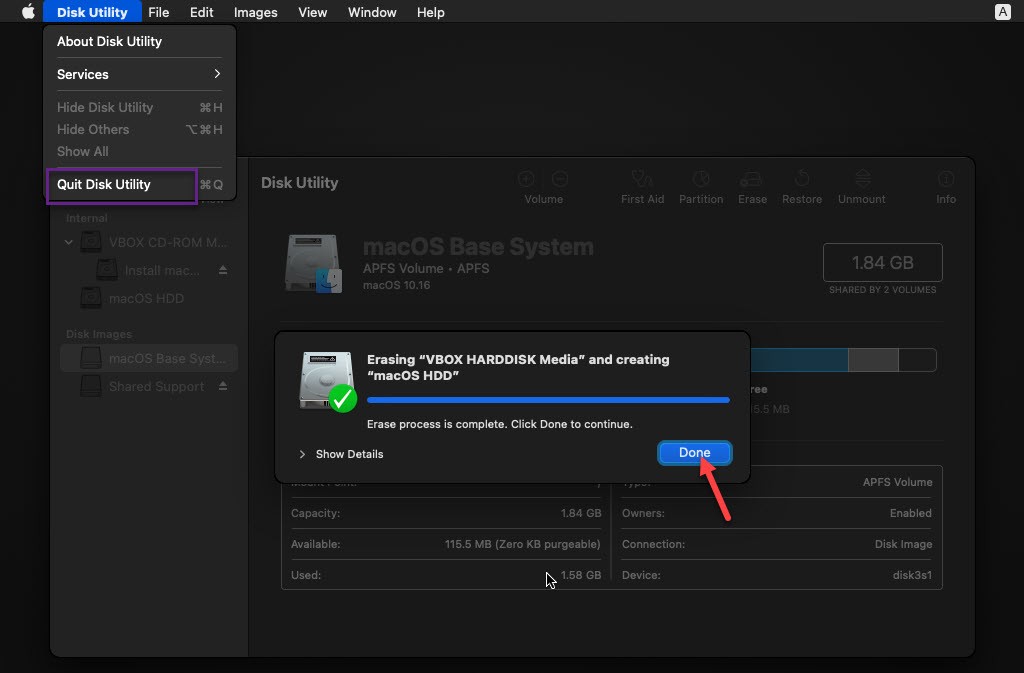
#5: once the erasing is done then click on Done and quit disk utility.
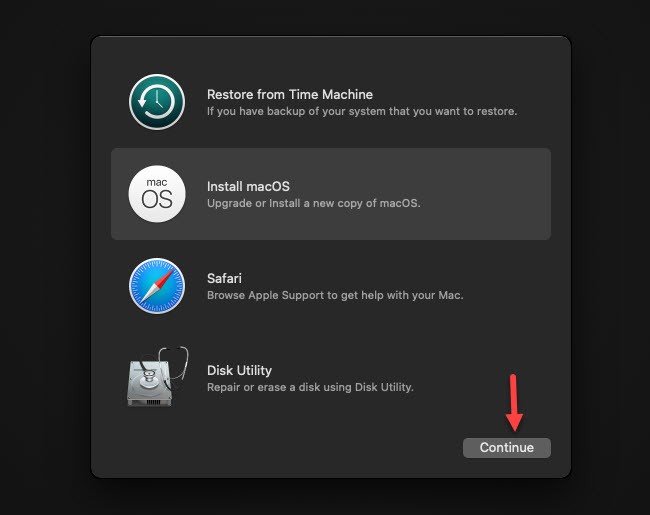
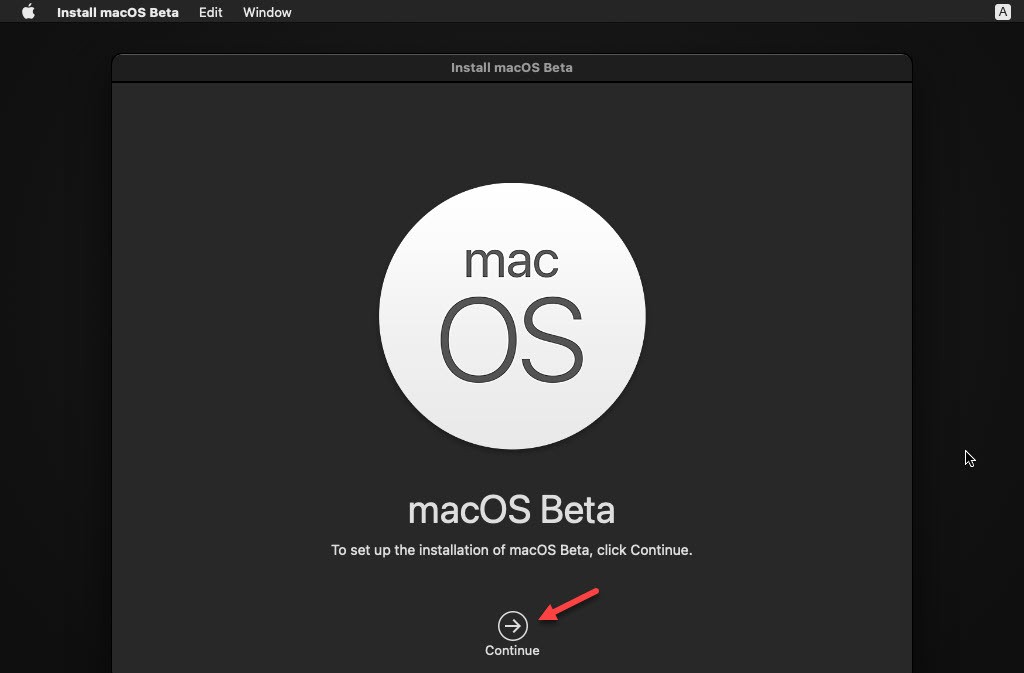
#6: Now, select Install macOS and click on Continue.
#7: To set up a macOS Beta installation click on Continue.
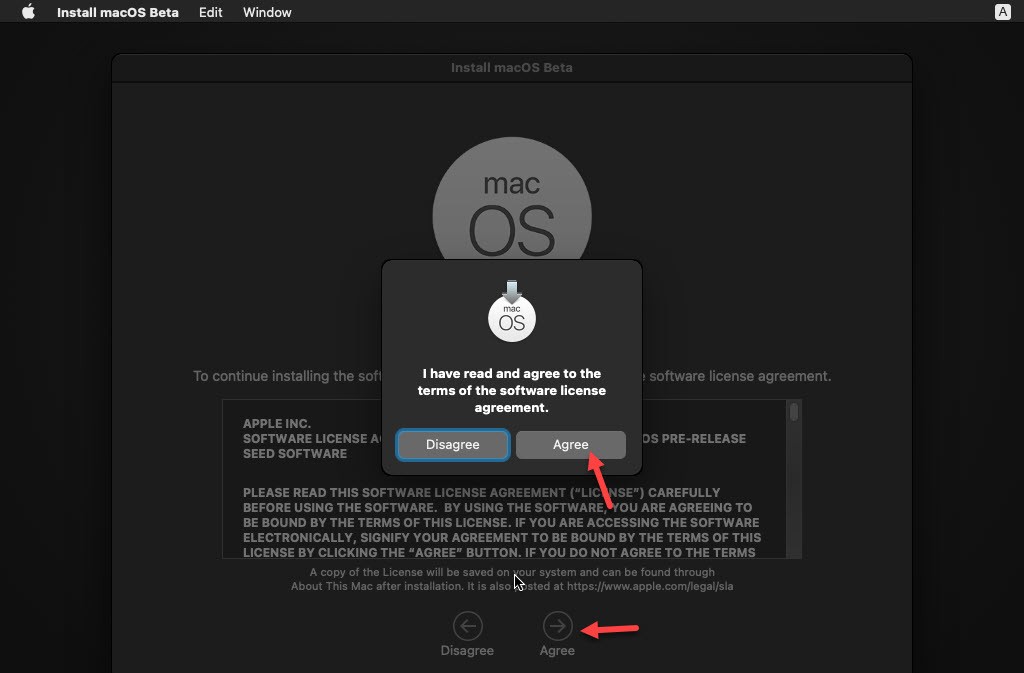
#8: To continue installing macOS Big Sur on Virtualbox you have to agree to the software license. So, click on Agree.
#9: Select the disk and click the Install button. After that, wait for 30 minutes to be completed.

Step 7: Complete macOS 11 Big Sur Installation on Virtualbox
Once you click the Install button then you will see the BiErrorDomain Error 3. But, in this article, I don’t see any types of error specially BiErrorDomain Error 3. However, it will take much time and you don’t need to worry because it will take time to prepare the macOS Big Sur for installation. Although, you will see lots of text scrolling down and black and white screen many times. Only you should wait until the macOS Big Sur welcome page appears.
In case, you face BiErrorDomain Error 3 while installing macOS Big Sur. Then, leave a comment and I will guide you on how to fix it. Though I didn’t see such an error while I am installing macOS Big Sur.
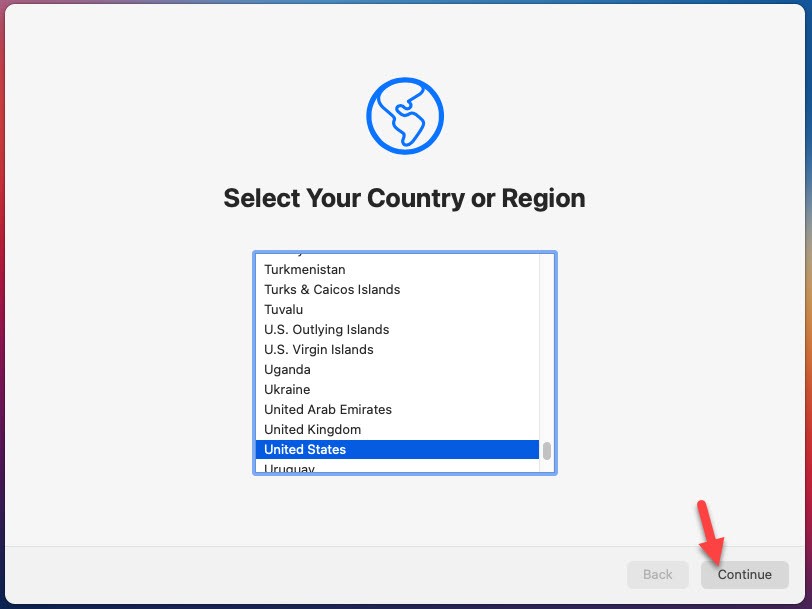
#2: Select your Country and Continue.
#3: On Written and Spoken language click on Continue.

#4: You can set up the Accessibility features later on macOS Big Sur. For now, click Not Now to skip this option.

#5: Click Continue.
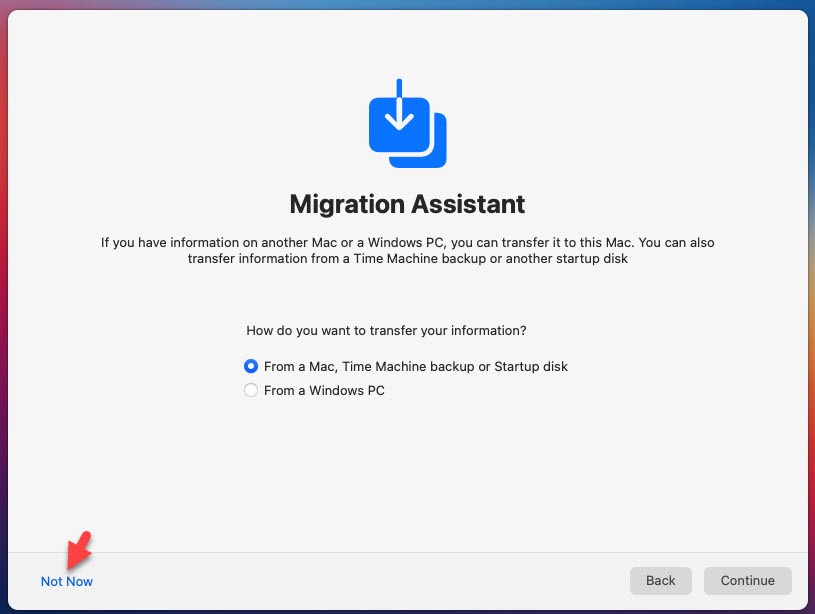
#6: If you don’t want to transfer data from your previous MacOS, then, click Not Now to skip this option and move on.
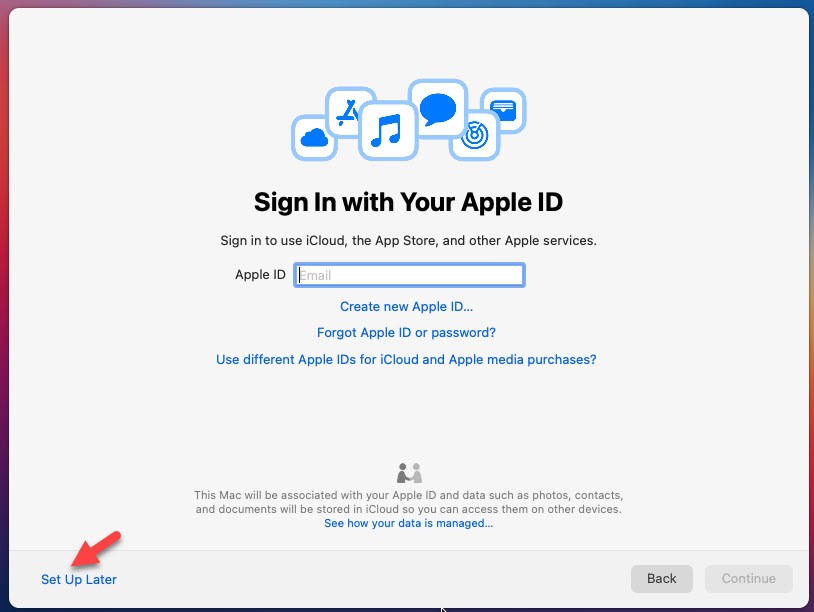
#7: For now, don’t sign in to your Apple ID because you can do it later. Simply, click Set Up Later and click Skip.
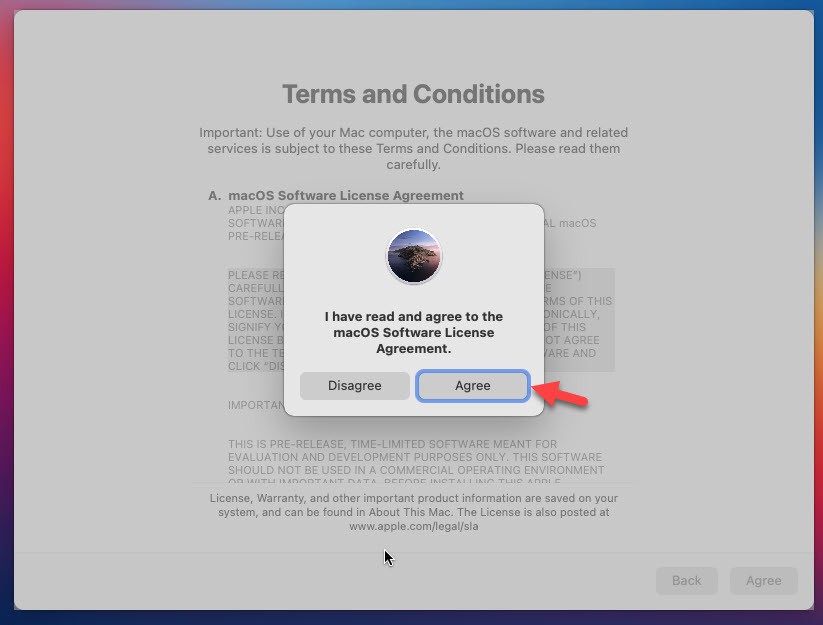
#8: Agree to the terms and Conditions of macOS Big Sur. Click Agree and click Continue.
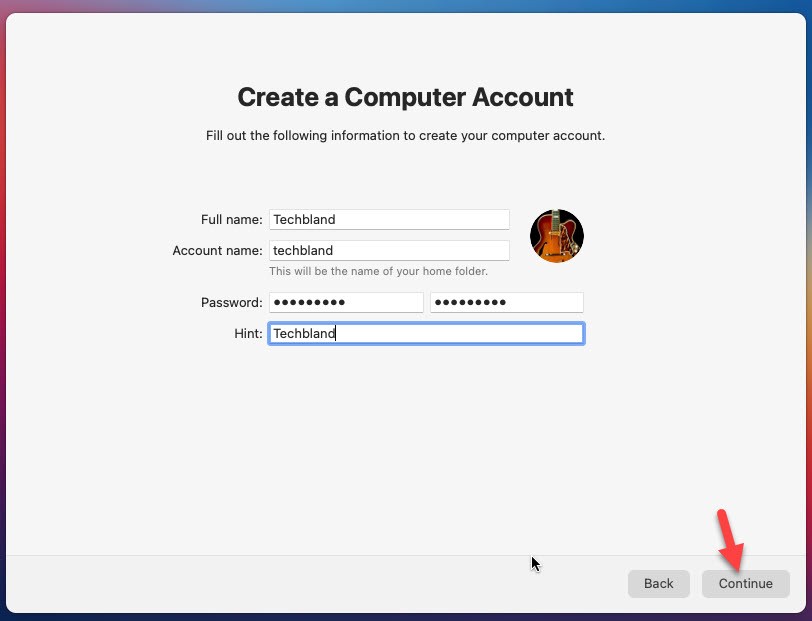
#9: Now create a computer account, to do that, type your Full Name, Account Name, Password, and Password Hint. Then, click Continue.
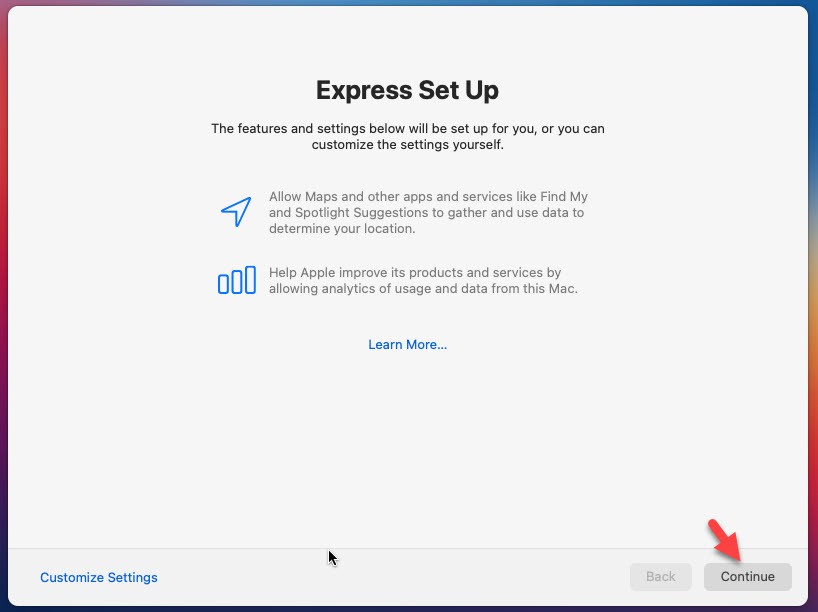
#10: If you want to customize Express Set Up then click on Customize Settings else click on Continue.
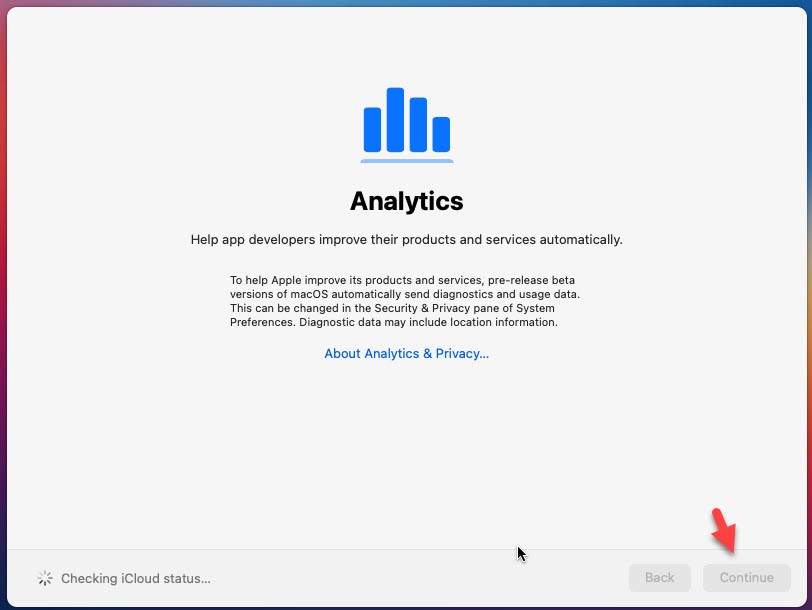
#11: Click Continue.
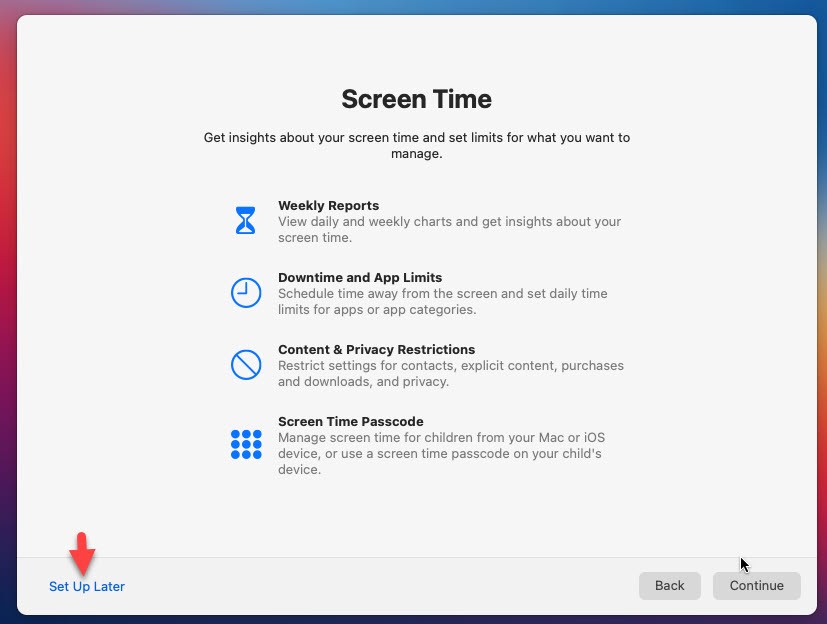
#12: Click Set Up Later.
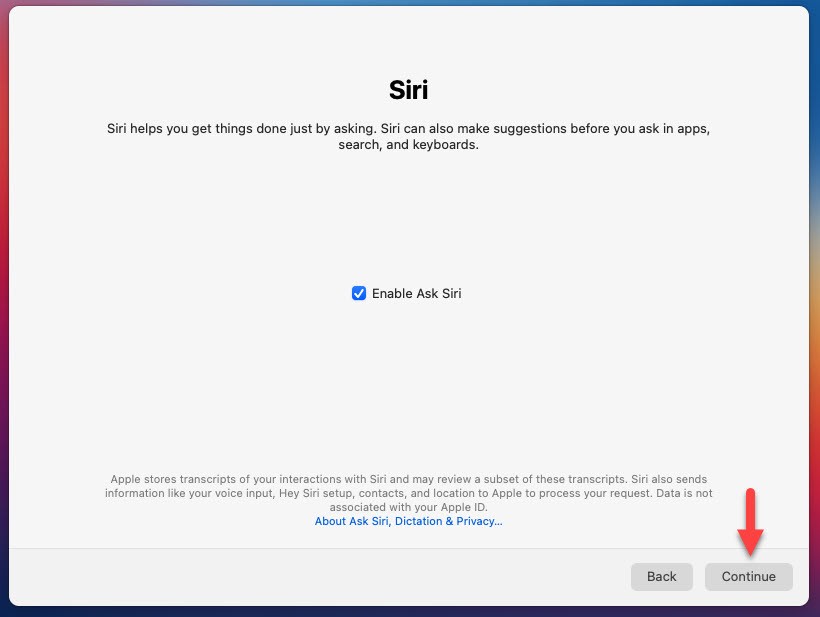
#14: on Siri click Continue.
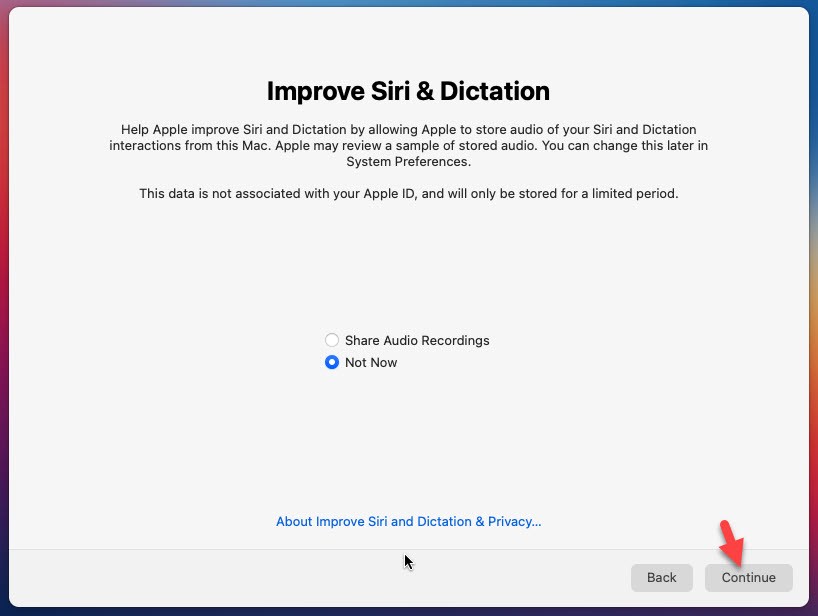
#15: Now, improve Siri by Allowing the share of Audio Recording. Otherwise, select Not Now and click Continue.
#16: The dark theme was introduced in macOS Catalina and in macOS Big Sur you can select an appearance theme (Light, Dark, and Auto) and click Continue.

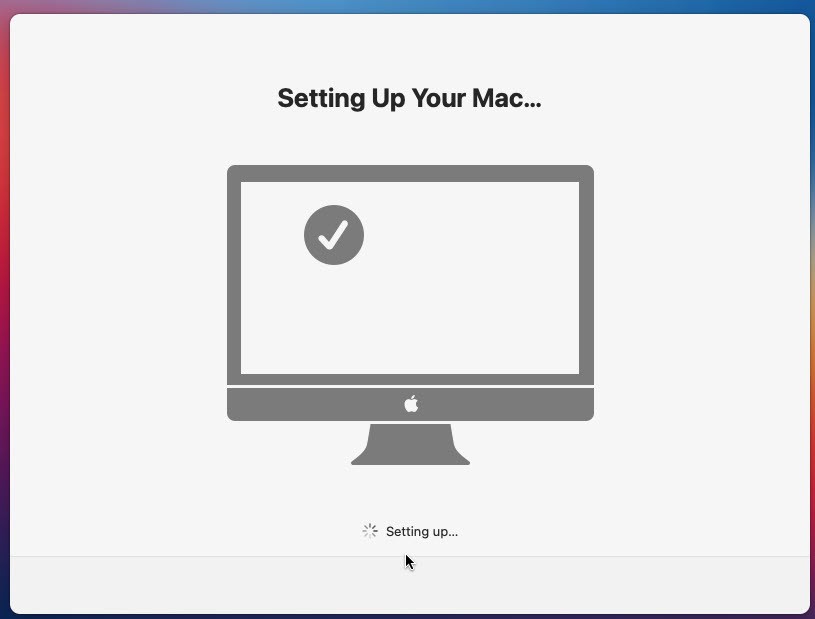
#17: Wait for a while to complete the setting up of your Mac.
#18: Finally, after a long time and spending hours. You have installed macOS 11 Big Sur on Virtualbox on Windows successfully without facing BiErrorDomain Error 3.
Download macOS Big Sur Wallpapers for your Desktop
Now you have macOS Big Sur on your system or on your VirtualBox on Windows. So, having the same wallpaper for a long time will be boring and you might be curious to download and find another macOS Big Sur wallpaper. However, macOS Big Sur has more than 10 wallpapers with a different time-zone. Therefore, download macOS Big Sur wallpaper for your desktop, iPhone, and iPad.
Read Next:
- How to Install macOS Catalina on Virtualbox on Windows
- Install macOS Catalina on Vmware on Windows
- Delete/Uninstall Application in macOS Big Sur
Conclusion
This article guide you A to Z on how to macOS Big Sur on Virtualbox on Windows. Whatever, you need for the macOS 11 Big Sur such as required files, creating a virtual machine, customizing Virtual machine, adding Virtualbox Code to CMD, and clean installation of macOS Big Sur.
Remember, you can install any of the macOS Big Sur installer versions with the same method. You don’t need to search for that method on Google. Because the following steps will work for all types of macOS 11 Big Sur installer version.