The new Apple operating system has several major features and new improvements in software. This update is much better than all previous Mac OS. Apple worked hard and developed macOS Big Sur with new ideas. It has many changes on menu bars, Dock, Notification center, Safari Web Browser, Maps, Messages, Control Center, and tons of other handy features.
However, Apple released the first developer beta at WWDC on June 22. This developer beta is for Apple’s developer to check it out and send their feedback in order to fix issues in the next beta version. Although the public beta is coming in this month and no specific date is announced by Apple. The public beta is free and everyone can use it to install macOS Big Sur on their system.
So, you are here to get the new method on how to install macOS Big Sur on Vmware on Windows. The virtual machines are the best platform for Windows, Mac, and Linux users to get an experience of all the newly released operating system. You can run multiple operating systems at a time on a single host. So, Vmware is one of the virtual machines that allows you to install macOS Big Sur.
You know the developer beta or without the final version of macOS Big Sur, all the other macOS Big Sur installer beta has several errors. The bugs can crash your data, that’s why Vmware is the best option for you to give macOS Big Sur a try. Once the final version is released then install it on your main host.
To install macOS Big Sur on Vmware on Windows, you will need to download the required files. Besides that, there will be more than 6 steps to complete the macOS Big Sur installation on Vmware. Therefore, be patient and pay attention to all steps.
Steps to Install macOS Big Sur on Vmware on Windows
Step 1: Required Files
- Download macOS Big Sur ISO File
- Download VMware Workstation Pro latest version
- And download Vmware Unlocker file
Step 2: Install Vmware Workstation Pro on your Windows
Once you download the Vmware Workstation from the above link. Then, follow the below steps to install the Vmware on your Windows.
- Go to Download folder and Double-click the Vmware installer setup. After that, it will prepare Vmware for the installation.
- Now, you will see the “Welcome to the Vmware Workstation Pro Setup Wizard“, Here, click the Next button.
- On the End-User License Agreement page, accept the terms in the license agreement, and click the Next button.
- Select the folder where you want to install VMware and check the box for Enhanced Keyboard Driver. Then, click the Next button.
- On User-Experience-Settings click Next button.
- Click Next.
- Finally, the Vmware Workstation Pro is ready to install on your Windows. So, click the Install button.
- Once the installation is done then click the Finish button.
check the complete guide on how to download and install Vmware Workstation on Windows
Step 3: Run macOS Unlocker
The reason to install Vmware unlocker before going to install macOS Big Sur on Vmware is to have the Mac OS X option on Vmware. Remember, before you want to install any Mac OS operating system on Vmware. You should install Vmware unlocker, otherwise, you will not have the Mac OS X option on Vmware.
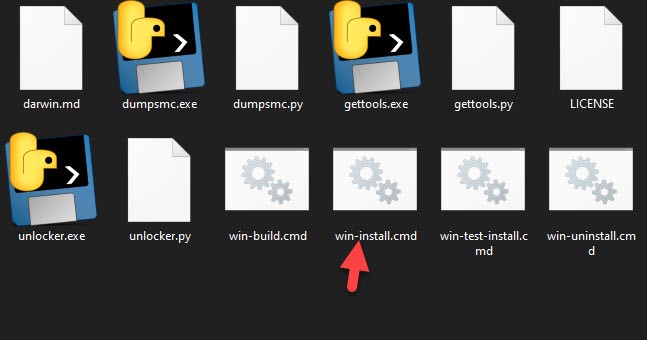
If you have downloaded the Vmware Unlocker from the above link. Then, you need to extract the file using WinRAR or 7ZIP software. Once the file is uncompressed then open the unlocker folder and follow the below steps.
#1: Once you open the unlocker folder. Then, Right-Click on Win-Install.cmd and run as administrator.
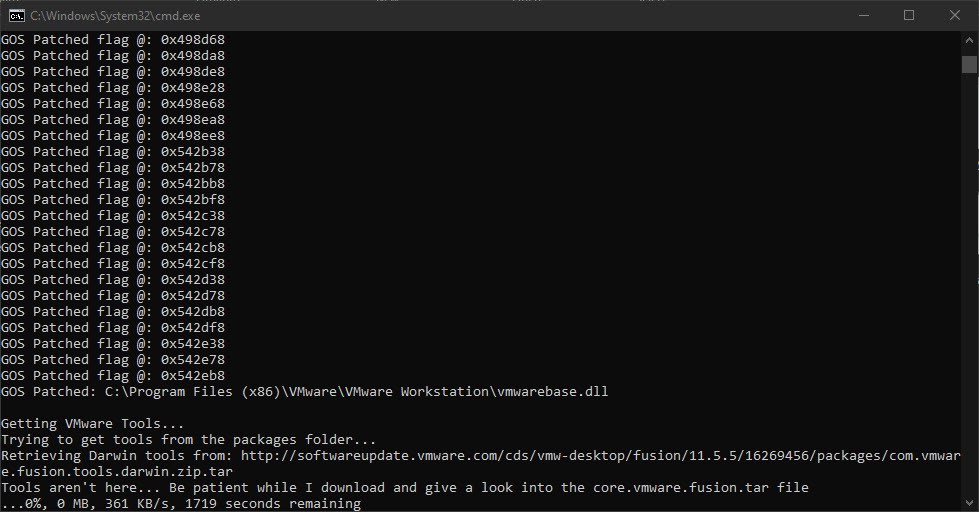
#2: Vmware Unlocker is running and installing. Just wait for a while to complete the installation. After that, cmd will close automatically.
Step 4: Create a New Virtual Machine for macOS Big Sur
Once you installed Vmware Unlocker for macOS big Sur. Then, it is time to create a new virtual machine to install macOS Big Sur on Vmware on Windows. Therefore, open the Vmware Workstation Pro and follow the below steps.
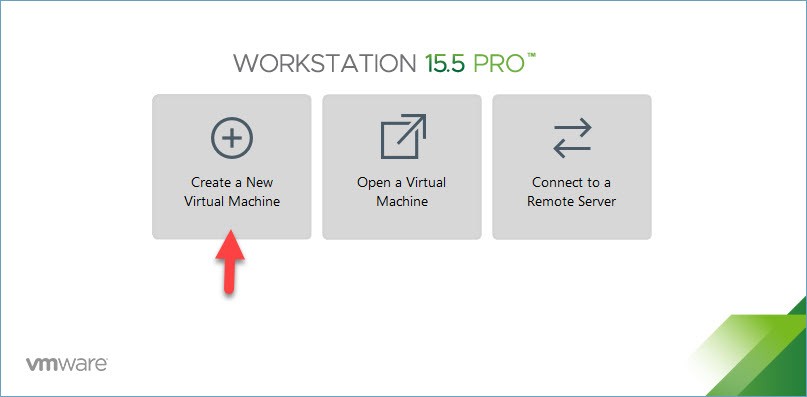
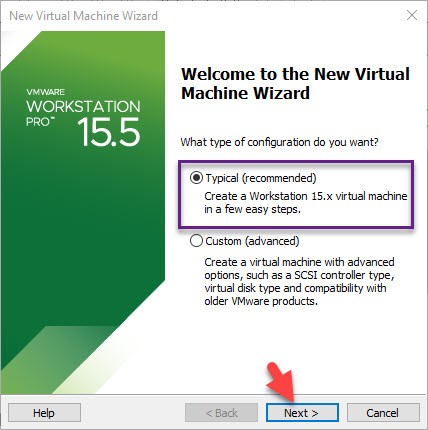
#1: Click on Create a New Virtual Machine then select Typical (Recommended) and click Next.
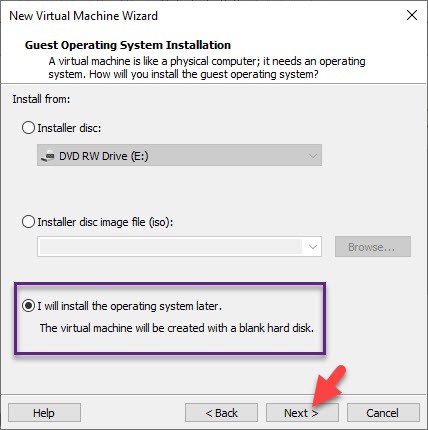
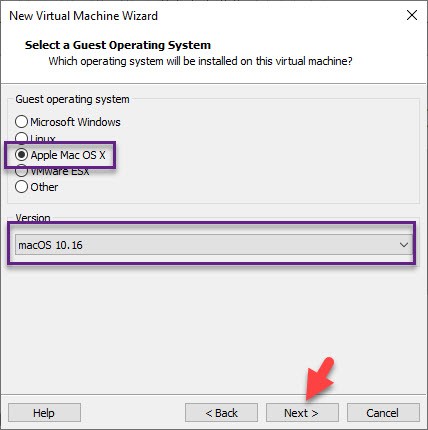
#2: On guest operating system installation select the last option and click the Next. After that, select Apple Mac OS X (If you didn’t install Vmware Unlocker then you won’t see this option). Then, select macOS 10.16 for Mac OS X version and click Next.
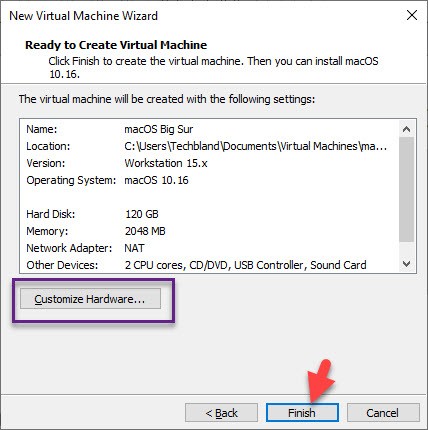
#3: Give a name to the virtual machine and change the default location of the macOS Big Sur installation folder if you want. Then, click Next. After that, specify disk capacity for macOS Big Sur and select the Store virtual disk as a single file. Then, click Next.


#4: As you created a virtual machine for macOS Big Sur. Now, bring some changes to the macOS Big Sur virtual machine. Therefore, click the Customize Hardware.
Step 5: Bring Changes to Virtual machine
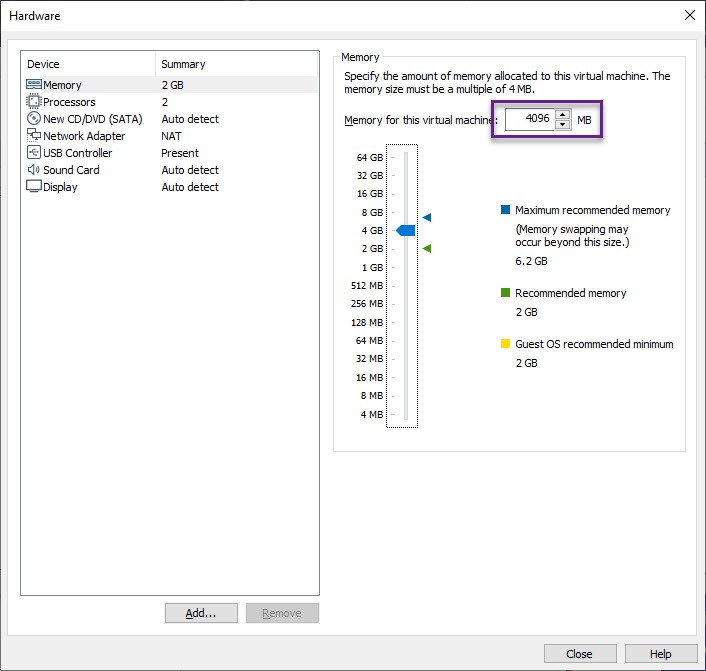
#5: Increase Memory size for a virtual machine from 2GB to 4GB or above for better performance.
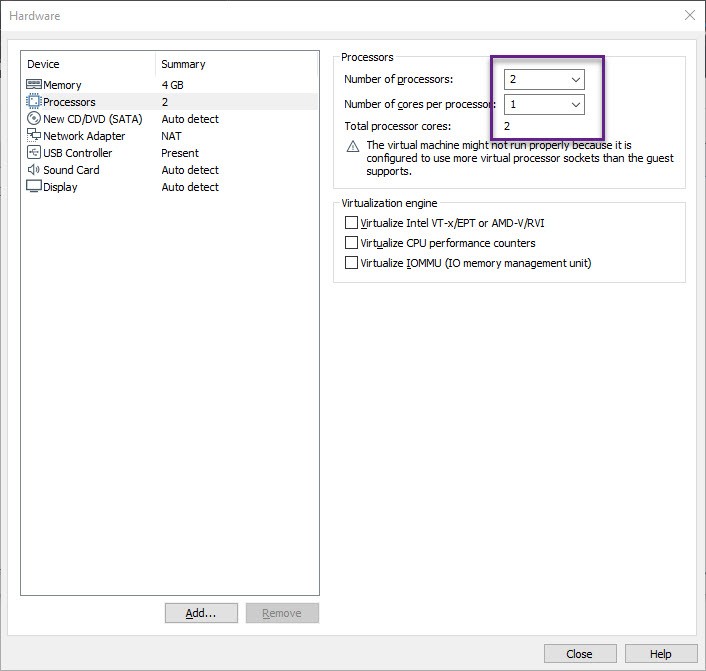
#6: Now, tap on Processor and increase the number of processors. The higher to select the better performance you see.
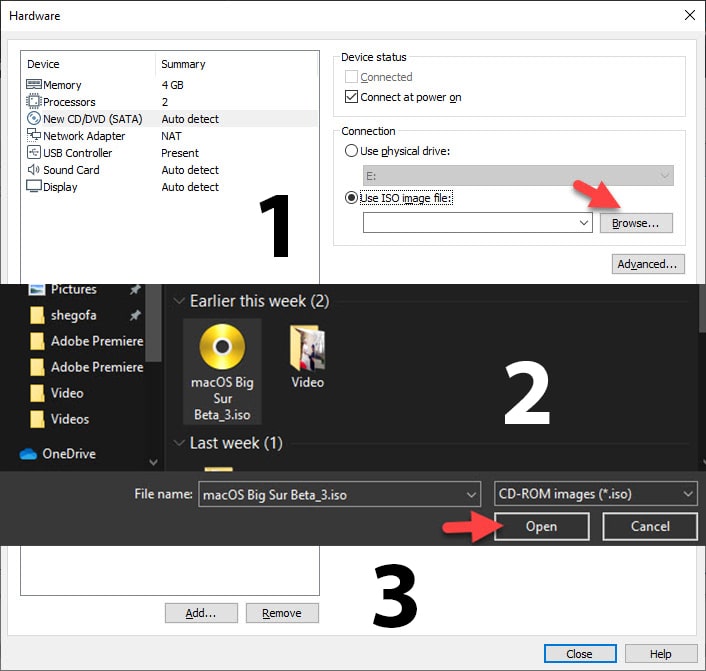
#7: Here, tap on New CD/DVD (SATA) and select the Use ISO Image File then click the Browse button. After that, insert the macOS Big Sur ISO file that you downloaded from the above link. At last, click the Close button to apply all the changes you made.
#8: Finally, you made all the changes to the macOS Big Sur virtual machine. Therefore, click the Finish button and close the Vmware.
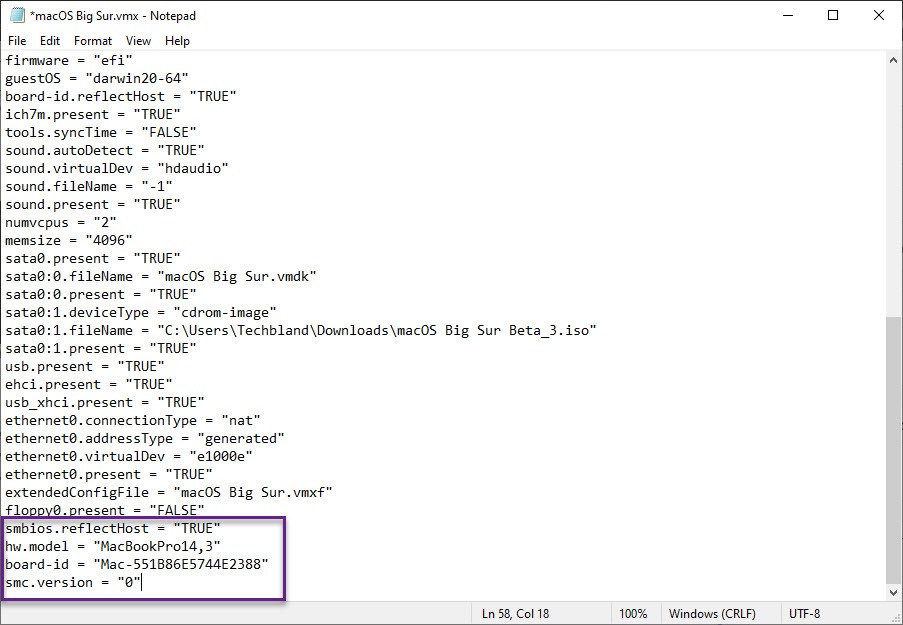
Step 6: Add Code to macOS Big Sur VMX File
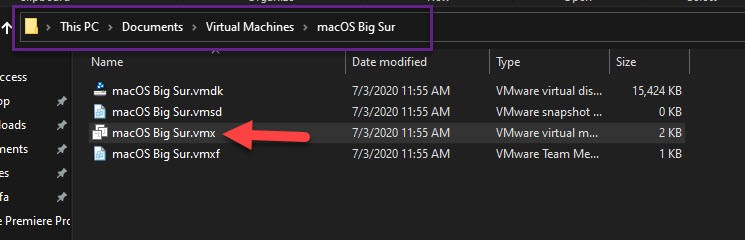
Once you create the new virtual machine for macOS Big Sur then you need to edit the macOS Big Sur VMX file. You can find it on Document > Virtual machines > macOS Big Sur. If you changed the default installation folder then you can find it to the new folder where you set it.
Now, Right-Click on macOS Big Sur.vmx file and open it with Notepad or other third-party code editors.
So, copy the below code and paste it at the bottom of the macOS Big Sur VMX file. Afterward, save the file and close it.
smbios.reflectHost = "TRUE"
hw.model = "MacBookPro14,3"
board-id = "Mac-551B86E5744E2388"
smc.version = "0"
Step 7: Run macOS Big Sur Virtual Machine
Till here everything is fine and you did all the steps correctly. Now, open Vmware and select macOS Big Sur virtual machine from the left side of the page. After that, click the power on option to start the virtual machine.
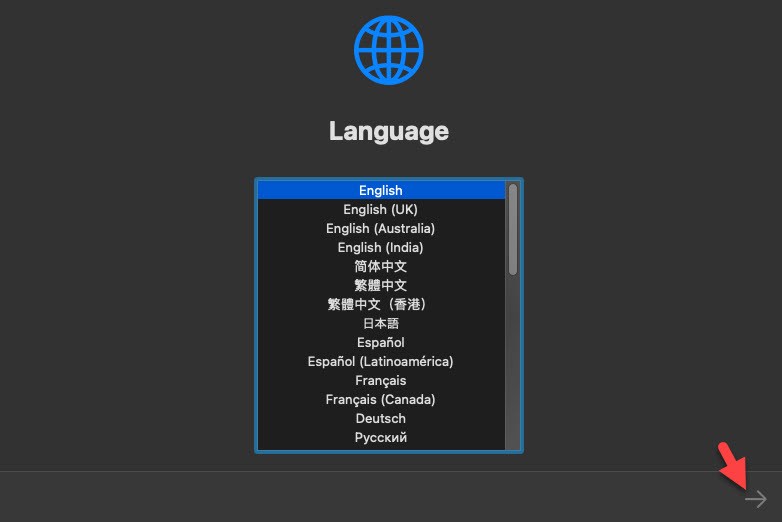
#1: On the first page, it will ask you to select your Language and click Continue.
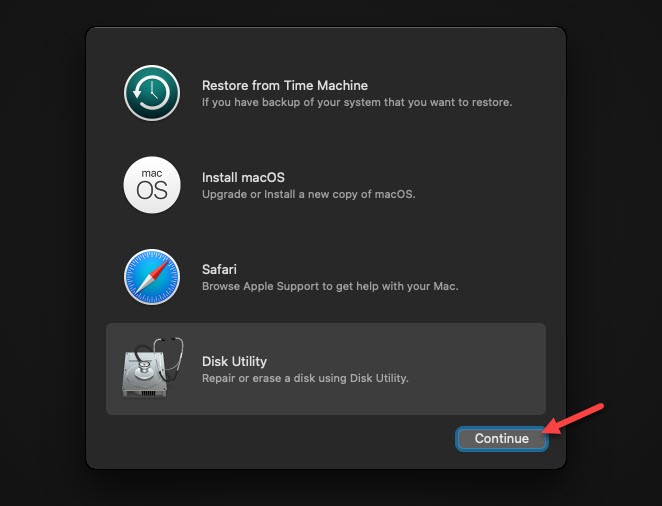
#2: tap on Disk Utility and click Continue.
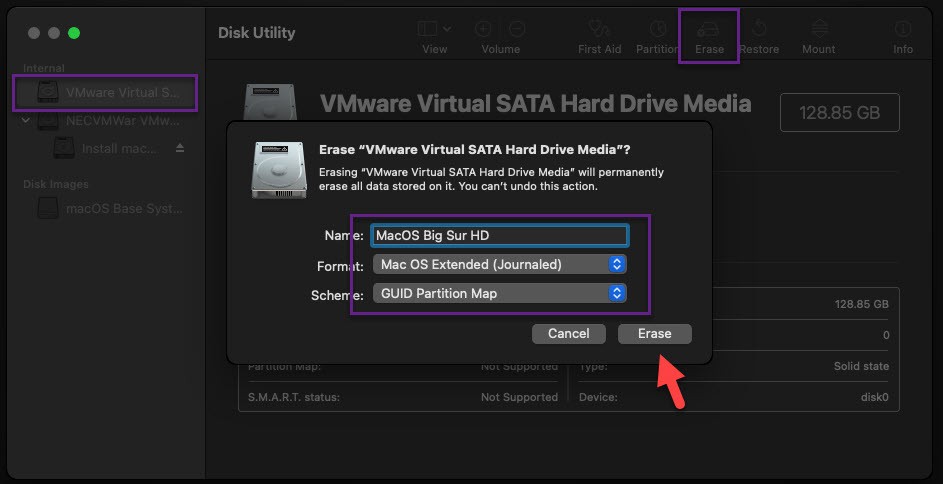
#3: Now, tap on Vmware Virtual System from the left side of the page and click the Erase button from the top menu bar. After that, set a new name to the Vmware Virtual system and click the Erase button.
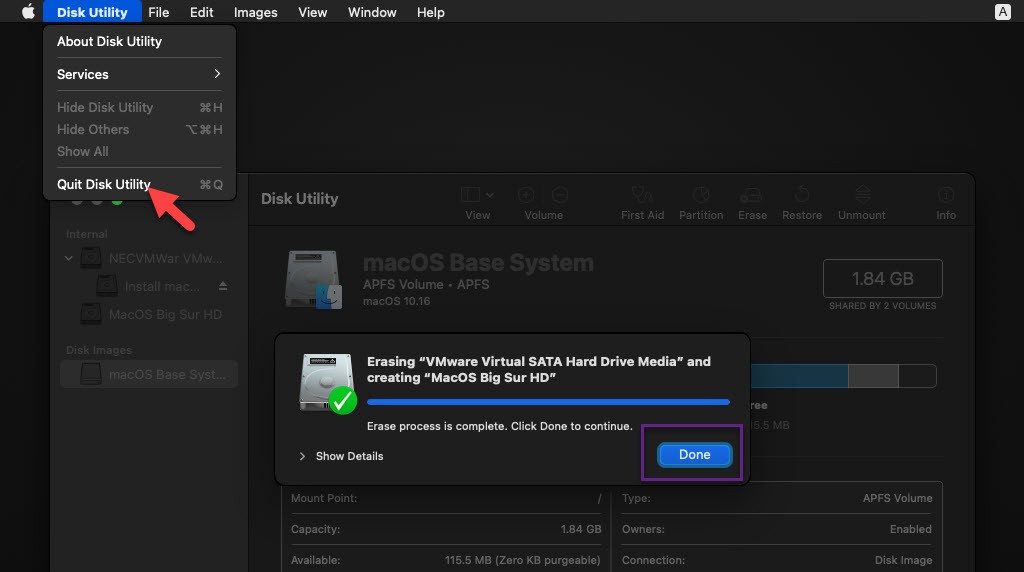
#4: Wait for a while to erase the hard disk. Once it is done then click Done and go to Disk Utility and click the Quit Disk utility.
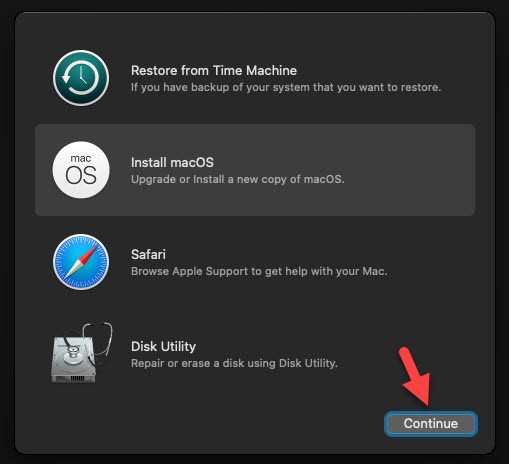
#5: tap on Install macOS and click Continue.
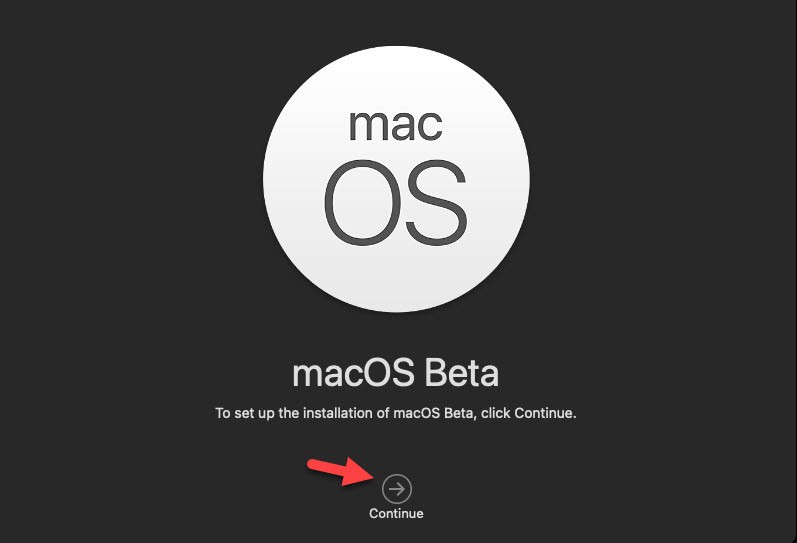
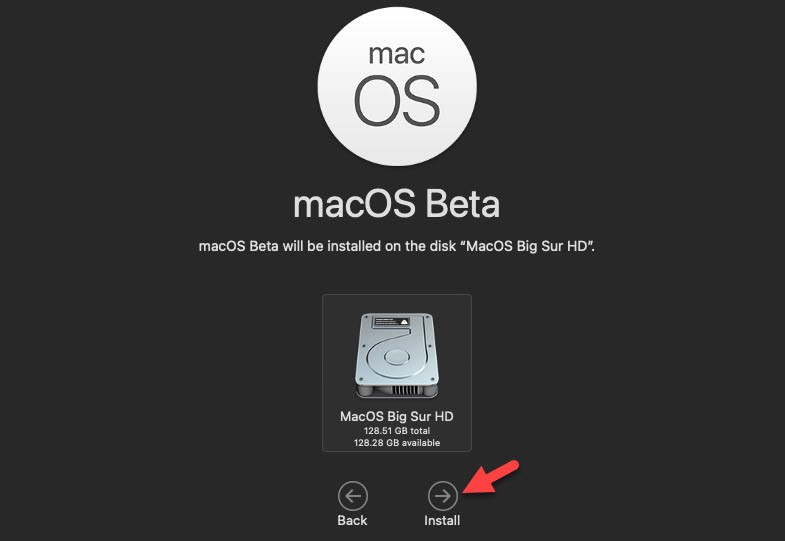
#6: To set up the installation of macOS Beta click the Continue button.
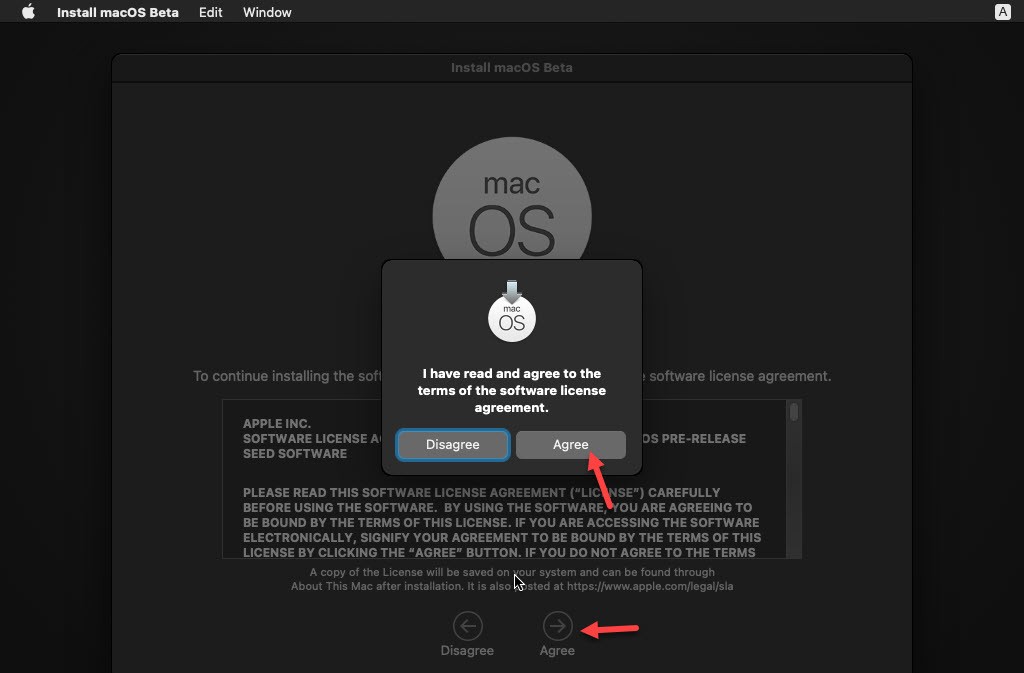
#7: Agree to the terms and conditions of macOS Big Sur software. Therefore, click the Agree button.
#8: Select the hard disk you want to install macOS Big Sur. though we created this hard disk a few steps before. Therefore, select the hard disk and click the Install button.
Now, macOS 11 Big Sur installation will start and it will take 30 minutes to complete the installation. You don’t need to do anything, just be patient and wait for it.
Step 8: Clean Installation of macOS Big Sur on Vmware
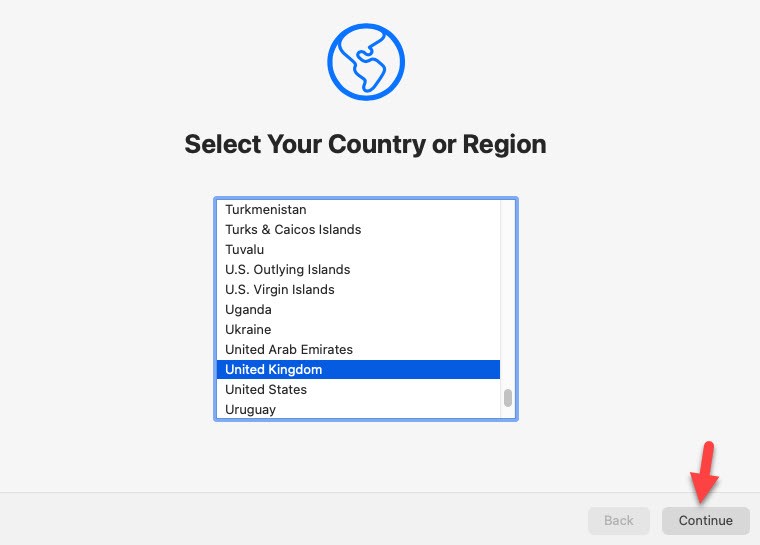
#1: The first page will ask you to select your Country and Continue.
#2: On Written and Spoken Language, if you want to change your language, keyboard layout, and dictation. Then, click Customize Settings Otherwise, click on Continue.

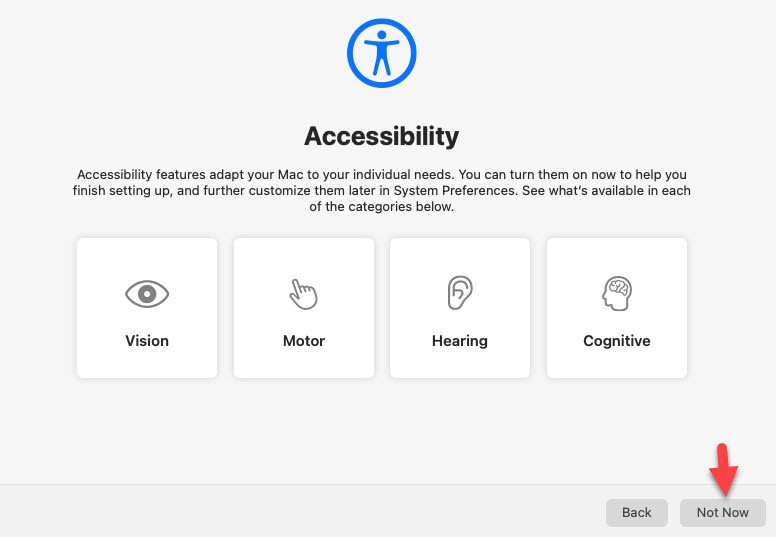
#3: You have several Accessibility features like vision, motor, hearing, and cognitive. In case, you don’t want to set up right now then click Not Now.
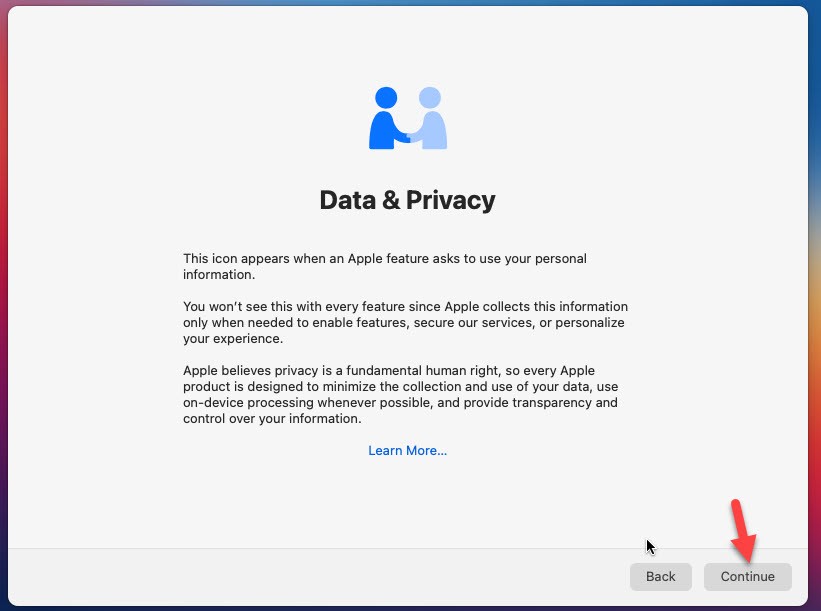
#4: On Data and Privacy click Continue.
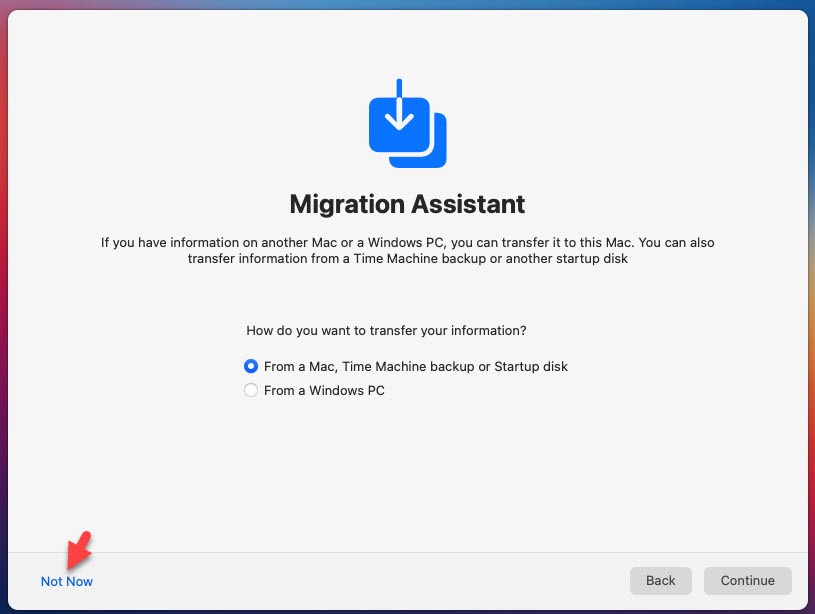
#5: If you want to transfer data from your previous computer. Then, select the option, otherwise, click Not Now.
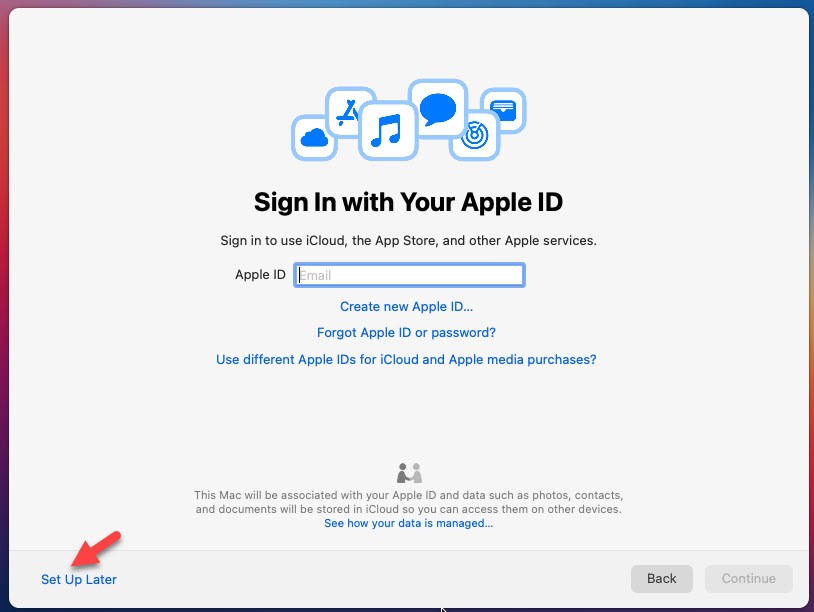
#6: For now, you don’t need to sign in to your Apple ID. Therefore, click the Set Up later and tap on Skip.
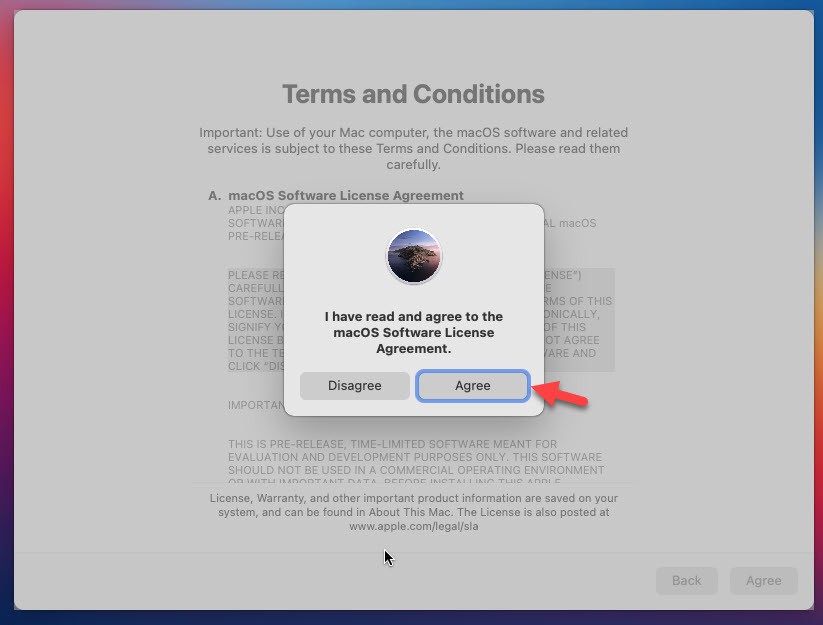
#7: To Continue the installation you need to agree to the terms and conditions. Therefore, click the Agree button.
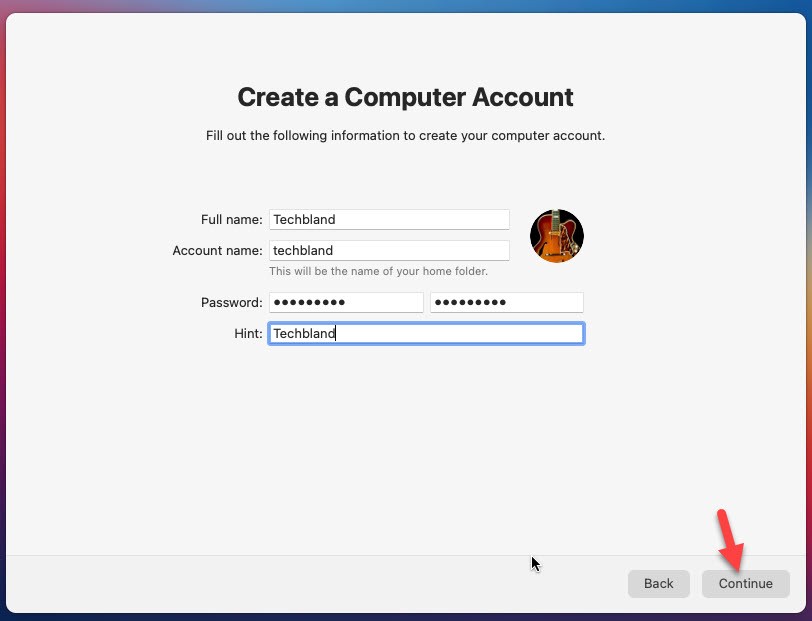
#8: Now you have to create a new computer account for macOS Big Sur. SO, fill out the below options.
- Type your Full Name
- The system will take your Account Name Automatically.
- Type strong Password
- And give a password hint, in case, you forget in the future. Then, a password hint will help you to recall the password.
- Click Continue
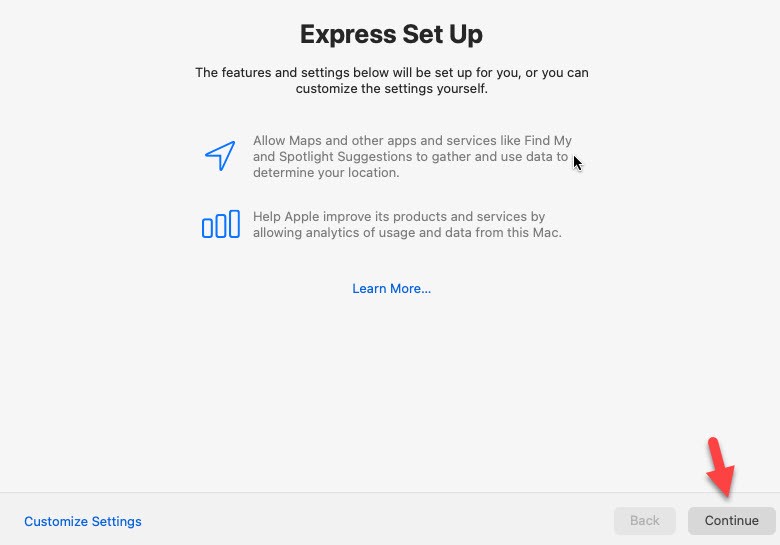
#9: Click Continue on Express Set Up page.
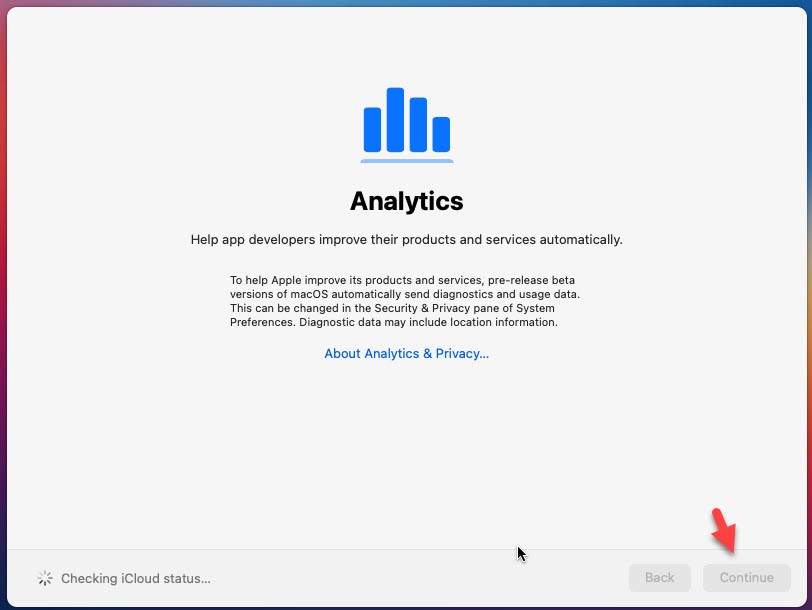
#10: Click Continue on Analytics page.
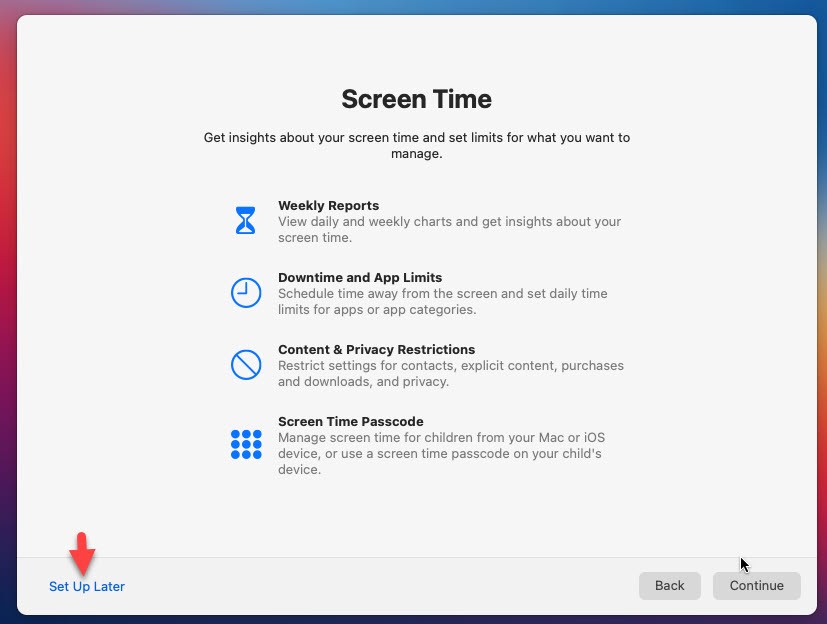
#11: You don’t need to set up screen time right now. Though you can do it once the installation is done. Therefore, click the Set Up later.
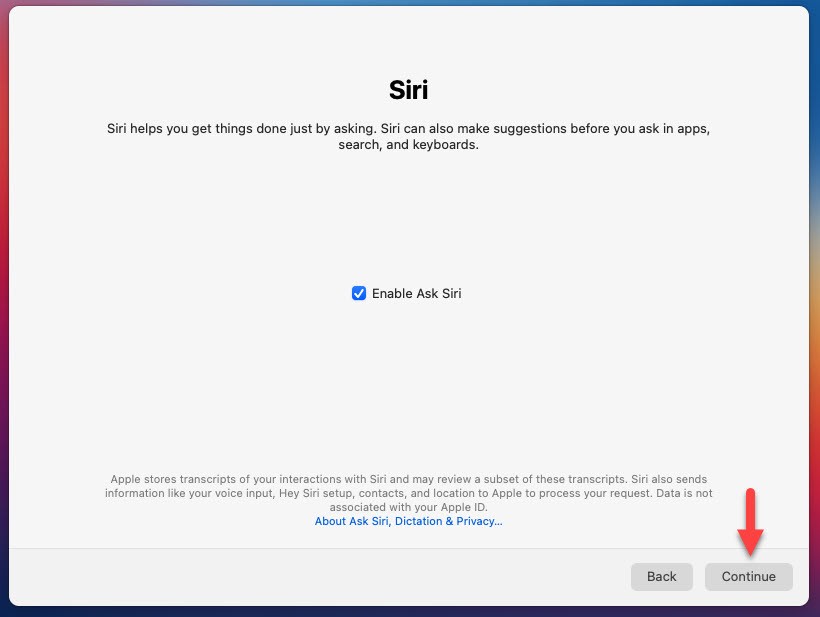
#12: This option is in macOS Big Sur while installing macOS 11. Here, tap on Enable Ask Siri and Continue.
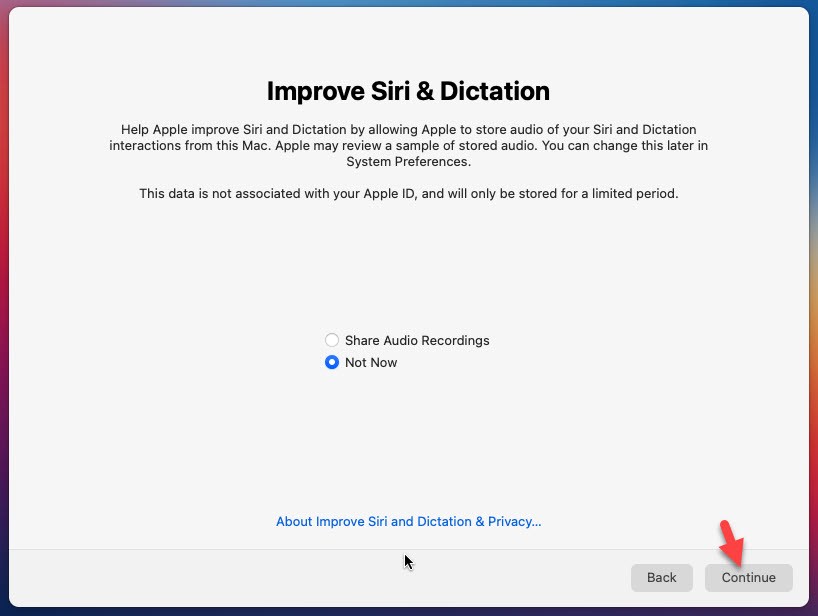
#13: On Improve Siri and Dictation select Not Now and click on Continue.
#14: You have three theme options for macOS Big Sur (Light, Dark, and Auto). Select any of the themes for your macOS Big Sur.

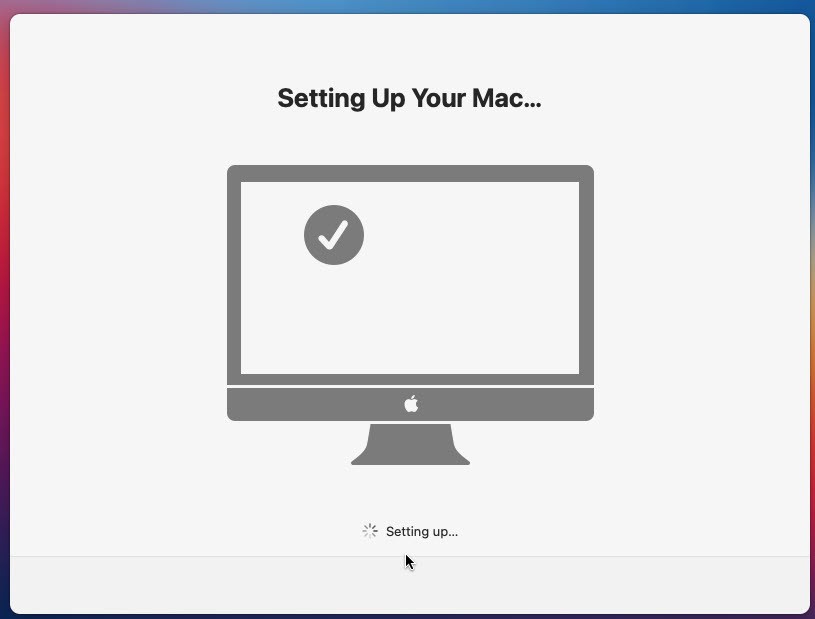
#13: The installation is setting up your Mac, Simply wait for a while.
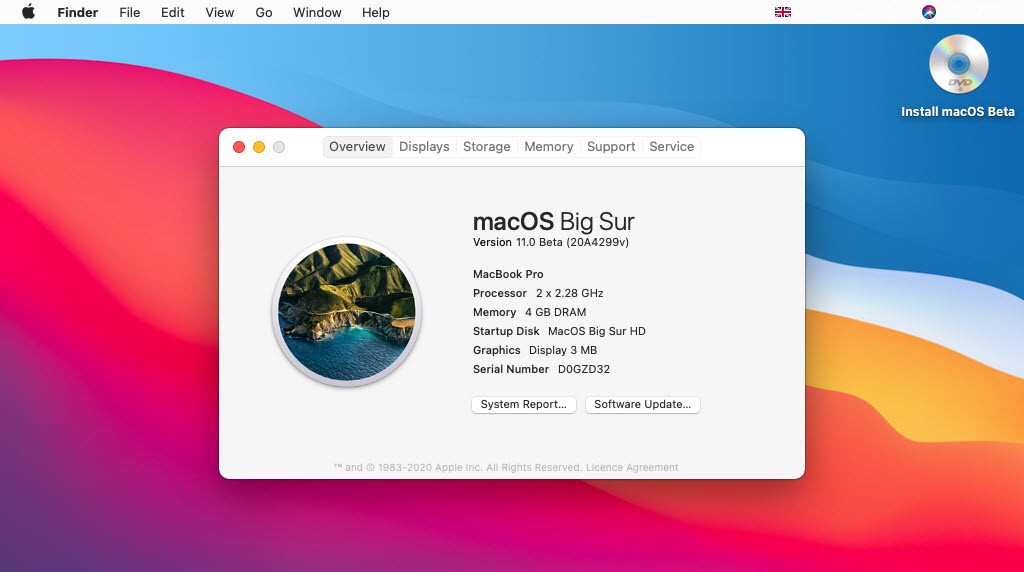
#14: Finally, after a long time the macOS 11 Big Sur has been installed successfully on your Vmware on Windows.
Download macOS Big Sur Wallpapers
While Apple released the latest operating system called macOS Big Sur at WWDC 2020. Meanwhile, Apple introduced the new wallpapers of macOS Big Sur with different time-zone. You will have macOS Big Sur wallpaper for your desktop, iPhone, and iPad. There are more than 10 wallpapers and all are beautiful and look awesome.
Therefore, download macOS 11 Big Sur wallpaper for your desktop. As you are done with macOS Big Sur installation and you have installed successfully. So, download the new wallpaper and set it as a background of your screen.
Read Next:
- How to Create macOS Big Sur bootable USB on Windows
- Download macOS Big Sur dmg File
- How to Install macOS Big Sur on Unsupported Mac
- How to Download and Install macOS Big Sur on Mac
- Delete/Uninstall Application in macOS Big Sur
Conclusion
Installing macOS Big Sur on virtual machines like Virtualbox, Vmware Workstation, Vmware Fusion, and other virtual machines are the same. You will need to follow the same steps and the same method. But, only a few steps are different and you need to perform its own virtual machine step.
So, the method you learn in this article will work with any macOS 11 Big Sur installer versions. As the developer beta is available and the public beta is coming in this month. So, you can follow these steps to install the public beta on Vmware on your Windows.