How to Install MacOS Catalina on Vmware on Windows?
Today, I am going to guide you on How to Install MacOS Catalina on Vmware on Windows. However, you might get the idea that the MacOS Catalina is the most recent MacOS Operating system and it is newly released and announced by the worldwide developer’s conference 2019 (WWDC19). Although MacOS Catalina is the 10.15 major release of the MacOS operating system and MacOS Catalina is the 16th major release of Apple company. People can use MacOS in desktop and Macintosh. Moreover, you can go ahead with MacOS Catalina in virtualization software, However, MacOS Catalina will release till the end of this year but you can try it in Virtualbox and Vmware workstation which is the best platform to test any new operating system before going to install on the original system.
You know Apple works a lot on their every operating system that they release newly, Therefore, they included the most awesome features which are best rather than MacOS Mojave and High Sierra. even they work a lot on the security performance of MacOS Catalina to not be hacked and users can trust easily. So, in this article, you will get about the most useful features of MacOS Catalina later. So, before going to install the full version of MacOS Catalina on your system you can install the developer in the virtual machine. Moreover, MacOS Catalina named Santa Catalina Island which is located in southern Los Angeles.
The easiest way to test any operating system like Windows, Linux, and MacOS is to go with any virtualization software such as Virtualbox, Hyper-V, and Vmware which is the best virtualization software that allows the user to get a great experience of Operating system. Therefore, in this article, I will show you the installation of MacOS Catalina on the Vmware Workstation. However, to install MacOS Catalina on Vmware you need to create the VMDK file from the beta version to ISO file of Vmware or Virtualbox image. Moreover, you will get the required files to install MacOS Catalina on Vmware on windows.
Related Article:
- How to install MacOS Catalina on Virtualbox on Windows
- How to install MacOS Mojave on Virtualbox on Windows
- Install MacOS Mojave on VMware on Windows
- How to install MacOS High Sierra on Virtualbox on Windows
What’s new in the MacOS Catalina Beta?
MacOS Catalina 10.15 is the most recent release of the MacOS operating system and Apple has announced its new operating system in WWDC19. Moreover, Apple has included very useful and amazing features inside the MacOS Catalina which is handy for Mac OS users. However, these features are the best than MacOS Mojave and MacOS Catalina has more features than Mojave. So, what’s new in the MacOS Catalina beta are mentioned below.
1. Bring Your iPad App to Mac:
By the heading you will get what it means, MacOS Catalina allows you to bring your iPad apps to Mac easily and you can do it in your iPad settings.
2. Sign in with Apple:
MacOS Catalina 10.15 beta version allows you to sign in with your Apple id to gives you a fast, secure and privacy-friendly way for people to set up an account.
3. SwiftUI:
Well, this feature is a modern approach to build user interfaces for MacOS, iOS, WatchOS, and tvOS. However, you can build dynamic interfaces faster than before using Declarative, Composition-based programming.
4. Combine:
Another best feature of MacOS Catalina which is Combine and it is a new framework that provides a declarative Swift API for processing values over time. Although these values can represent user interface events, scheduled events, network responses, and many other kinds of asynchronous data.
5. Apple CryptoKit:
Cryptokit feature is new in the MacOS operating system and this feature included in the recent release of MacOS Catalina. You can use the new apple Cryptokit framework to perform common cryptographic operations securely and efficiently.
Here are some more features of MacOS Catalina 10.15 which is the most useful and awesome.
- iTunes Gets Split Into 3: Music, Podcasts, and TV
- Sidecar Makes iPad a Secondary Display for Mac
- Find Me
- Activation Lock
- Screen Time
- Accessibility Features: VoiceControl and Zoom Display
Step 1. Required files to install MacOS Catalina
- Pitch Tool: To install MacOS operating system or to create a new virtual machine on Vmware workstation you will need at first to install unlocker because Unlocker tool is a simple tool that enables Apple Mac OS X Guest option, otherwise you will not be able to install or create any MacOS virtual machine.
- Download and Install Vmware Workstation: before going to install MacOS Catalina 10.15 on VMware using windows 10 you need to download VMware from its official website and install it on your system. The main purpose to install Vmware on your PC is to install macOS Catalina otherwise you will not be able to complete the installation.
- Download and Install WinRAR: the macOS Catalina VMDK file is compressed with WinRAR or 7zip to decompress or extract the MacOS Catalina VMDk file you will need to download the WinRAR or 7zip from its official website and install it on your PC then after that you can unpack the MacOS Catalina VMDK file.
- Download MacOS Catalina 10.15 VMDK file: To install MacOS Catalina you need to download the MacOS Catalina image file for virtual machines.
Step 2. Download and Install Vmware Workstation
As I mentioned that we will install MacOS Catalina on Vmware on windows and to install MacOS Catalina on VMware you will need to download VMware workstation pro or VMware workstation player from its website and install it on your PC. However, the installation is quite easy and simple if you don’t know then don’t worry here you can install Vmware workstation in a few steps.
- Download Vmware workstation pro or Vmware Workstation player
- When the download is completed then double click on the Vmware setup file
- Then you will see the welcome setup wizard and click on the Next button
- Now accept the terms in the license agreement and click on the Next button
- After that, you will custom setup and click Next button
- In user-experience settings click on the Next button
- If you want to create shortcuts icon then check the box and click on the Next button
- Now the installation is ready, So click on the Install button
- After a while, the installation will get done and Vmware has been installed successfully, So, click on the Finish button
Step 3. Install Pitch Tools
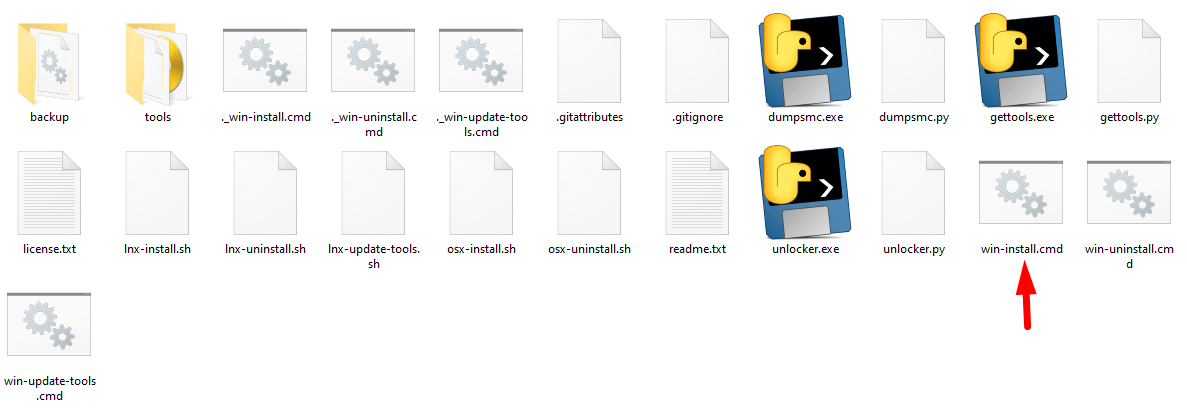
While you download and install the Vmware workstation on your PC then after that download Pitch tools from above and install it. to install unlocker tools you will need to extract pitch tools and right-click on the win.install.cmd and run as Administrator and it will install pitch tools for you.
Step 4. Create a New Virtual Machine
To install MacOS Catalina 10.15 on Vmware you will need to create a new virtual machine but before going to create a new virtual machine you have to install an unlocker tool if you didn’t installed yet then at first install unlocker tools then create a new virtual machine.
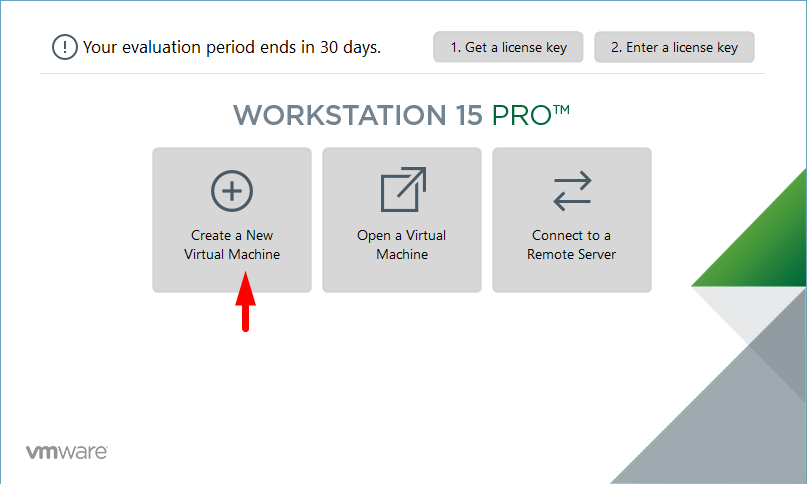
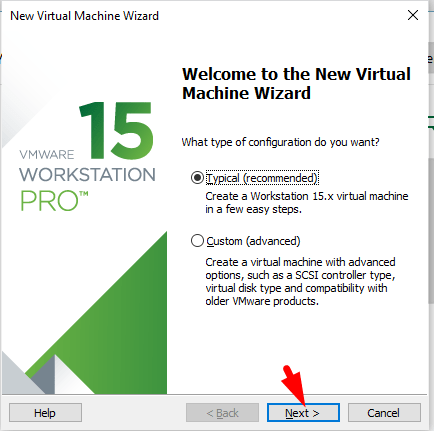
#1. open Vmware workstation and click on Create a new virtual machine after that, Select the Typical first option and click on the Next button.
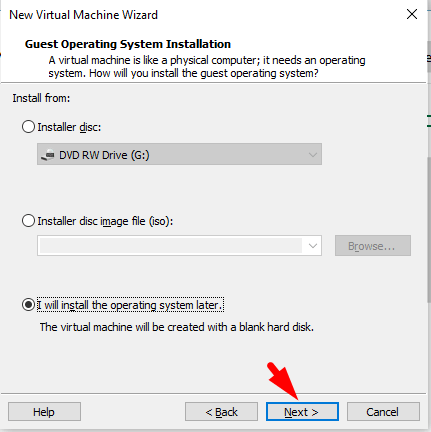
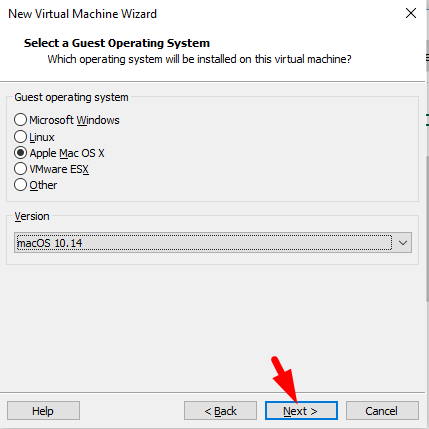
#2. For the guest operating system, you will have three options but you need to select the last option and click on the Next button. after that, select Mac S X as a guest operating system and click on the Next button.
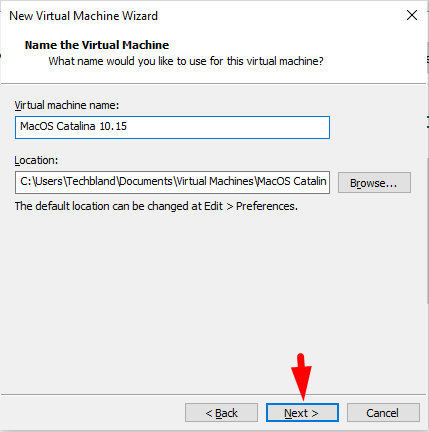
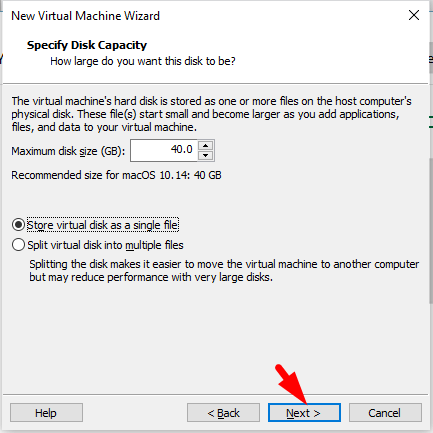
#3. In this step, give a proper name to the operating system and click the Next button. after that, specify disk capacity for MacOS Catalina 10.15 and click on the Next button.
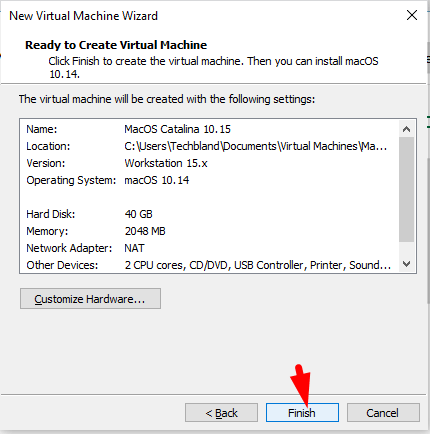
#4. This is all about creating a new virtual machine for MacOS Catalina 10.15 and we have created a Virtual machine successfully. So simply click on the Finish button.
Step 5. Customize Virtual Machine
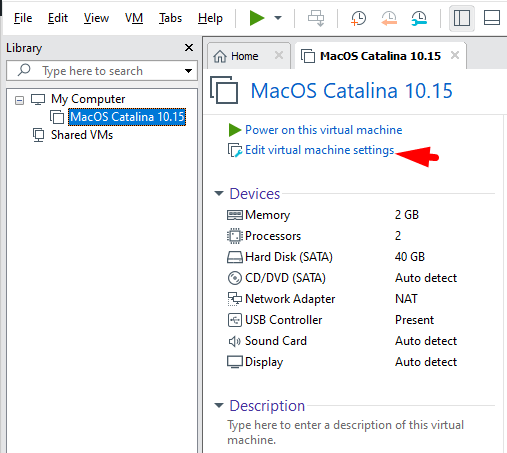
#1. select the MacOs Catalina Virtual machine and click on the Edit the virtual machine settings.
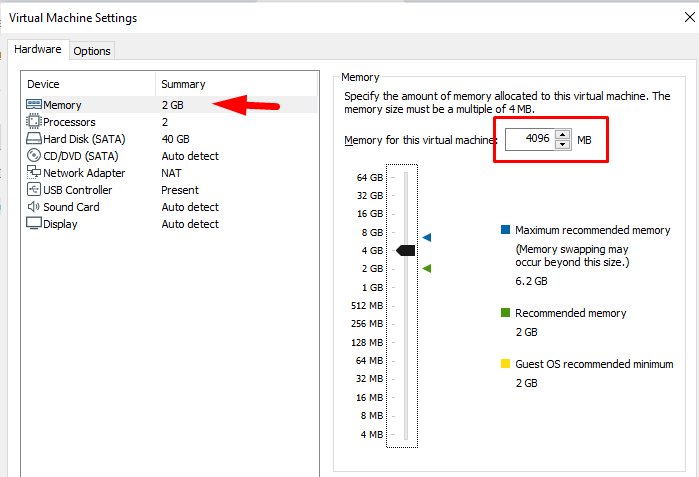
#2. In the first step, increase memory from 2GB up to 4GB for the virtual machine.
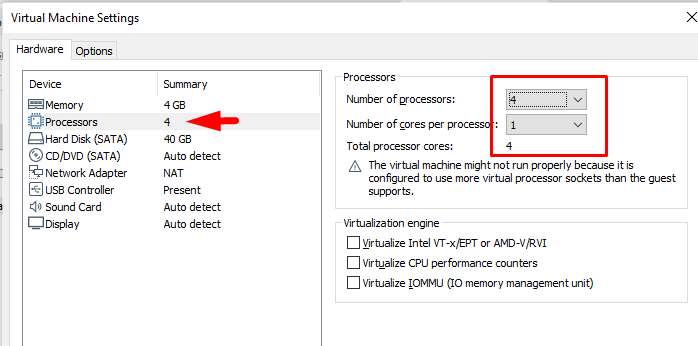
#3. After that, you need to increase the number of processors up to 4.
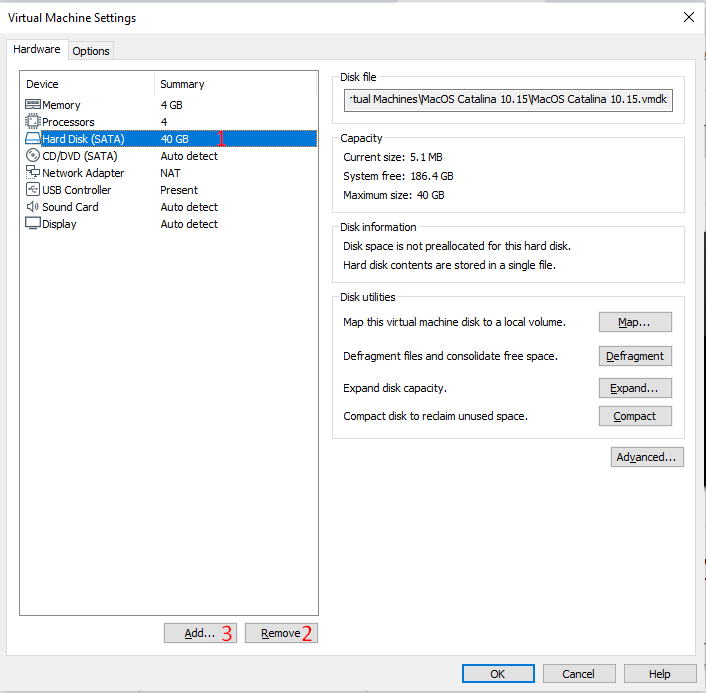
#4. Here, at the first remove the hard disk by clicking on the Remove button, after that, click on Add button to add a new hard disk.
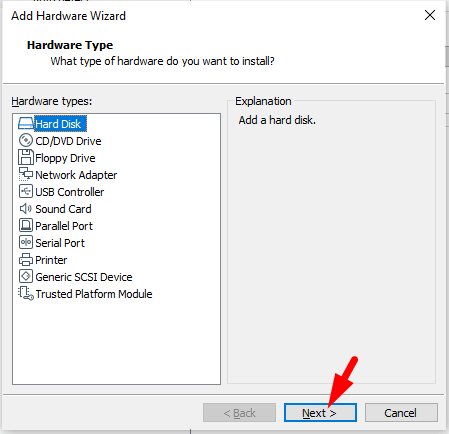
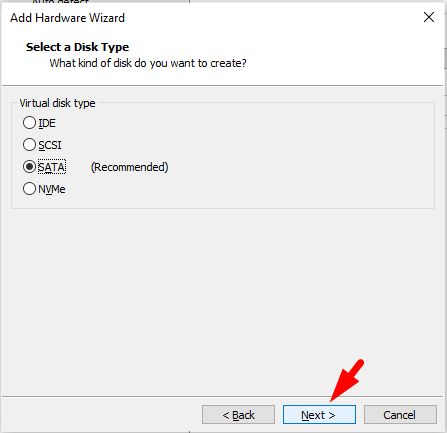
#5. Now select Hard Disk for Hardware Type and after that, select SATA and click on the Next button.
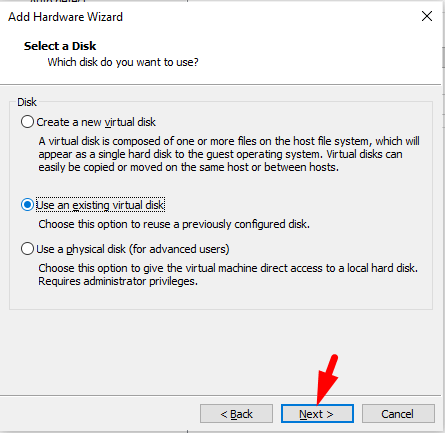
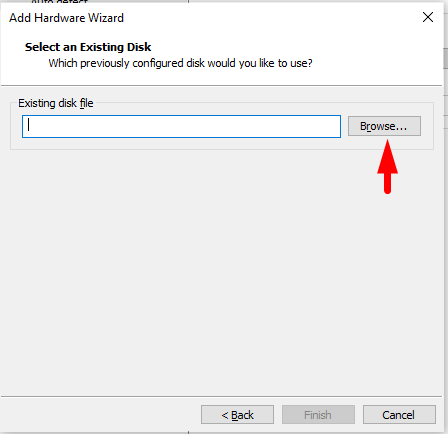
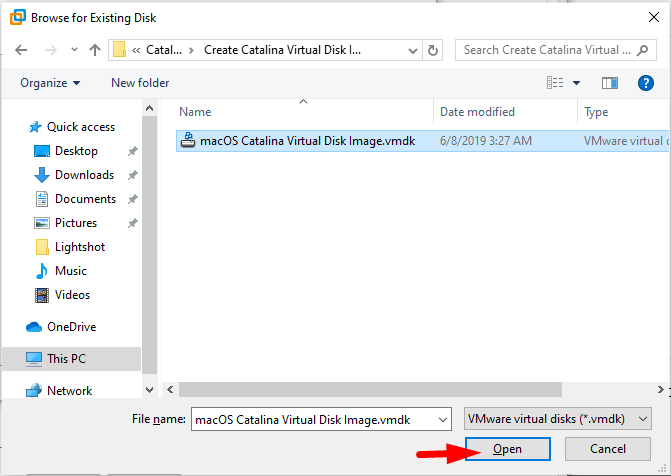
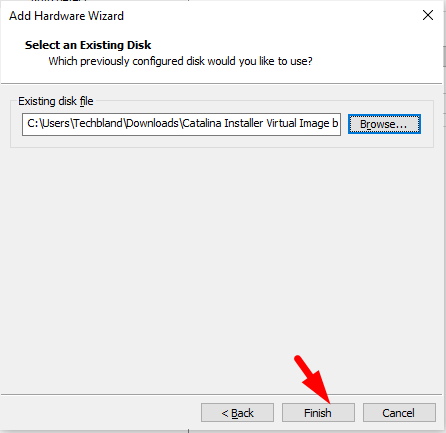
#6. Here, select the second option for Disk and click the Next button. after that, browse for MacOS Catalina VMDK file and when you select the MacOS Image file then click on open and then click on the Finish button.
When you have done with all of these options and steps than at the last click on the Ok button. After that close Vmware to add one line code and to close Vmware doesn’t click on the X button because it won’t close the Vmware properly. to close Vmware go to the File menu and click on the Exit option.
Step 6. Editing the VMX file
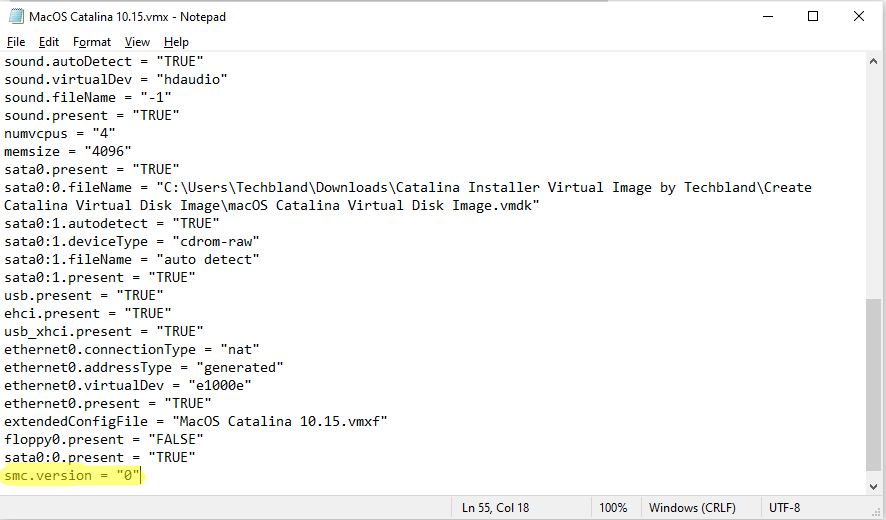
Now we have to add one line of code to the VMX file and VMX file is located on the virtual machine that you created in step 4. find the location and open MacOS Catalina 10.15.vmx, However, open the file with notepad and add the code at the bottom of the file and save the file then close it.
smc.version = “0”
Step 7. Install MacOS Catalina on VMware on Windows
You have done with all the steps and now everything is ready to go ahead. Therefore, open Vmware and install MacOS Catalina.
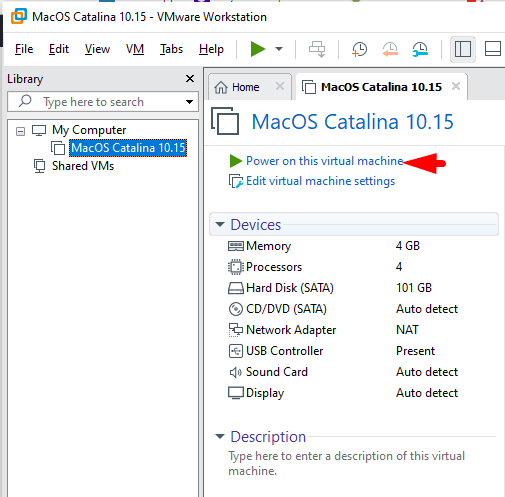
#1. Open Vmware and select the virtual machine that you created later, after that, click on the Power on this virtual machine option.
#2. After that, it will ask you to choose your country, therefore, select your country and continue.
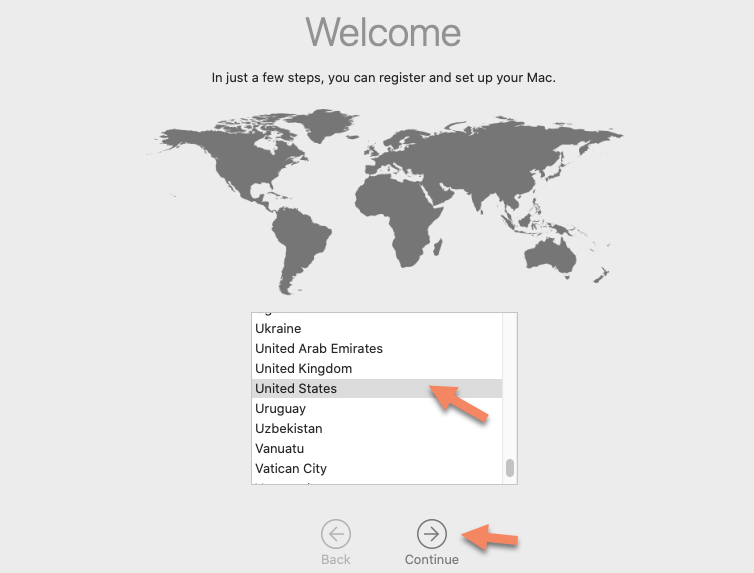
#3. Then, it will ask you to connect your macOS Catalina with an internet connection, Here, click on the third option and continue.
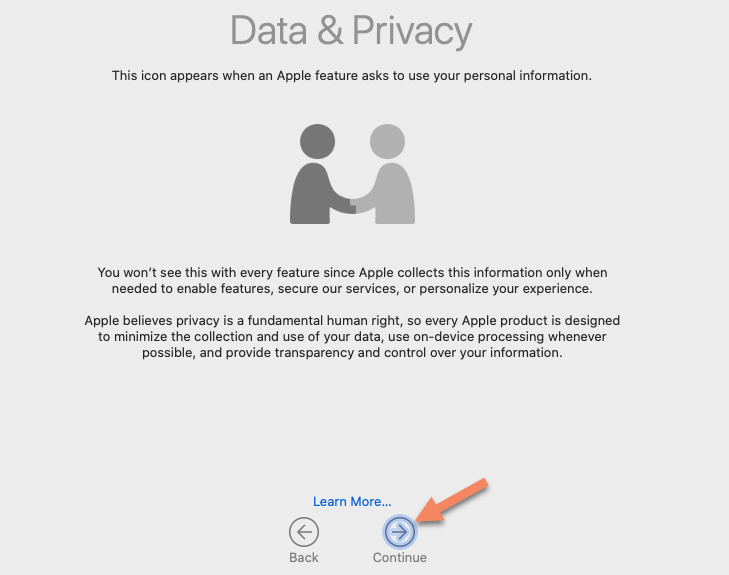
#4. In the next screen, you will see data and privacy, therefore, read it carefully and click on the continue button.
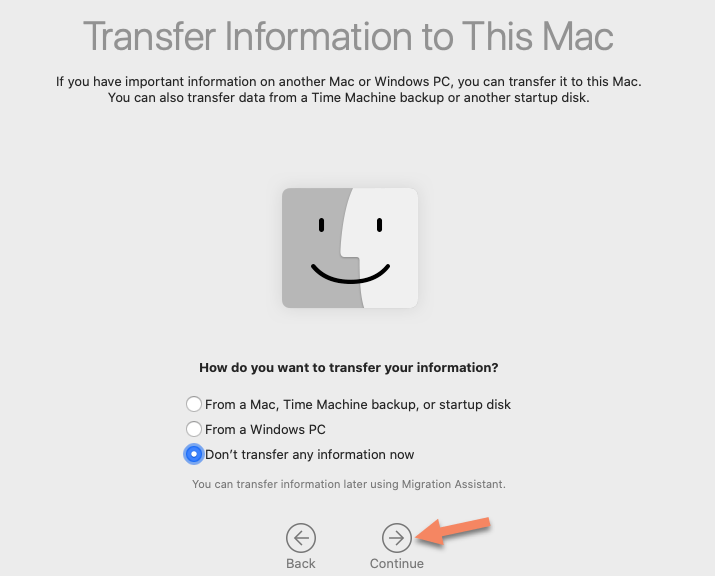
#5. If you don’t want to transfer information to this Mac then hands down, select the last option and click on the Continue button.
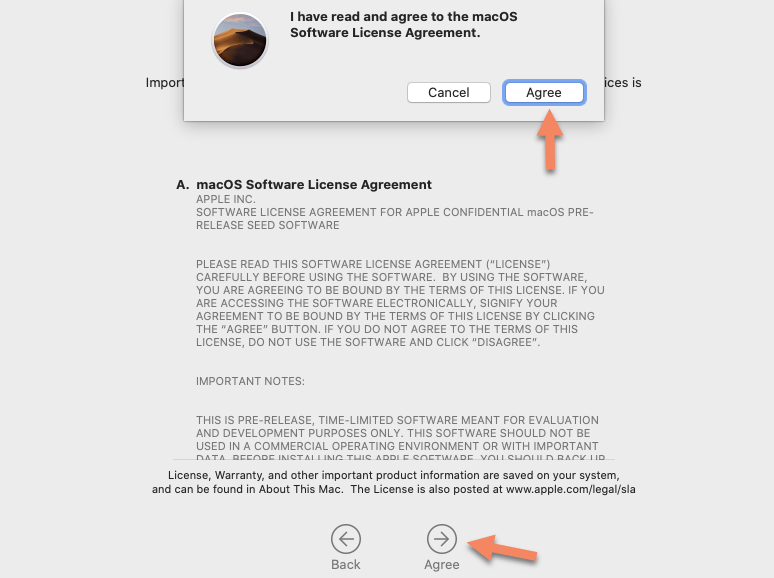
#6. Finally, it will ask about the Term and conditions. Therefore click on Agree.
#7. Now create a new computer account with following the below information.
- Full name: Write your full name.
- Account Name: Select your account name.
- Password: Write the password and verify the password.
- Hint: write something memorable about your password. When you forget your password. The hint will help you to find it back.
- Now, click the Continue button.
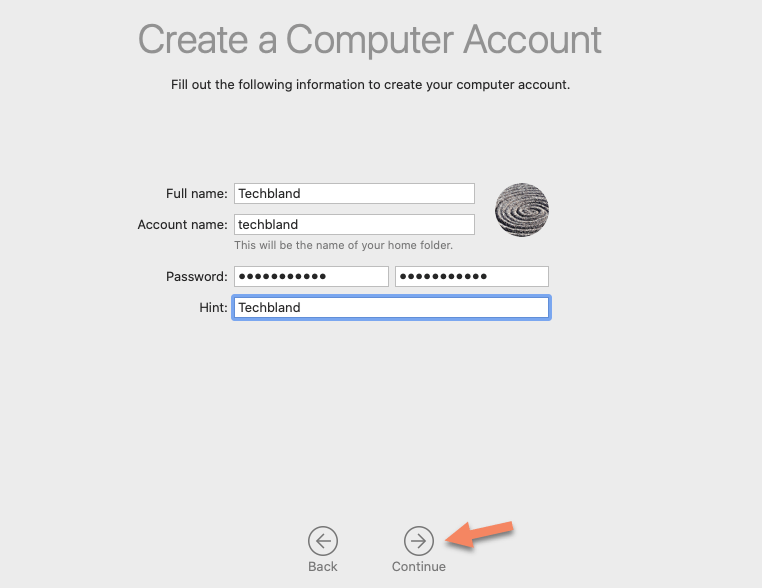
#8. in this step of Express Set up simply click on the Continue button.
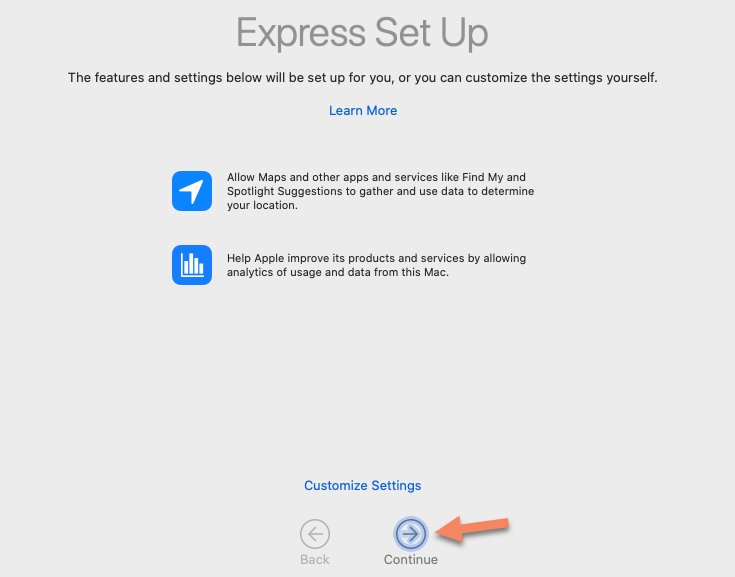
#9: On analytics, click the Continue.

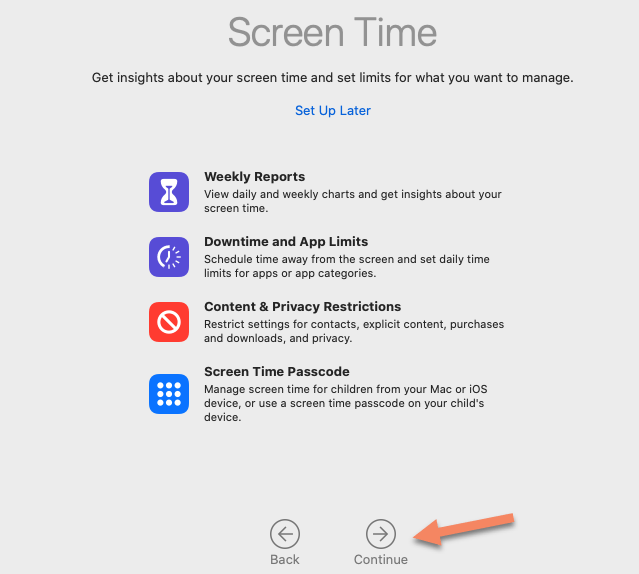
#10: On Screen-time, click the Continue.
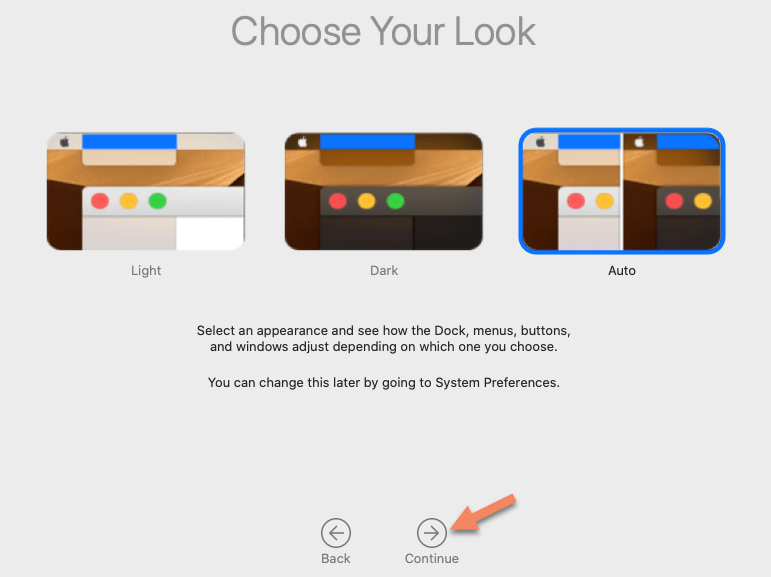
#11: Now choose looks for your Mac, here you have three options Light Mode, Dark Mode, and Auto Mode (Auto mode is the new feature of MacOS and Apple added Auto Mode on MacOS Catalina). Once you select the theme then click Continue.
#12: MacOS Catalina is setting up your Mac, wait for a while.
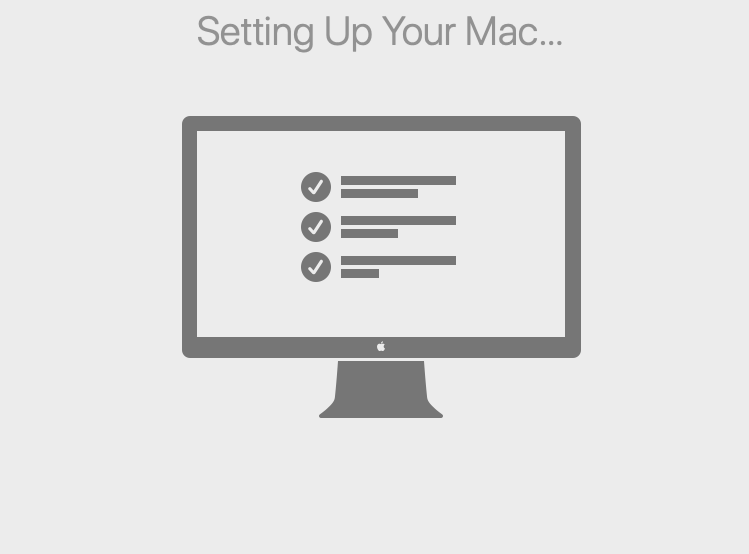
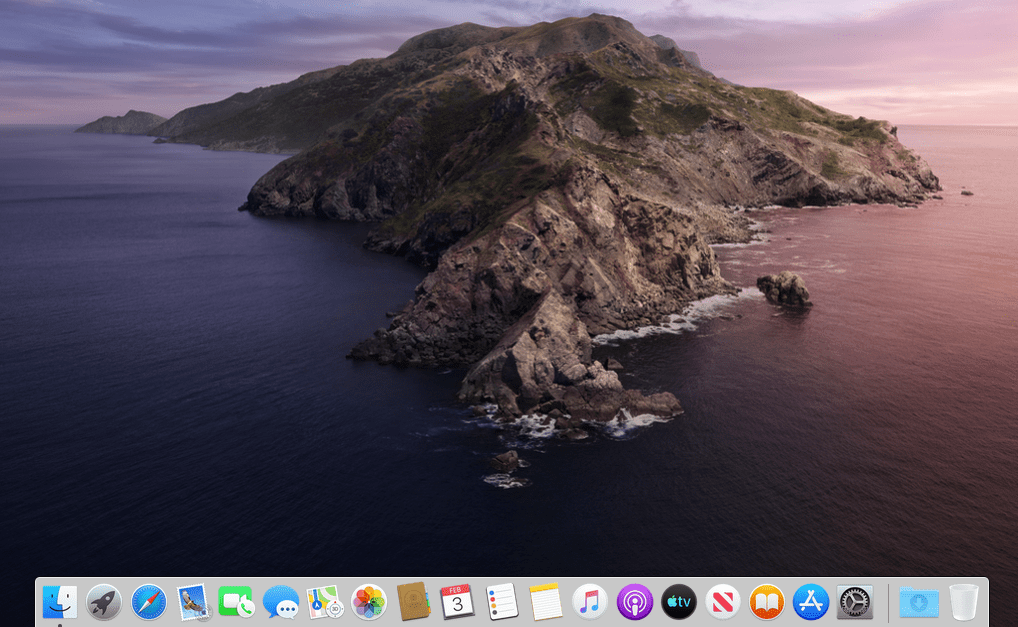
#13. MacOS Catalina has been installed successfully on Vmware Workstation, Now enjoy the new operating system on your Windows.
Related Articles:
- How to Reset MacOS Catalina Forgotten Password on Virtualbox
- How to Reset Forgotten Password of MacOS Mojave
- How to Downgrade MacOS Mojave to MacOS High Sierra
Conclusion
In this article, you learn how to install MacOS Catalina on Vmware on windows, So, I hope you get whatever I mentioned here. furthermore, if you get any kind of confusion or question then feel free to ask me in a comment. moreover, don’t forget to give your feedback and subscribe to our blog.

