How to Install Mac OS X EL Capitan on Virtualbox on Windows
Hello, friends in this article I will walk you through how to install Mac OS X El Capitan on Virtualbox on Windows. as you know Mac OS is the best and the most useful Operating System and legions of users are using Mac and Macintosh. although it is the best OS overall so, therefore, in here I will guide you on how to download and install Mac OS X El Capitan on Virtualbox using windows. you might have no idea about Mac OS X El Capitan yeah? so, don’t worry in this article you will learn about Mac OS X El Capitan. Ok, for what you are waiting, let’s get a start
OS X El Capitan is indeed a great system and developed by Apple so far, although it can be installed inside windows too with some tricks. usually, we need to download and install Virtualbox or any Virtual machine on windows to run Mac OS X.
Well, Virtualbox is a program where you can install Guest Virtual Machines such as Mac OS X with an Intel-based and AMD processor. the whole process is very easy and simple, you only need to follow my instructions one by one to install OS X on Virtualbox.
How to Downgrade MacOS Mojave to MacOS High Sierra How to Install Kali Linux in Virtualbox How to Install MacOS Mojave on Virtualbox on Windows How to Install MacOS High Sierra on Virtualbox
Computer and Software Requirments to install Mac OS X El Capitan on VirtualBox
Computer requirement
Windows: 7 or 8 or 10 (64bit)
Processor: Intel
Memory 3072 MB (minimum)
BIOS: Enable virtualization in BIOS (VT-x)
Software:
VirtualBox: VirtualBox 4.3.18 or 5.0
Image: Mac OS X 10.11 El Capitan Retail VirtualBox Image
Winrar or 7zip
Download Mac OS X El Capitan
To install OS X El Capitan on Virtualbox, at the first you will need to download OS X El Capitan Image File. so, if you don’t know from where you can download it, then don’t worry here in below links you can download Mac OS X El Capitan on your system and then you can easily install it on Virtualbox.
OS X 10.11 Download Image File:
- Download Mac OS X El Capitan
Download and Install Virtualbox on your PC
Now, that you have downloaded OS X image file then in the next step, you will need to download Virtualbox from its website. while you download it then you need to install it on your system, the installation is quite an easy task but if you have no idea then click the link below to know about how to download and install Virtualbox on Windows. besides that, you will find the Virtualbox setup link inside the link below and you will learn step by step to install Virtualbox.
How to install Oracle Virtualbox on Windows 7/8/10
Extract OS X Image File
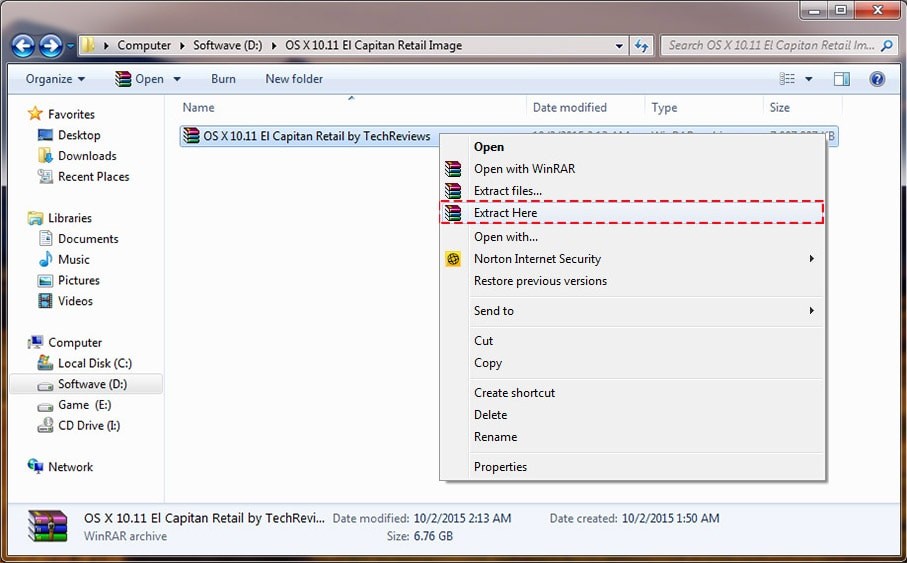
While you downloaded the Mac OS X El Capitan Image file then you will get it in compress file, but you will need to decompress the file with Winzip or 7zip. one thing I should tell you that, these two tools are the best for saving your file from viruses, so always save your file with these two tools because they are the best one to compress the files. Ok, install one of this tool on your system and extract the OS X image file, Right Click on the file and select Extract Here.
How to Check your Debian Linux Version How to Install Debian 9 on VMware Workstation on Windows How to Install Kali Linux On VMware Workstation How to Install Debian 9 on Virtualbox on Windows 10
Create a New Virtual Machine
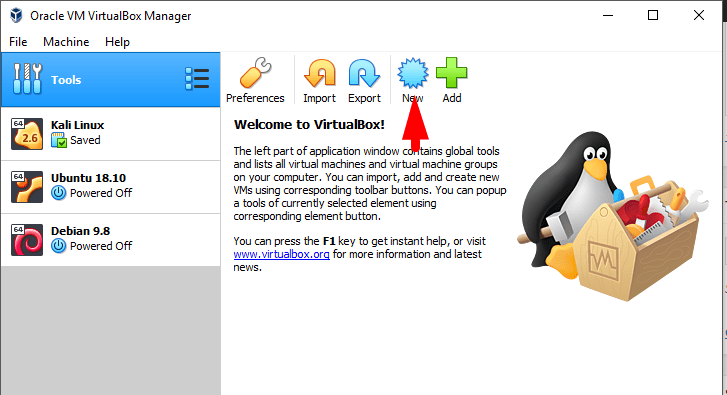
Step 1. Now, everything is ready to go, so at first, you will need to create a new Virtual Machine and for that open Virtualbox and click the New menu from the top of the window.
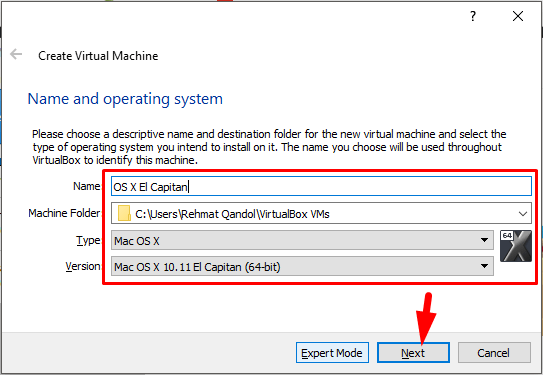
Step 2. Now in this step, you have to give a proper name to the new Virtual machine as I have given OS X El Capitan. once you type the name then the version and type will appear automatically, then click the Next button.
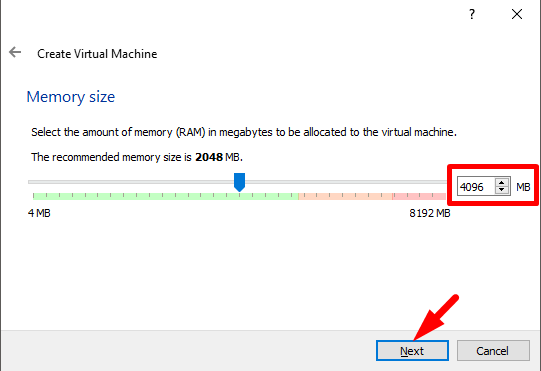
Step 3. now select the amount of memory in MB to be allocated to the VM and remember the recommended memory size is 2GB (2048MB). select the size of memory and click the Next button.
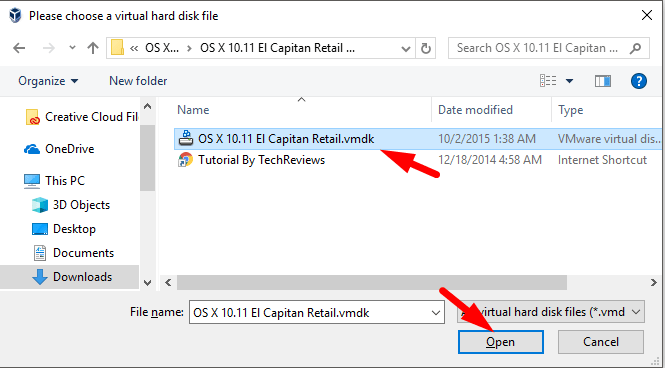
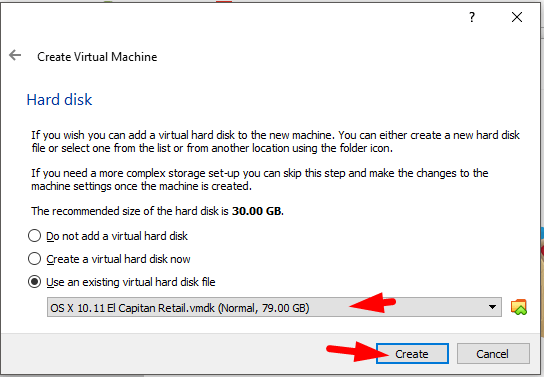
Step 4. In here you have to insert OS X El Capitan image file that you downloaded earlier, so for that, select last option and click the small folder icon and find the image file and open it then click the create button.
How to Download & Install VMware Workstation on Windows How to Install Virtualbox Extension Pack How to Install Virtualbox 6.0.4 on Ubuntu 18.10 How to Install Ubuntu 18.10 on Virtualbox on Windows
Customize the Created Virtual Machine
Step 1. now that you created a new Virtual Machine for installing OS X El Capitan, so, in here you will need some more steps to customize the created Virtual Machine. therefore, select the created VM and click the Settings.
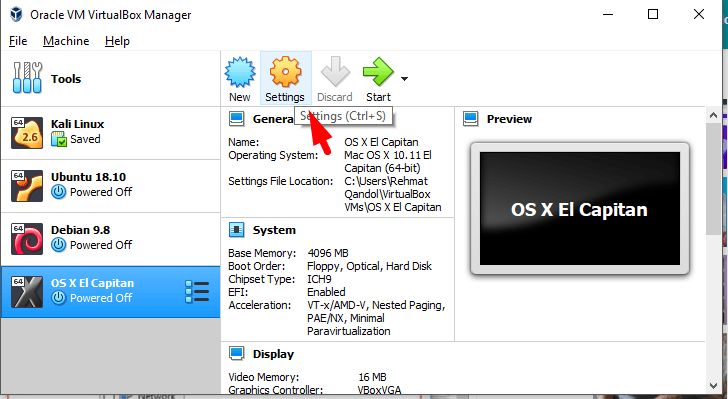
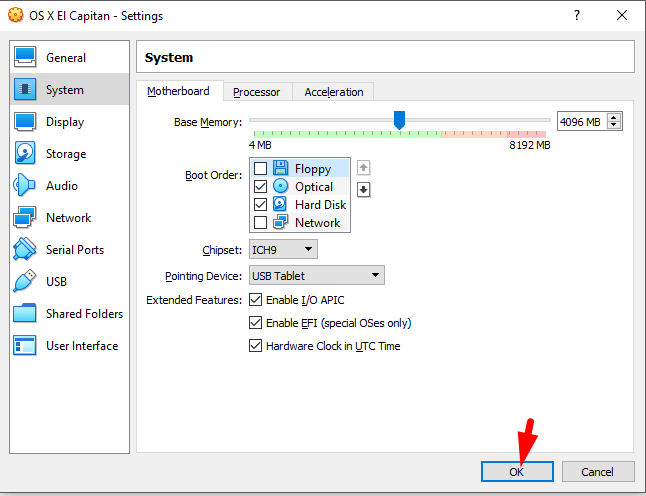
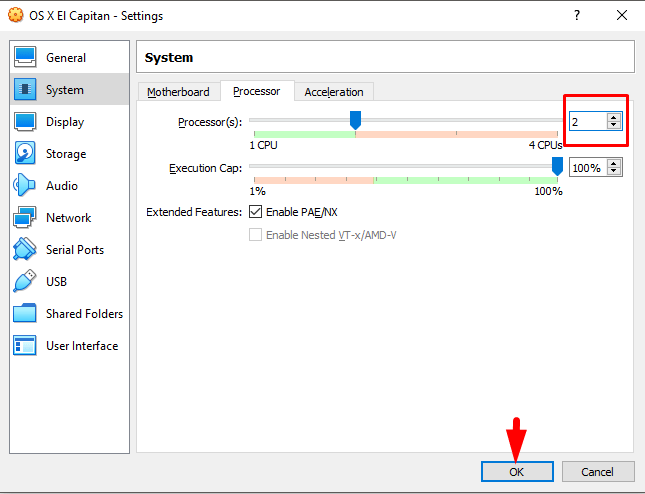
Step 2. in setting option don’t touch General option, direct click the System and inside system uncheck floppy disk in the motherboard. besides that click processor and increase CPU up to 2.
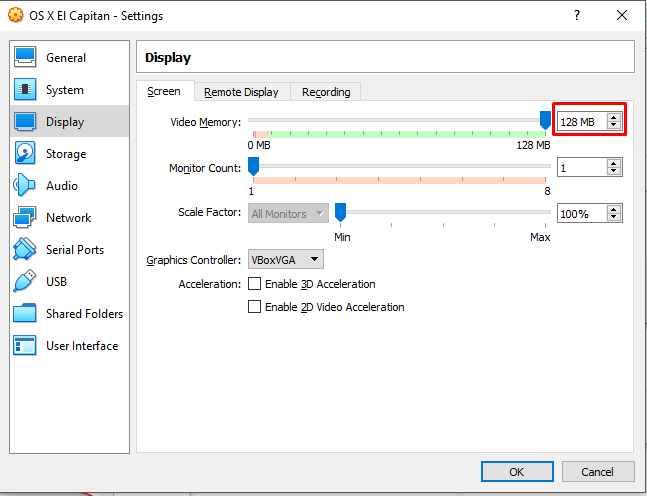
Step 3. after that, go to Display option and increase Video memory up to 128MB.
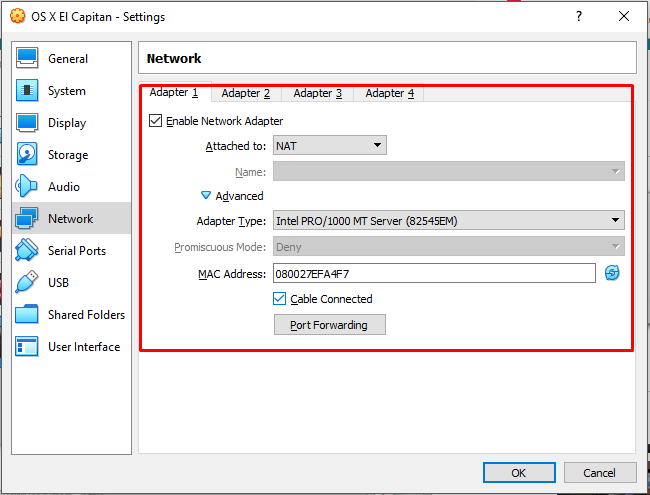
Step 4. now go to Network and follow the below instructions.
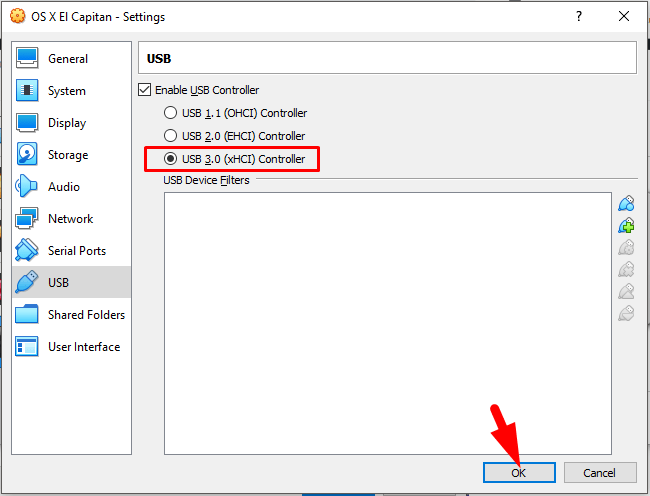
Step 5. in the last step, you need to click the USB option and inside that select USB 3.0 in order to not face with mouse and keyboard devices during installation, while you did all of these steps then click OK button.
Add Code to Virtualbox
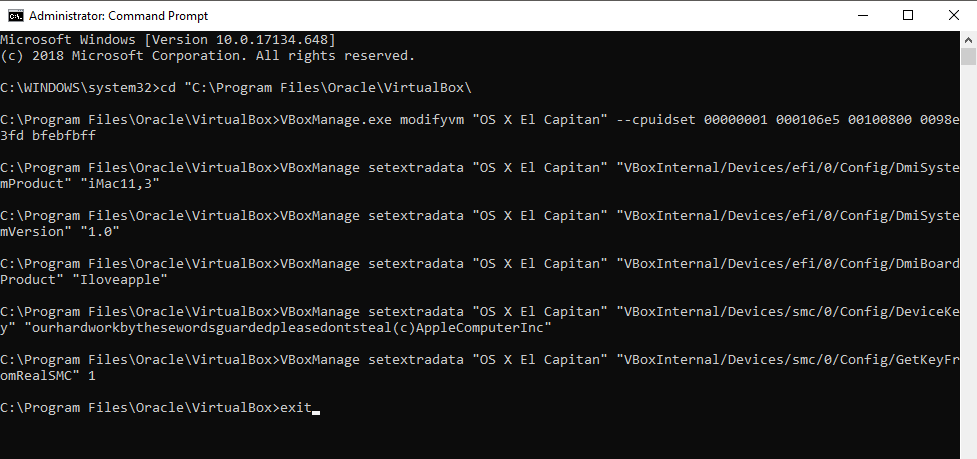
So, now copy and paste the below code to Virtualbox through CMD but before doing that you need to replace your Virtual Machine name with Your VM Name that given inside the code. now what you have to do, copy the code and paste it in notepad then change the Virtual machine name with your own one, after that copy and paste the code in command prompt.
Code for Virtualbox 4.x.x:
cd “C:\Program Files\Oracle\VirtualBox\”
VBoxManage.exe modifyvm “Your VM Name” –-cpuidset 00000001 000306a9 04100800 7fbae3ff bfebfbff
VBoxManage setextradata “Your VM Name” “VBoxInternal/Devices/efi/0/Config/DmiSystemProduct” “MacBookPro11,3”
VBoxManage setextradata “Your VM Name” “VBoxInternal/Devices/efi/0/Config/DmiSystemVersion” “1.0”
VBoxManage setextradata “Your VM Name” “VBoxInternal/Devices/efi/0/Config/DmiBoardProduct” “Iloveapple”
VBoxManage setextradata “Your VM Name” “VBoxInternal/Devices/smc/0/Config/DeviceKey” “ourhardworkbythesewordsguardedpleasedontsteal(c)AppleComputerInc”
VBoxManage setextradata “Your VM Name” “VBoxInternal/Devices/smc/0/Config/GetKeyFromRealSMC” 1
Code for Virtualbox 5.0.x:
cd “C:\Program Files\Oracle\VirtualBox\”
VBoxManage.exe modifyvm “Your VM Name” –-cpuidset 00000001 000106e5 00100800 0098e3fd bfebfbff
VBoxManage setextradata “Your VM Name” “VBoxInternal/Devices/efi/0/Config/DmiSystemProduct” “iMac11,3”
VBoxManage setextradata “Your VM Name” “VBoxInternal/Devices/efi/0/Config/DmiSystemVersion” “1.0”
VBoxManage setextradata “Your VM Name” “VBoxInternal/Devices/efi/0/Config/DmiBoardProduct” “Iloveapple”
VBoxManage setextradata “Your VM Name” “VBoxInternal/Devices/smc/0/Config/DeviceKey” “ourhardworkbythesewordsguardedpleasedontsteal(c)AppleComputerInc”
VBoxManage setextradata “Your VM Name” “VBoxInternal/Devices/smc/0/Config/GetKeyFromRealSMC” 1
Now open the CMD as administrator after that, copy each line code one by one and paste it in CMD and hit the enter button. but one thing, if you are using VirtualBox version 5 then copy the code of Virtualbox 5.0 if you are using VirtualBox version 4 then use the code of Virtualbox version 4.

Install Mac OS X El Capitan on Virtualbox
Now, that everything is ready and you add code to Virtualbox too. then now it is time to install Mac OS X El Capitan on Virtualbox using windows, so, open Virtualbox and follow the below instructions.
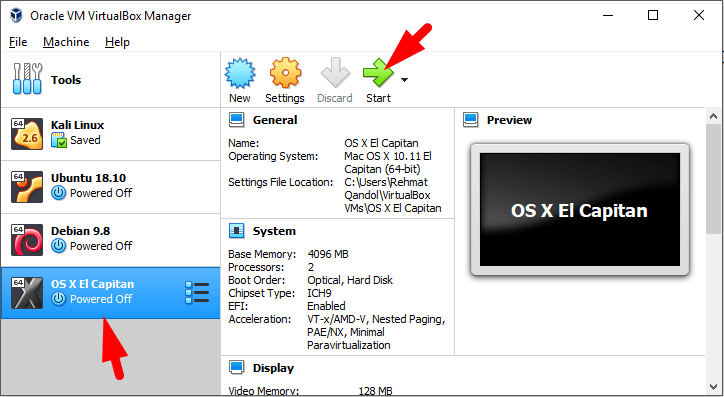
Step 1. in the first step, select the created Virtual Machine from the left side of the window and click the Start option from the top.
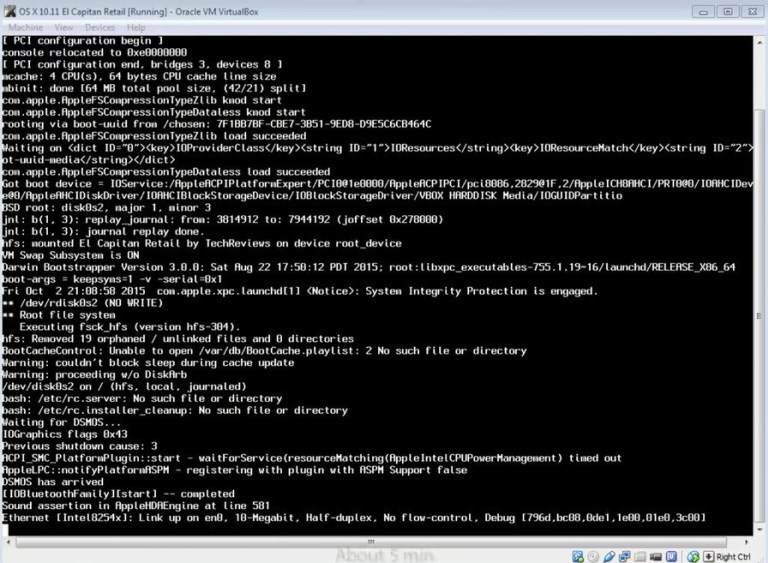
Step 2. while you clicked the Start option then you will see this screenshot, so don’t worry, these codes are preparing the installation.
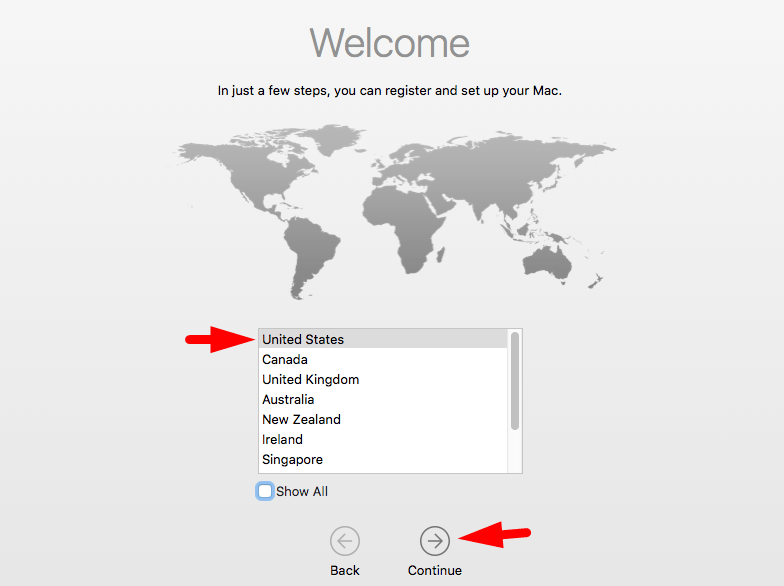
Step 3. in here, it will ask you to select your Country so, select the Country and click the Continue button.
Step 4. select your keyboard layout in this step and click the Continue button.
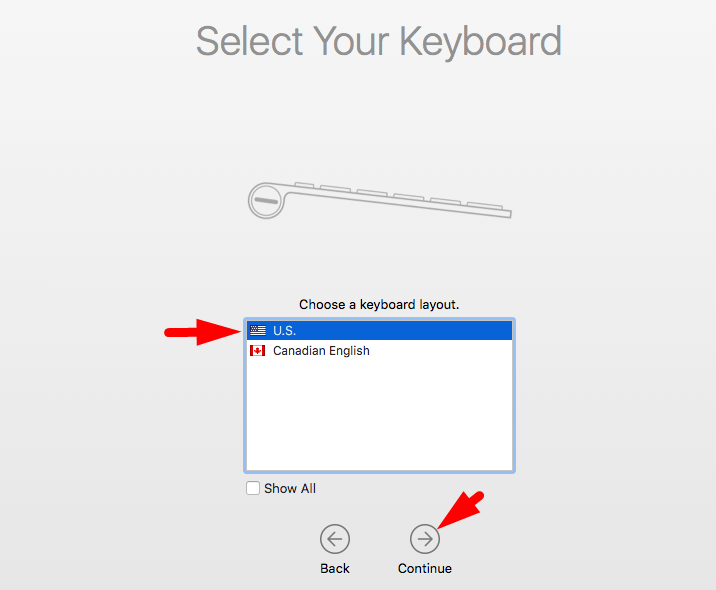
Step 5. if you don’t want to transfer information to this Mac then select the last option and click the Continue button.
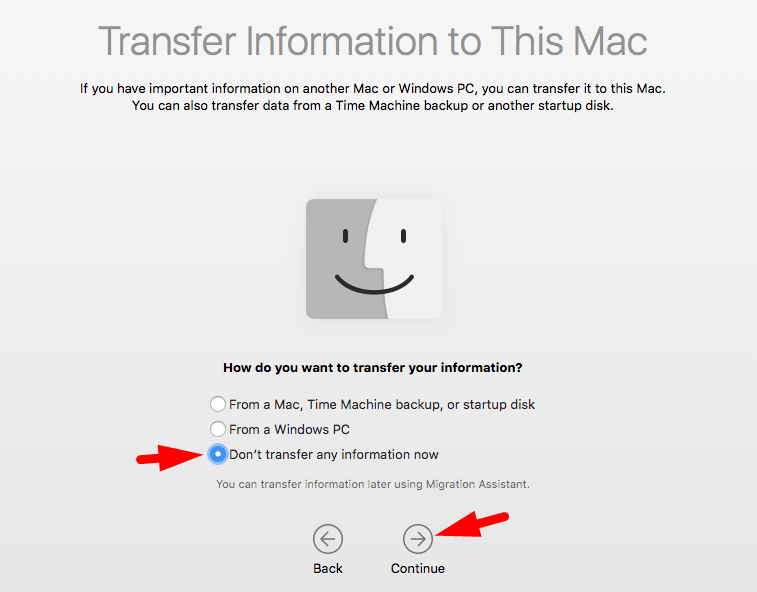
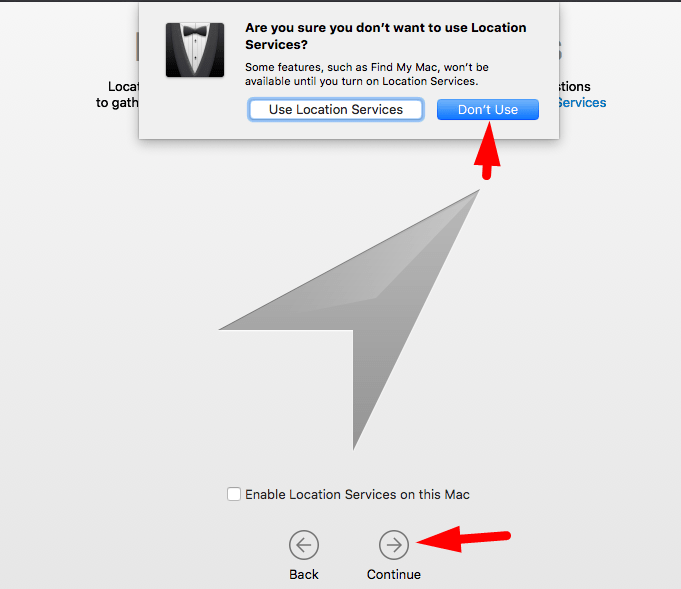
Step 6. Well, I recommend you do not use your location just click on Continue and click the Don’t use button.
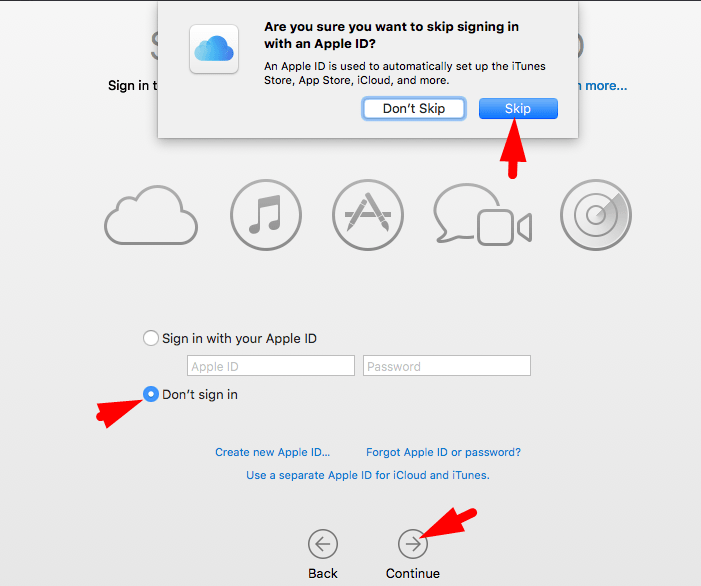
Step 7. in this step, don’t sign in to Apple ID just simply select Don’t sign in and then click the Continue button and click the Skip button.
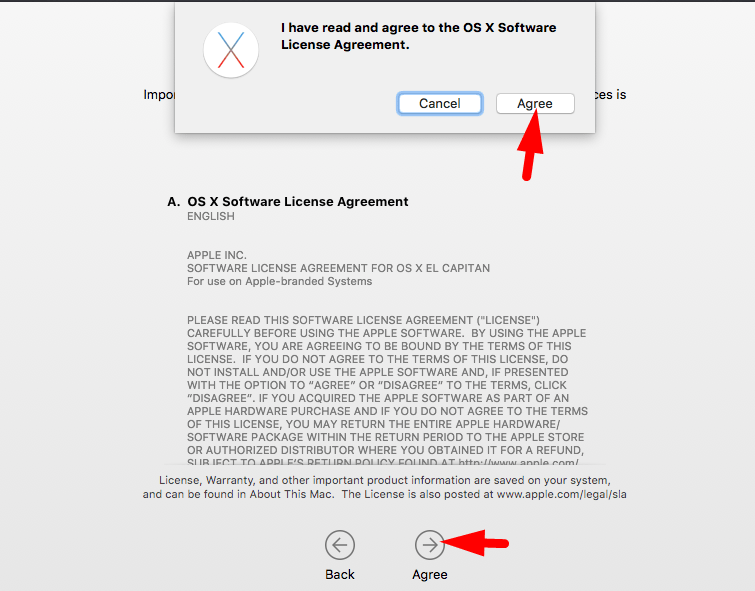
Step 8. you have to agree on the terms and conditions so for that click the Agree button and click again on the Agree button.
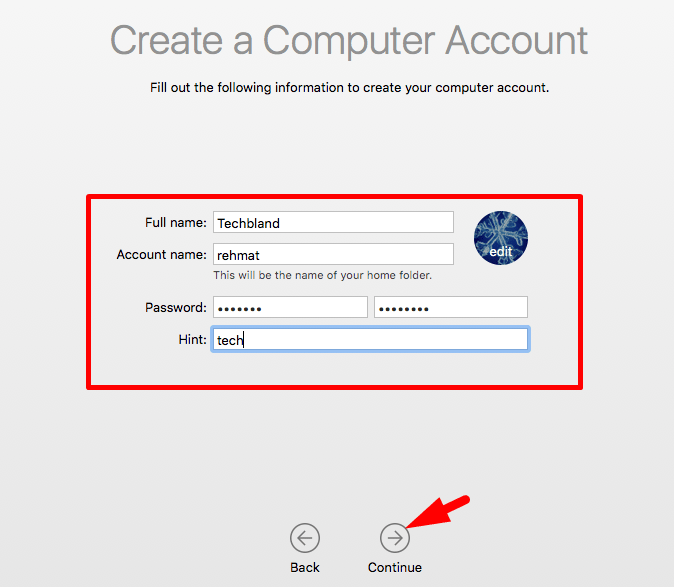
Create A User Account
Step 9. now create a new User Account, so type your Full Name, Account name, Password and then verify the Password and give any password hint. then click the Continue button.
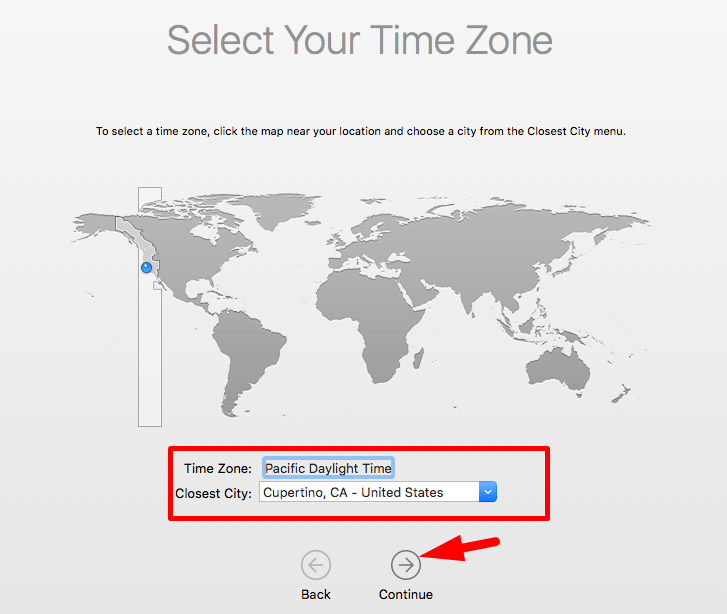
Step 10. after creating a new account then set your time zone, so select your time zone map and click the Continue button.
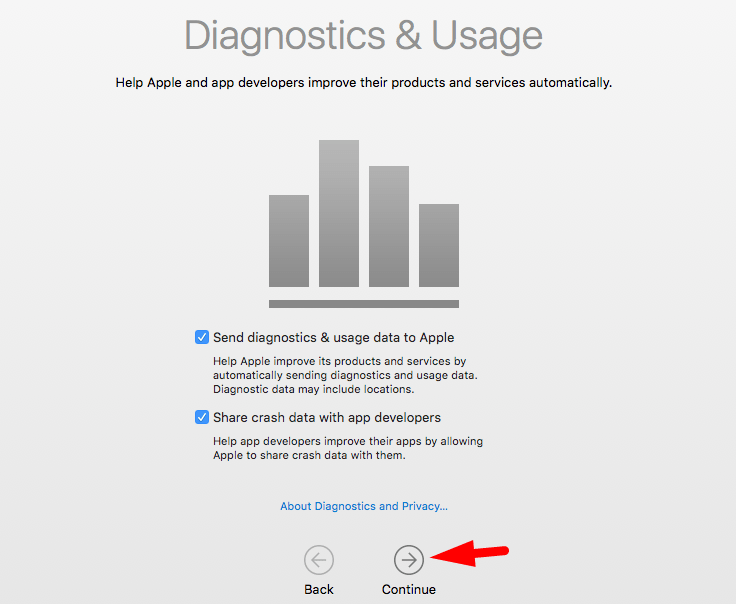
Step 11. in this step you don’t need to do any task just simply leave as a default and click the Continue button.
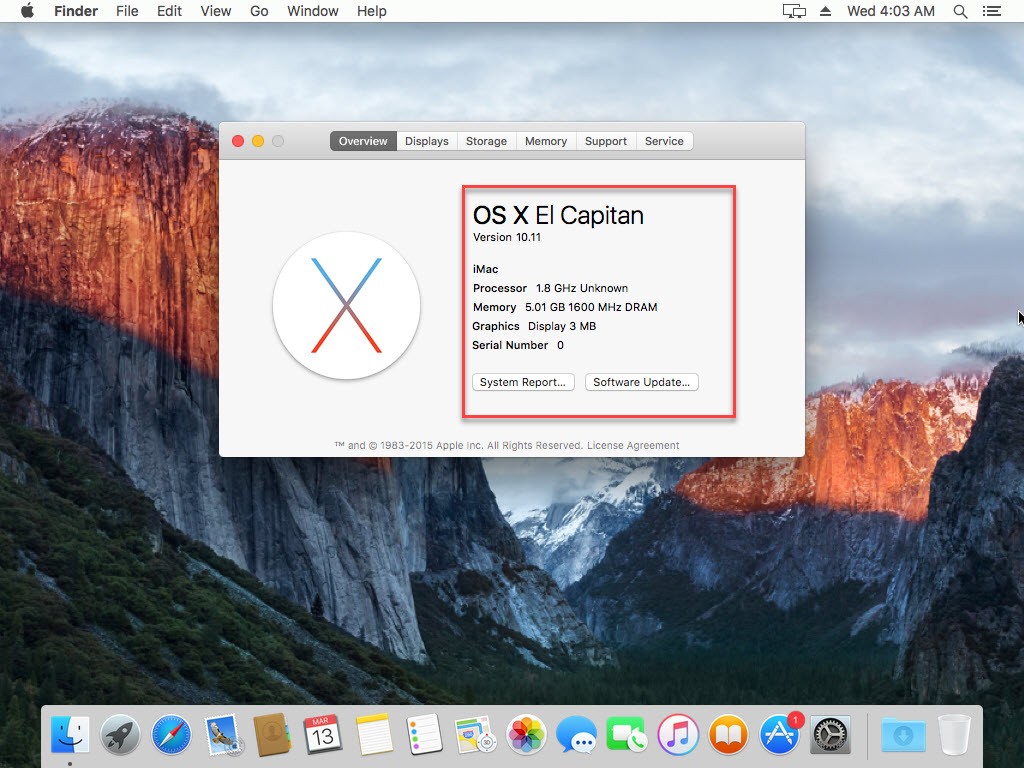
Step 12. OK, now you have done with installation of Mac OS X El Capitan. therefore start using OS X on VirtualBox and give it a try.
In Conclusion
In this post, you learn how to install Mac OS X El Capitan on Virtualbox on Windows, and you have seen how easily we did it with some steps. so now if you have installed OS X then start using it by login with your account and enjoy it on Virtualbox. besides that, if you get any kind of question and confusion then feel free to ask me in a comment.

