How to Upgrade MacOS Mojave to MacOS Catalina on Vmware?
The most interesting thing is while you Upgrade MacOS Mojave to MacOS Catalina on Vmware, However, the user will get a software update notification on every operating system even on Windows, Mac, and Linux OS. the main point is, you should update your OS to the latest version and put your system up to date in order to get new changes and updates of a new version. Whenever the new Operating system comes to the public then users can’t wait to test and upgrade its operating system because the new OS has tons of new features and many bugs will be fixed, therefore, if you are running MacOS Mojave latest version 10.14.6 and you want to update MacOS Mojave to MacOS Catalina on Vmware then you are in a good place.
However, Apple release a new operating system every year and each operating system is better than the previous one, as MacOS Mojave is one the best operating system which has several handy features although MacOS Catalina is the current version of Apple operating system and Apple worked on its new version and included major new features like auto dark mode, iPad apps on the Mac, SideCar feature, and many other features. in this case, I recommend you to upgrade Mojave to Catalina because MacOS Catalina is one of the greatest and high demand from the legions of users.
Updating to the next OS is quite simple on the host computer but if you are trying to upgrade on virtual machines like Virtualbox and Vmware then it will be complicated and you will need to know the steps and details on how to upgrade Mojave to Catalina on Virtual Machines. you don’t need to worry, in this article, I will show you step by step on how to update MacOS Mojave to MacOS Catalina on Vmware.
What to do before upgrading your Operating system on Vmware?
It is not simple to update your OS to the new version without having its knowledge and image file of the new version that you want to jump. in case, you want to jump to macOS Catalina from MacOS Mojave then you must have installed MacOS Mojave on Vmware or you should installed MacOS Mojave on Virtualbox. as you know, macOS Catalina is the current release of Apple company that announced on WWDC 2019 and released the first beta for the public to test the new OS.
MacOS Catalina has several new features that MacOS Mojave doesn’t have, besides that, you have installed MacOS Catalina on Vmware and you have tested MacOS Catalina on Virtualbox But you haven’t try to update from macOS Mojave to MacOS Catalina on Vmware, Yes. macOS Catalina installation is quite matching with macOS Mojave installation only you will need to download the MacOS Catalina image file for Virtualbox and Vmware then you can install macOS Catalina.
So, you have macOS Mojave on your VMware and you want to upgrade to macOS Catalina then make sure you have a backup of your file and you can download MacOS Catalina on macOS Mojave from App Store and simply install it on your HDD, make sure your HDD is formated as APFS otherwise you can’t install MacOS Catalina.
What is the Current Version of MacOS Catalina?
Apple released MacOS Catalina’s first beta version in September only to test the new version of OS. later on, Apple released the MacOS Catalina DMG, VMDK, and Image file for its users to install it on different platforms. However, the first version of Catalina has several bugs and errors like Login problems, Audio problems, Email problems, Wifi problems, and some other common issues.
When time goes by, Apple updated MacOS Catalina and release the update version of Catalina which is 10.15.2 although Apple added many new changes and fixed several bugs on the new update of MacOS Catalina. therefore, if you have MacOS Catalina 10.15 then upgrade to MacOS Catalina’s latest version. afterward, you won’t face problems anymore.
You can Update MacOS Catalina on?
Beside Virtual machines, you can also update to MacOS Catalina on the below platforms. if you have one of the below computers, hands down, you can jump to MacOS Catalina 10.15.2.
- Mac Pro: Late 2013 models and onwards.
- iMac Pro: All models.
- iMac: Late 2012 models and onwards.
- Mac Mini: Late 2012 models and onwards.
- MacBook Pro: Mid 2012 models and onwards.
- MacBook Air: Mid 2012 models and onwards.
- And MacBook: Early 2015 models and onwards.
New Changes of MacOS Catalina 10.15.2
- Apple News: New format for Apple News+ stories from The Wall Street Journal and other principal newspapers.
- Stocks: Get hyperlinks to related memories or more stories from the equal publication at the give up of an article. “Breaking” and “Developing” labels for Top Stories. Stories from Apple News are now to be had in Canada in English and French This update additionally includes the subsequent bug fixes and improvements.
- Music: Restores the column browser view for dealing with the tune library, Resolves a problem that would prevent album paintings from performing and fixes the trouble that could reset music equalizer settings throughout playback.
- iTunes Remote: Adds aid for the use of an iPhone or iPad to remotely control the Music and TV apps on a Mac.
- Photos: Resolves a hassle that could motive some .AVI and .MP4 documents to seem as unsupported, Fixes hassle that stops newly created folders from acting in Albums view, Addresses an issue wherein manually sorted snapshots in an album may be revealed or exported out of order and Fixes a problem that stops the zoom-to-crop device from operating in a print preview.
- Mail: Addresses a difficulty that could motive Mail Preferences to open with a clean window and Resolves a problem that would save you the usage of undoing from retrieving deleted mail.
- Other: Improves the reliability of syncing books and audiobooks for your iPad or iPhone via Finder, Fixes problem wherein reminders can be out of order within the Today clever list in the Reminders app and Resolves an issue which could reason slow typing performance within the Notes app.
Upgrade MacOS Mojave to MacOS Catalina on Vmware
If you want to update MacOS Mojave to MacOS Catalina on Vmware or Virtualbox then you can apply this methodology, the steps are looking the same and you can easily upgrade your system with the below instructions. Although, there are no differences between Vmware and Virtualbox. So, let’s get started.
Step 1: Download MacOS Catalina from App Store on Mojave
To jump from macOS Mojave to MacOS Catalina you will need to download MacOS Catalina from the App store, after that, you can install macOS Catalina on Vmware.
#1: First of all, run Vmware Workstation and select MacOS Mojave Virtual machine and click the Power on button.
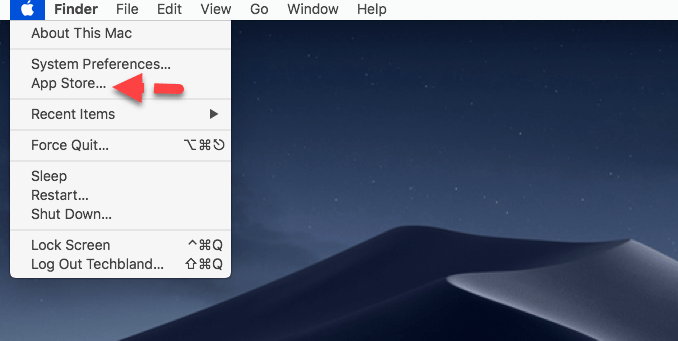
#2: Then, go to Apple Logo and open App Store to download MacOS Catalina.
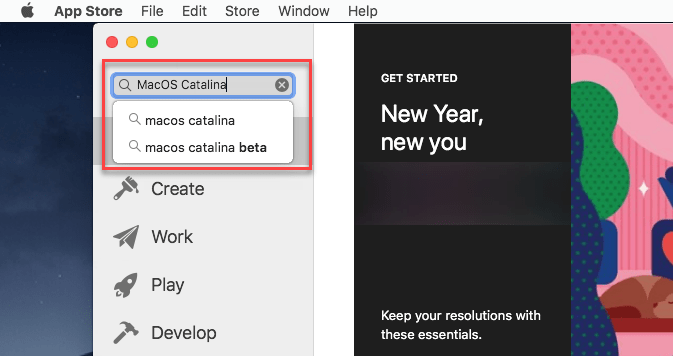
#3: Now search for MacOS Catalina on App Store Search Box.
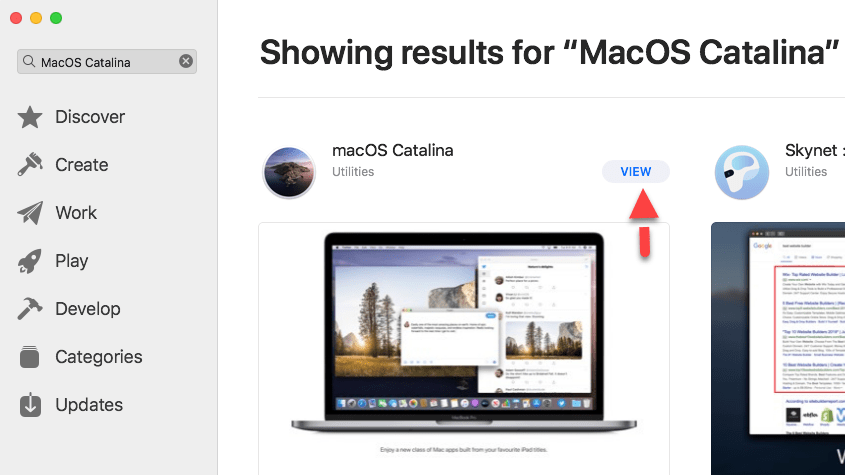
#4: Once you search MacOS Catalina then you will get MacOS Catalina on the right side of the page, Therefore, click the View button.
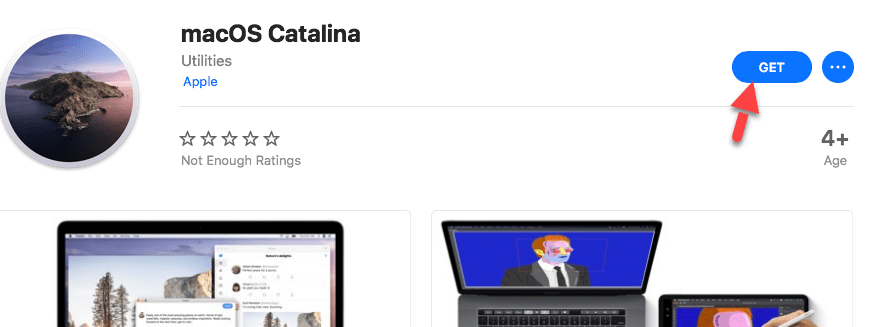
#5: To download MacOS Catalina click the Get button and the download process will start, wait for a while to complete the process.
#6: Once you click the get button then it will check for MacOS update when the new update is found then you will see Update Now option, therefore, click update now and click the Download & restart.
Note: You will see this option when your MacOS Mojave is not up to date, in this case, you have to follow the below steps. if your MacOS Mojave is up to date then simply skip this step and jump to #7 step.
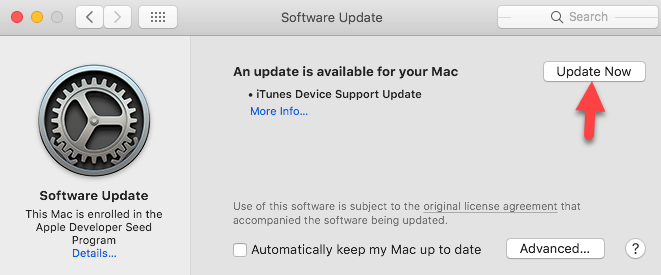
Wait for while it is downloading the MacOS update. after that, it will ask you to restart your system.

#7: The latest version of MacOS Catalina is 10.15.2, therefore, when you click the get button then you will see MacOS Catalina 10.15.2 download option. So, click the Download button and wait to complete the process.
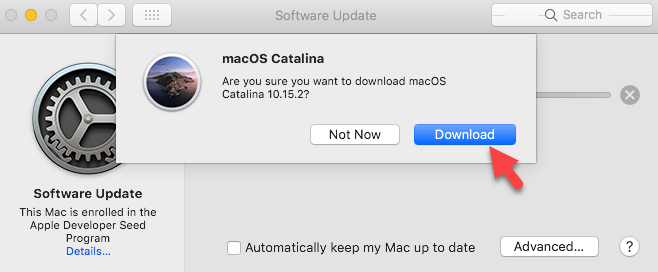
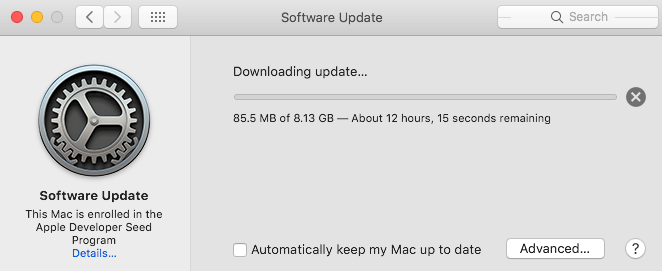
The macOS Catalina 10.15.2 file size is 8.13GB, therefore, you will need a fast internet connection to download the large file. Moreover, make sure your MacOS Mojave have 10GB free space.
Step 2: Install MacOS Catalina on Vmware
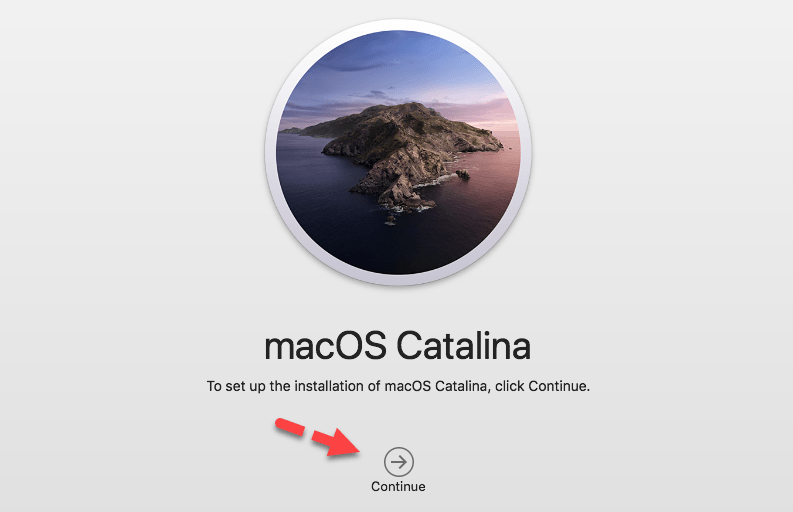
#8: While you download the MacOS Catalina then you will see the dialog box to set up the installation of MacOS Catalina, therefore, click the Continue button to go ahead.
#9: After that, you will see the Software License agreement page, therefore, to continue installing the software you will need to agree to the terms of the software license agreement.
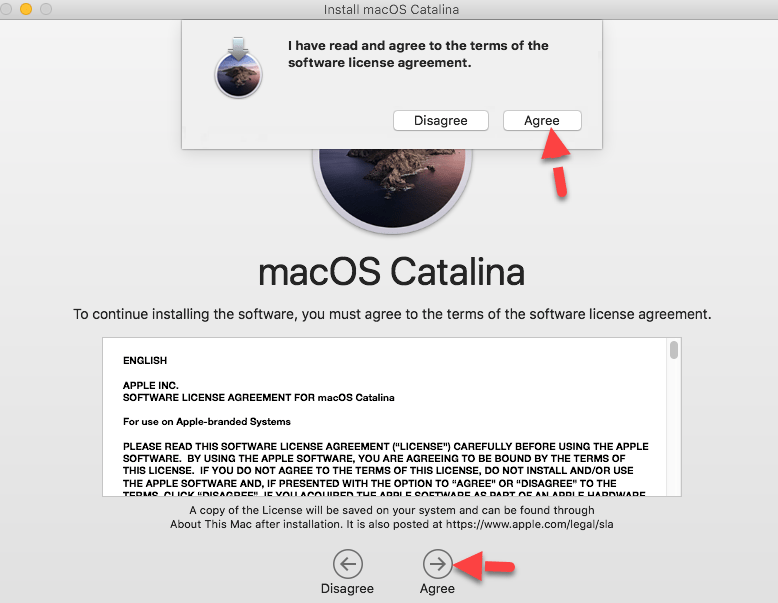
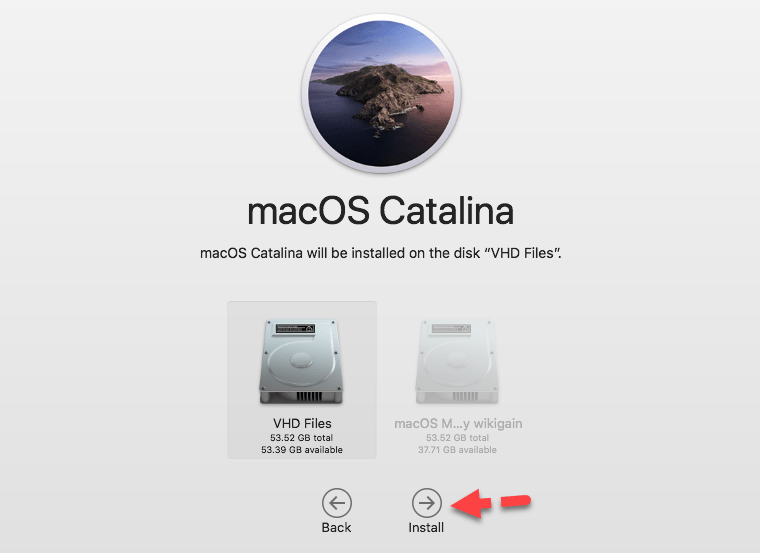
#10: Now, the MacOS Catalina installation is ready to go, therefore, click the Install button. afterward, you will be asked to type the admin password and continue.
Remember, the hard disk you have selected to install MacOS Catalina, it should be formated as APFS, otherwise, the MacOS Catalina won’t be installed.
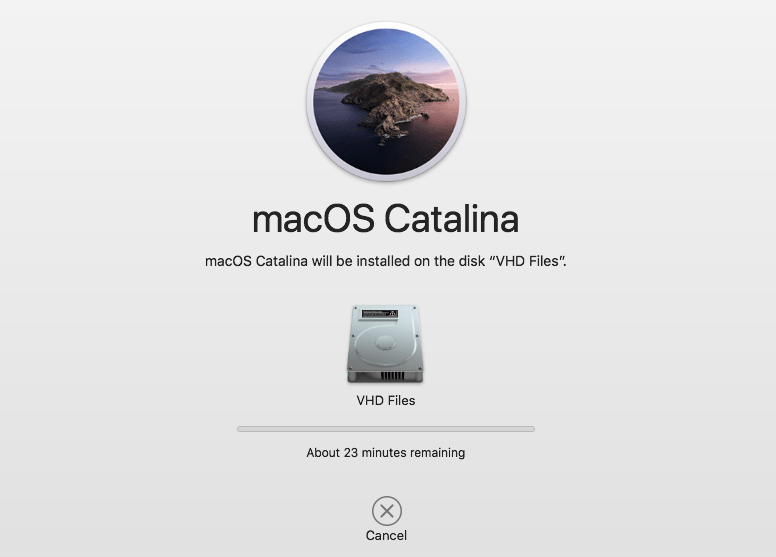
#11: Finally, MacOS Catalina will be installed on the selected Hard Disk, it will take 30 minutes to complete the installation and upgrade from MacOS Mojave to MacOS Catalina. the duration of installation will depend on your internet connection if you have a fast internet connection then it will be installed within 30 minutes.
#12: Congratulation, you upgrade your MacOS Mojave to macOS Catalina successfully, now restart your system and come back with new operating system MacOS Catalina.
#13: Once you login to macOS Catalina then you will see Analytics settings, here, click the Continue button.
#14: On Screen time, simply click the Continue button. after that, you will see the next window that setting up your Mac.
Read Next:
- How to Downgrade from macOS Catalina to MacOS Mojave
- How to Downgrade from MacOS Mojave to MacOS High Sierra
- Dual Boot MacOS Mojave with Windows 10
Conclusion
So, you have installed MacOS Catalina on macOS Mojave and all your files and data are in their previous place, therefore, go to Finder and check all your files. hands down, all your files will be there only you have change operating system and you have updated your OS to the new OS.
Moreover, I hope you like our article and you enjoy the methods, So, give us your feedback and if you have any question then feel free to ask me in the comment box.
